I hope you love the products I recommend. Just so you know, DaddyStaysHome may collect a share of the sales or other compensation from links on this page.

If you have caught the woodwork bug, you will be happy to know that you are in good company. 

Woodworking is a great activity to help you put in some physical activity, pass the time, make some income and even relieve stress. 

One of the essential tools required in woodwork is the wood planer. 

Here, read all you ever need to know about this fundamental tool. 

What is a Wood Planer?

When working with wood, you will get larger planks that you have to mold into the final product. 

Typically, saws are used to size larger planks down or cut them into the required shapes. What you get as a result are smaller pieces in the shapes you want, but not necessarily in the smoothness, you want. 

This is where wood planers come in. 

What Do Wood Planers Do?

A wood planer is used to shave wood into the required thickness. It is also used to smoothen wood surfaces to give them a classy, refined look. 

The better you are at using a wood plane, the less work you will have with hand files and sanding. 

You can also utilize it for levelling floorboards. 

Types of Wood Planes

The different types of wood planers can be classified into two broader categories:

  1. Manual planes
  2. Electric planes

Manual Planes

These are more old school and take you back to the olden days when people took a lot of pride in creating things from scratch, relying on their might and creativity. 

Let’s delve deeper into the individual types of manual planers.

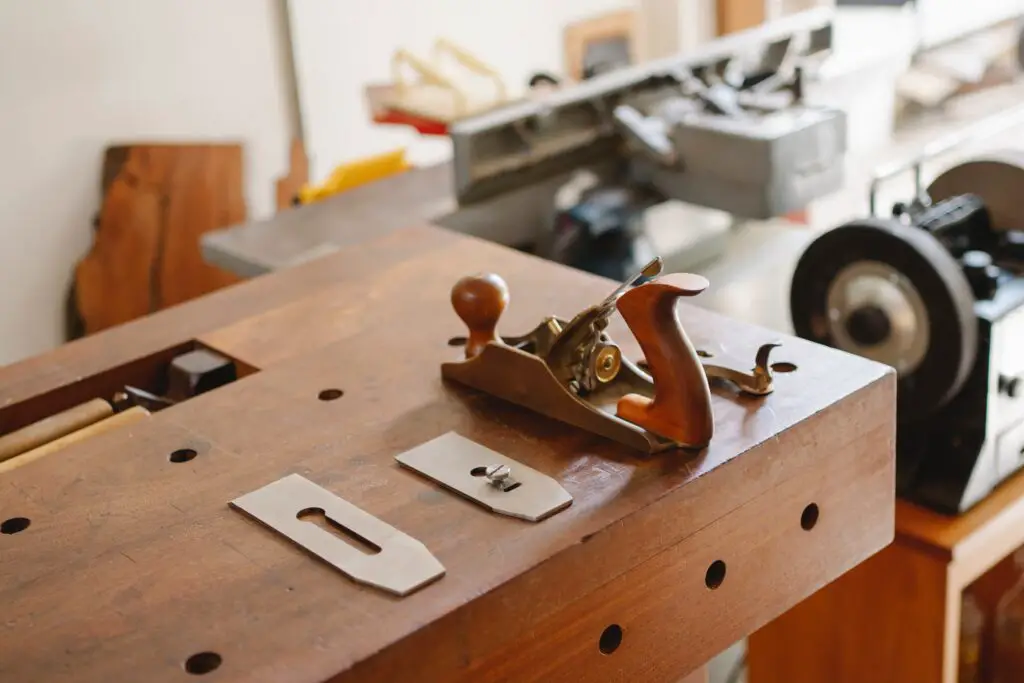
Hand plane
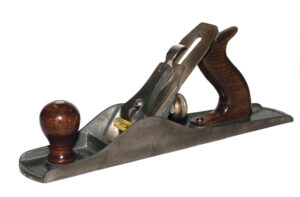
Jack Hand Plane

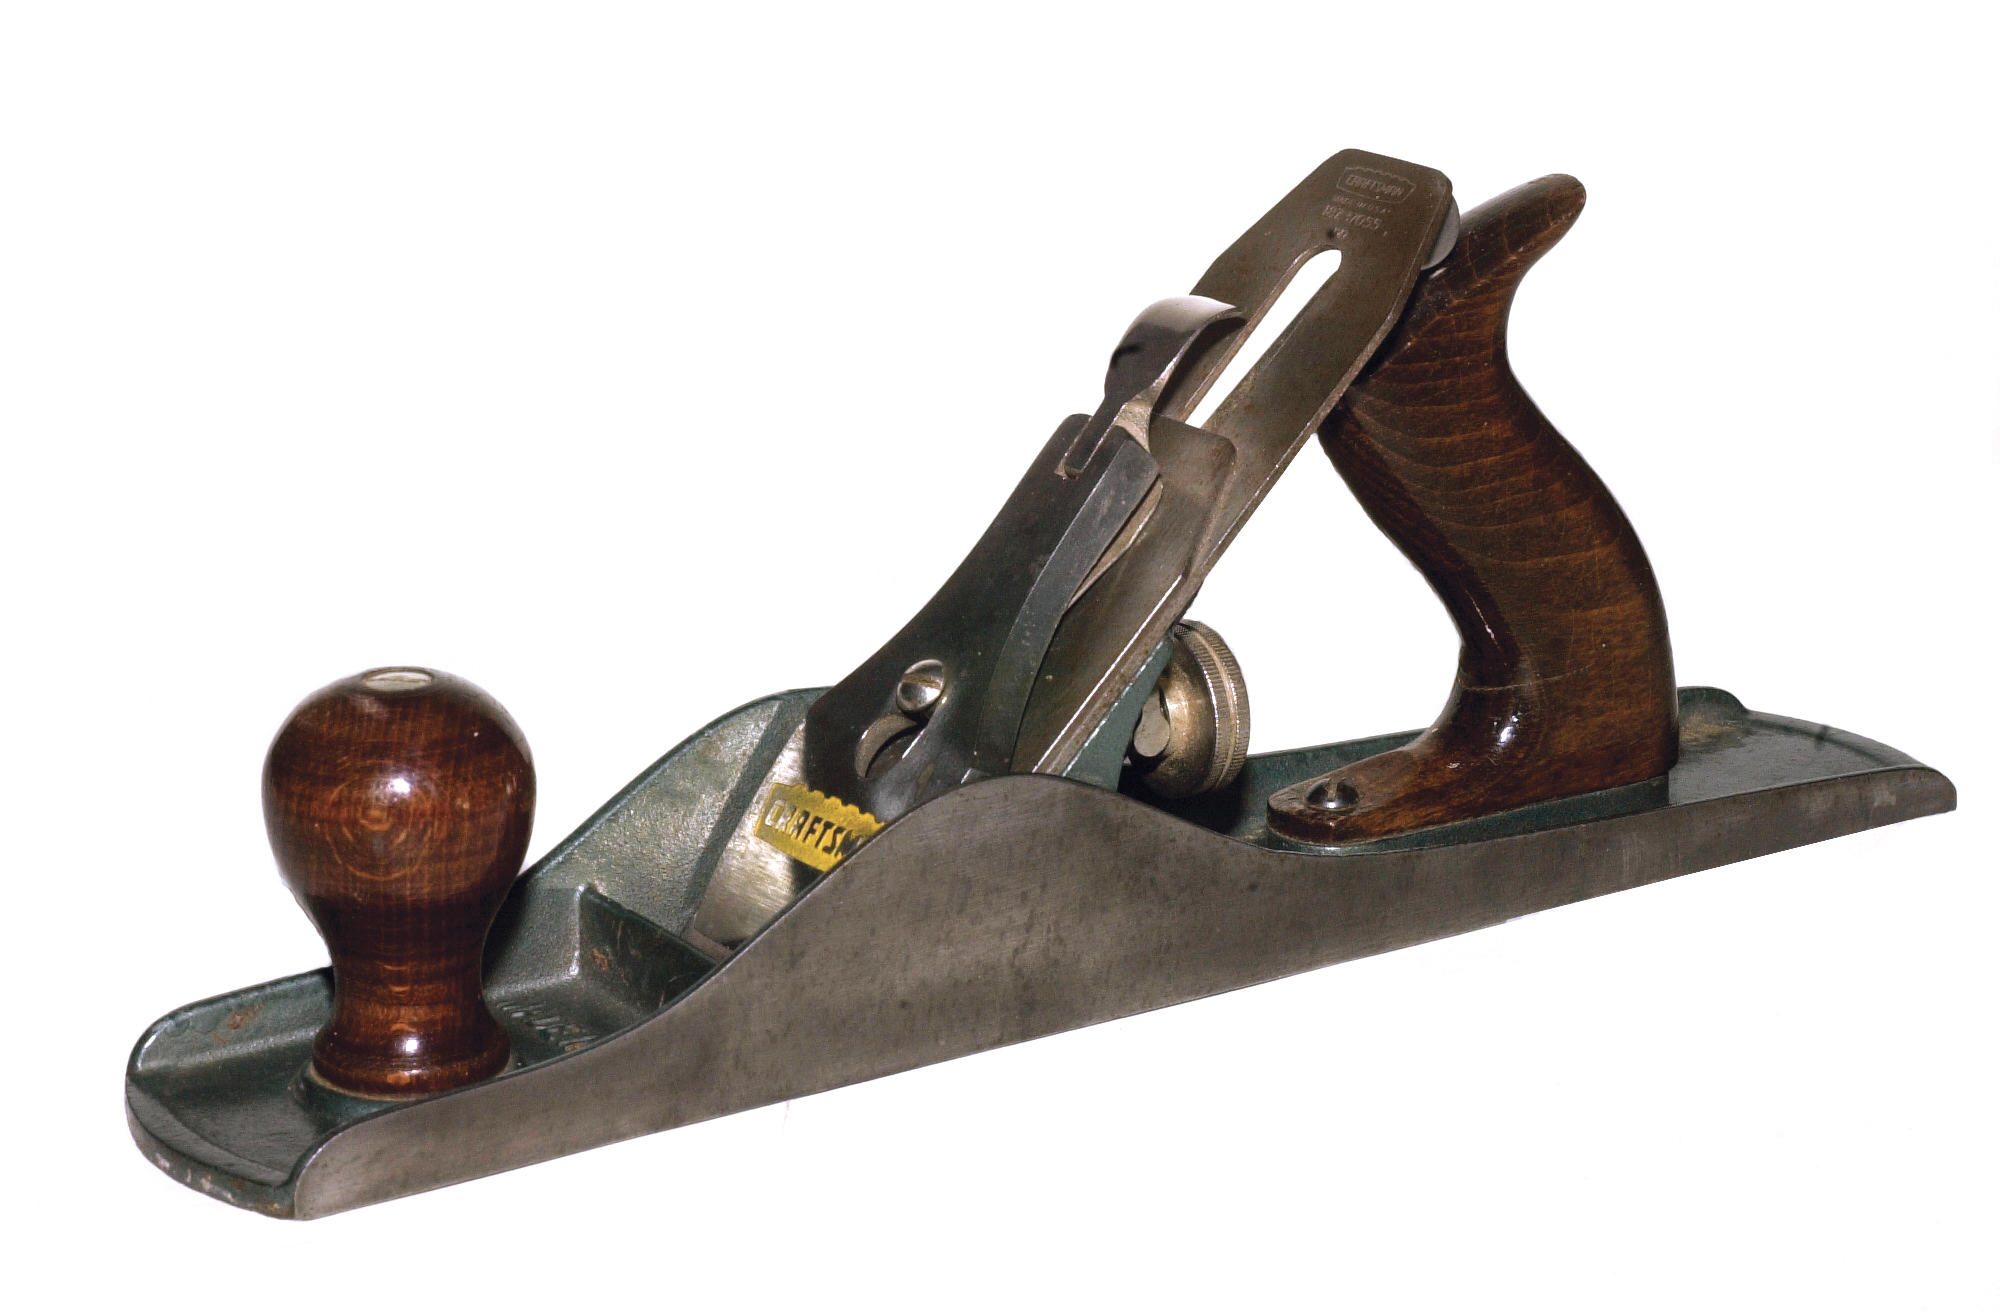
This is the most basic hand planer, and the design has remained the same for decades and decades. 

You can use both hands for more control, and the hand planer’s design allows you to adjust the depths it can cut. 

Two-handed plane

This is very similar to the basic hand planer; only it has two handles instead of one. This allows for lighter, better-controlled action. 

The blades are adjustable as well, and the two-handed planer is preferred when shaping corners. 

Combination rasp plane
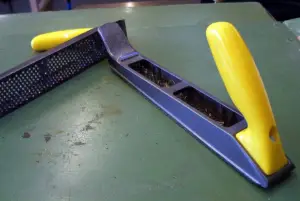
Rasp plane - What is a wood planer

This works less like a planer and more like a cheese grater. The combination rasp planner is also much more versatile and allows woodworkers to also use it on soft aluminum and fiberglass. 

Flat plane bottom-edged wood hand planes
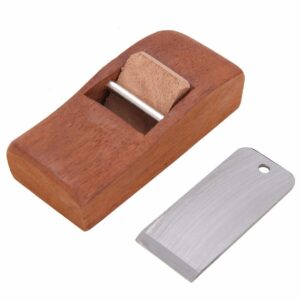
Woodworking Planer Flat Plane Bottom Edged Handle Tools Woodworking What is a Wood Plane DIY Hand Tool

This is operated on one hand. For this reason, it’s unsuitable for when you have hard planning to do as the energy exerted on one hand might not be sufficient to accomplish the desired result. 

For softer planning, this tool allows you to shave off a little at a time. This model is affordable and allows you to monitor what you are doing closely.

Hand scraper
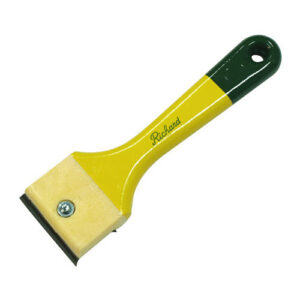
Wood Hand Scraper Blades - What is a wood planer

Traditional planers use a pushing action. This planer, however, uses a pulling action and is often used on hardwood floors. 

Its function is, however, similar to traditional planers when it comes to smoothening out wood surfaces. If you are looking for a planer without the pushing action, this is it. 


Electric Planers

With all their advantages, manual planers are also considerably slow. This aside, they also require significant energy. 

This can get tiring, leading to mistakes, which can interfere with your ability to create the desired object. 

If you love woodwork but would like to take the hard work out of planing, electric planers bridge the gap. 

Indeed, times have moved on!

That aside, electric planers today come in both corded and cordless versions. 

Corded versions can be a hazard more so for armature woodworkers. It’s all too easy to get a wire tangled around you or the project while working, often leading to disastrous results. 

Here are the most common electric planers in the market. 

Handheld planer

This is similar to a hand planer, only it has a spinning blade, instead of an immobile one. The planer also comes with a contoured handle to aid with the grip. 

This planer works impressively fast even on shallow settings. You then want to keep an eye on it to prevent drifting and shaving too much. 

Bench planer

DEWALT Benchtop Planer, Single Speed, 15-Amp, 12-1/2-Inch (DW734)

The bench planner is too small to affix on a workbench but too big to be handheld. The bench planer can handle smaller pieces of lumber, though not quite suited for smaller, more detailed woodwork tasks. 

Molding planer 


Grizzly G1037Z Planer/Moulder, 13-Inch

This is a more advanced piece of equipment used mainly by professionals and serious woodworkers. 

This planer sits on the workspace floor-mainly a workshop- and its primary function is molding. 

Stationary Planer
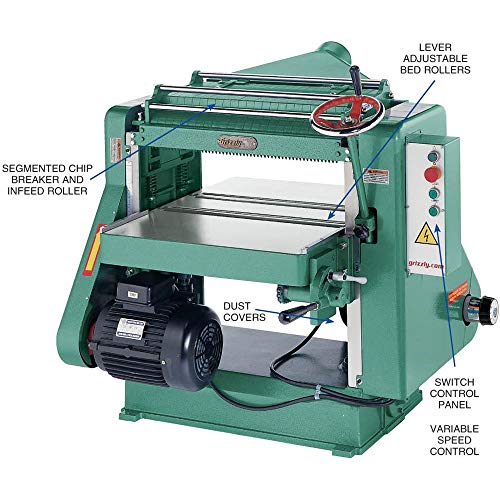
 

Grizzly Industrial G5851Z - 24" 5 HP Planer

This is a serious planer for more extensive, professional projects. This is often designed to handle bulk work and for people with extensive budgets for equipment. 

The next step from stationary planers is industrial grade planers. 

How to Use a Planer

By and large, how you use a plane depends on the results you want to achieve. There are some common factors, however. 

The first is the direction of motion. The rule of thumb is to plane along the grain of the wood. Failure to do this and you end up with what is commonly known as tear-outs. This happens when your blade gets stuck, and you pull it out with jagged timber. 

At times, you will work with tree species whose wood grains run in different directions. In such instances, your choice of plane matters a lot. For these, professionals advise you use the sharpest blades available. 

The other thing to always remember is that planers are dangerous tools. If you are using an electric one, even more so. 

Avoid working with these tools when you are tired, sleepy or drowsy. Similarly, form the habit of having your protective gear on before you commence any woodwork. This should be standard practice irrespective of what tools you will be using. 

What is a Wood Planer in Summary

Wood planers are one of the fundamental tools for woodworking. However, it’s essential to understand the different types of planers, their characteristics, and which planers are best for your projects. 

If you are just starting out a great option is this super cheap hand planer you can get on Amazon.

I’ll link a video of how to easily tune it up  so it works as well as a hand plane costing several hundreds of dollars if you are willing to put in about 30 mins of work. It’s well worth the small time investment and the same techniques can be used to tune up  many other tools.
 

Older Posts

I hope you love the products I recommend. Just so you know, DaddyStaysHome may collect a share of the sales or other compensation from links on this page.

There is an old woodworkers saying that one can never have enough clamps. 

So, what clamps do I need for woodworking? If you are new to woodworking, you have probably gone to a shop and left more confused than ever by the huge variety of tools. Just the wide array of clamps arranged neatly in rows can indeed get confusing. 

The good news is, you do not need all of them to begin your woodwork project. You can start with a few and grow your collection as you gain competency and the confidence to take on larger or more intricate projects. 

What are Clamps?

Clamps are fastening devices used to hold wood pieces together to prevent separation and movement. They can also hold planks of wood steady for drilling, filing, sawing, chiseling, and painting. 

Generally, clamps have a moveable jaw attached to an adjustable screw. 

So, What Clamps Do I Need for Woodworking?

A woodworker complaining about having too many clamps is almost unheard of. While having many is good, having the right clamps, and knowing how to use them is definitely better. 

Still, as versatile as some clamps are, they cannot serve every function. 

Here are the most common clamps and their functions.

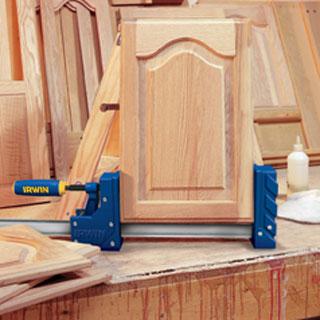
Trigger Activated Bar Clamp

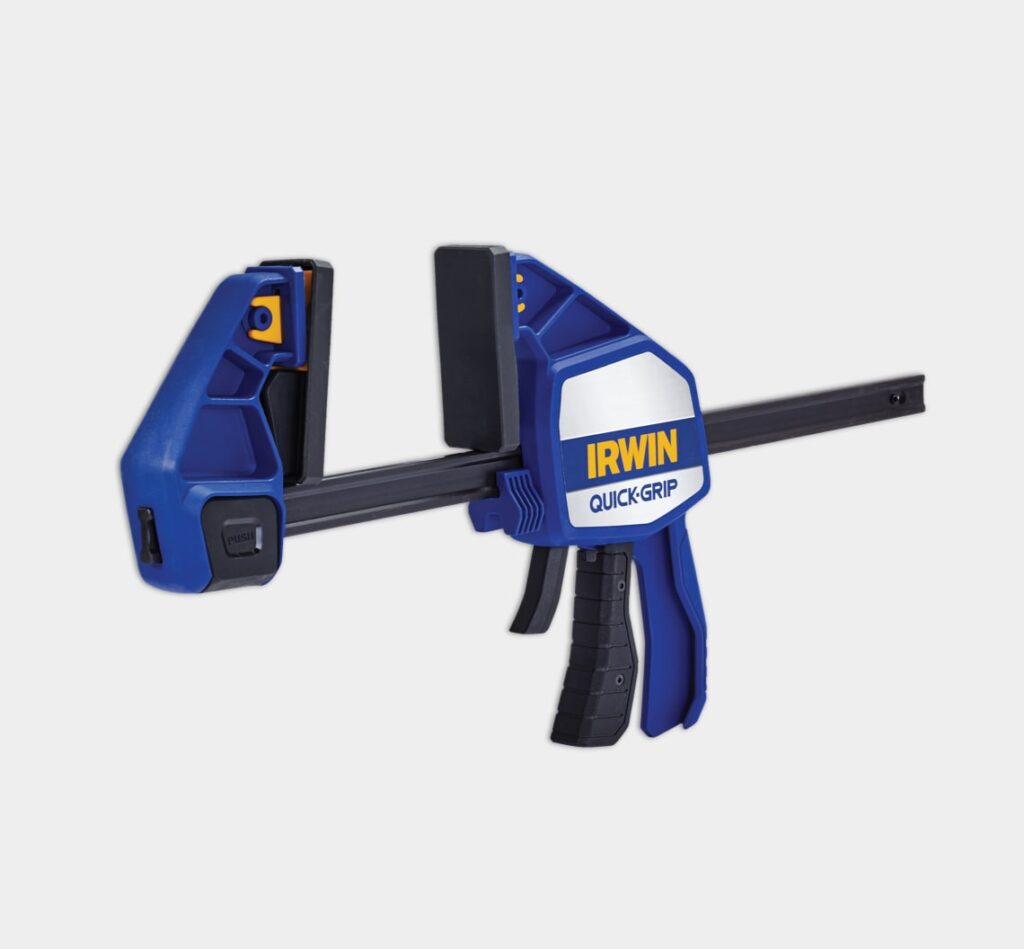
Trigger Activated Bar Clamp - What Clamps Do I Need For Woodworking

This clamp’s bar length ranges from 6” to 50”. It can be operated with one hand, freeing up the other hand to hold workpieces or maneuver around the workbench. 

As its name suggested, the trigger clamps used a trigger mechanism to adjust its jaws. It is also called the one handed bar clamp because it allows for one handed operation. 

This clamp is ideal for both light and heavy woodwork duty. It’s also easy to manure, making it the go-to clamp for both professionals and armatures.

Aside from clamping, some trigger clamps come with detachable jaws that can be placed on the main bar facing different directions. In this setting, the clamp can be used for detaching.

G/C Clamp

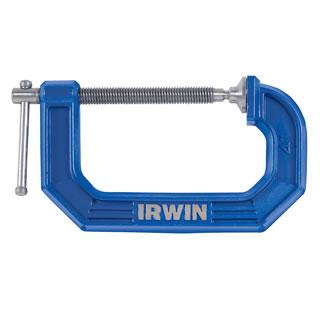
c g clamp - What Clamps Do I Need For Woodworking

This clamp looks like an upper Case letter G, which is where it gets its name from. It’s also known as the C-clamp. 

The G/C clamp is very versatile and is an essential must-have when working with a restrictive budget. Different styles of G/C clamps come with throats of varying depths, the general range being 3’’ to 14’’. 

There are also miniature versions at 1’’ by 1’’. These are often for people taking up woodwork as a hobby, however. 

In a workshop, these clamps work best on narrow pieces of wood where one requires to apply a lot of pressure on multiple points. 

Spring Clamps

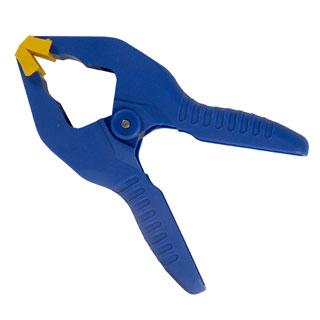
spring clamp - What Clamps Do I Need For Woodworking

The spring clamp is also called the pinch clamp. This tool features two handles, two grippers, and a spring pivot to connect all the moving bits.

These apply light clamping pressure. You apply force to the handled to release the pressure and hold. 

The jaws are fitted with rubber pads or other soft padding to prevent damage to the item being clamped.  

These are great for domestic use and for holding smaller, more delicate bits when woodworking. 

F Clamps

passive lock bar f clamp - What Clamps Do I Need For Woodworking

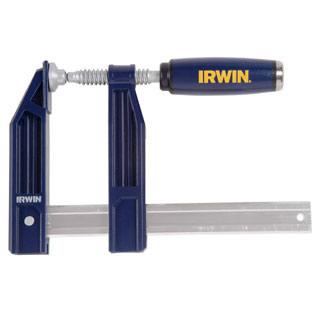
This F-shaped clamp has a long vertical bar fitted with two perpendicular bars. The F-clamp is very sturdy and can be used for heavy woodworking. 

You can find it in different sizes depending on the bulk of the wood pieces you will be using. 

These clamps are available in numerous sizes. You can therefore get the idea-sized pump for the job you intend to carry out. These can go from 6” to 48”. 


Parallel Jaw Clamp

parallel jaw clamp - What Clamps Do I Need For Woodworking

The parallel clamp is much like the F-clamp, only much more powerful. 

Just like the F clamp, the parallel clamp allows for wide openings. The jaws of this clamp remain parallel when packed with increasing loads. This prevents dimpling and offers a larger distribution area. 

This parallel clamp can deliver about 1000 pounds of pressure. This clamp is often the preferred clamp for large glue-up jobs. 

Aside from their power, these clamps are also very versatile. Their downside is that they tend to be expensive, which is expected for the level of power and the versatility they deliver. 

These clamps also come with large throats that comfortably hold 3 to 4 inches of material. 

A parallel jaw clamp is easy to disassemble as well, and you can turn it around to functions as a spreader. 

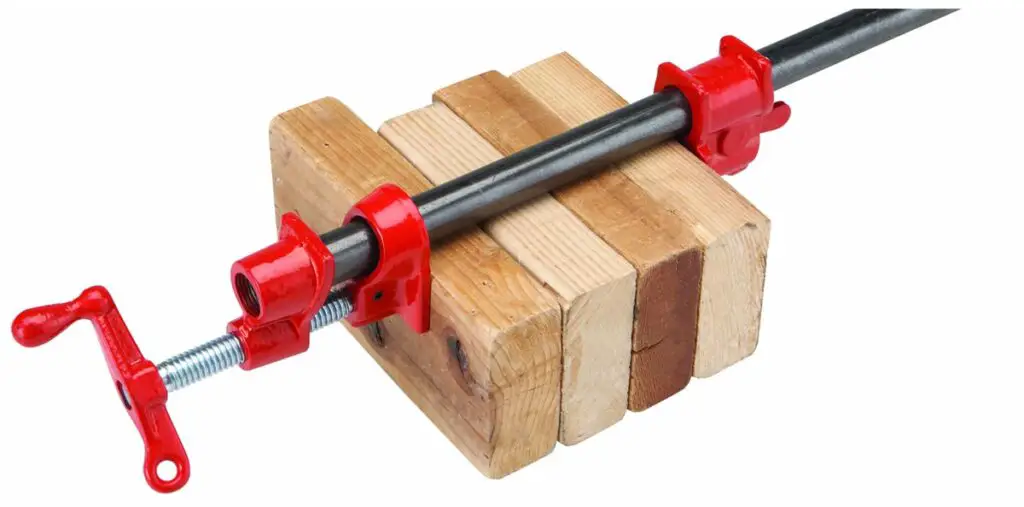
Pipe Clamps

pipe clamp - What Clamps Do I Need For Woodworking

These are heavy-duty reasonably-priced clamps. Most people get flustered by their relatively small clamping mechanism. 

Once you pick your required size, you need to purchase steel gas pipes from your hardware store. You then need to slide the clamp into the pipes to have a functional clamp. 

The pipe’s thickness remains standard at ½” or ¾”. However, you can buy pipes of different lengths depending on the lengths you require for individual projects. 

A downside to the pipe clamp is the throat, which is often short and limiting for certain woodwork tasks. 

Another negative aspect of this clamp is that the pipers tend to leave residue and grease from the pipes to the project one is working on. However, you can place rags between the pipes and your wood pieces to prevent the residue transfer. 

Quick Tips for Working with Clamps

As mentioned earlier, knowing how to use clamps is just as important as buying the correct ones. 

1. Work on a flat surface

Despite your best efforts, an assembly table that is not entirely flat can destabilize your clamp and cause racking and twisting. You then end up with a less than perfect finished result. 

2. Apply pressure evenly

Use enough pressure to bring two pieces together along the glued edges. You should see some squeeze out without squeezing out all the glue applied. 

Equal squeeze out along the joint line is one way to let you know you are applying even pressure. 

3. Create Barriers

Dents and stains are a common complaint when using clamps. Whenever you are using a clamp without protective padding, place a piece of waxed paper between the workpiece and the clamp. 

This prevents glue from sticking onto the clamps’ surface. Thin scrapes of softwood can similarly be used to prevent marring or denting. 

The Woodworkers Guild of America has an excellent series on how to glue and clamp wood properly. For example here is a quick video about how to clamp irregularly shaped objects.


So in the end when you asked ‘What Clamps Do I Need For Woodworking?’

The answer is ‘It depends on the job’.

As you get more experienced and take on new projects your collection of clamps will inevitably grow. Old woodworkers all have massive collections of clamps for good reason, and now you understand why!

Older Posts

I hope you love the products I recommend. Just so you know, DaddyStaysHome may collect a share of the sales or other compensation from links on this page.

They say the day you get into woodwork, quitting becomes a problem. Having just a few essential tools for a beginner woodworker is all you need to get started in woodworking.

With good reasons too. Woodworking means different things to different people. This goes farther than the joy of creating beautiful or functional pieces. 

For some, woodworking is a way to create an income or additional income on the side. Others love the cathartic, stress-relieving properties of a good woodworking session. 

For some, it’s a means to get a muscle workout while being creative. 

For others it is just an outlet to make interesting things beyond furniture like for instance, longbows.

Whatever the reason, the correct tools support your end game. If you are just discovering this art, here are the essential tools you should have in your woodworking toolbox.

Essential Tools for a Beginner Woodworker #1 – Safety Gear

This is not necessarily a tool but is an absolute must-have when engaging in any woodwork activity. 

If professional woodworkers put safety first after formal training and years of expertise: so should you. Without this, you risk inflicting small or even severe permanent injuries on yourself.

Gloves and safety goggles will offer ample protection against flying wood chips, dust and debris and minor tool mishaps. 

If you will be working with power tools, hearing protection is required to protect you from hearing loss. A good quality facemask will also protect you from inhaling dust and particles, as well as from paint and varnish. 

Essential Tools for a Beginner Woodworker – Saws 

Woodworking requires a lot of cutting. Saws are, however, not a one size fits all. Different saws accomplish different functions. Here are some saws to start off your cutting tools collection. 

#2 Handsaw:

The handsaw is great for beginners because it’s lightweight and has no cords to wrangle while you work. 

#3 Circular saw:

These feature a circular or round blade with sharp teeth to cut through wood. Circular saws are electric-powered, with different types and brands having different power ratings. 

Circular saws have three types of blades:

  • ripping blades
  • crosscut blades
  • combination blades

#4 Jigsaw:

The electric tools are designed to make curved, straight or winding cuts. They cut with up, down and back and forth movement. You can also make smaller, more intricate interior cuts with the jigsaw. 

Essential Tools for a Beginner Woodworker – Planing, Filing and Sanding

Unless you are going for a rustic look and feel, the planks of wood you cut need some finishing to give it a better appearance. 

This is where planning, sanding and filing tools come in. 

#5 Planes

woodworking essential tools for a beginner woodworker

Planes are tools that use a fixed blade to shave wood fibres. This allows the object you’re making to take shape and become gradually smoother. The most common ones are:

  • Jack plane
  • Block plane
  • Joining Plane
  • Rabbet plane
  • Scraper plane

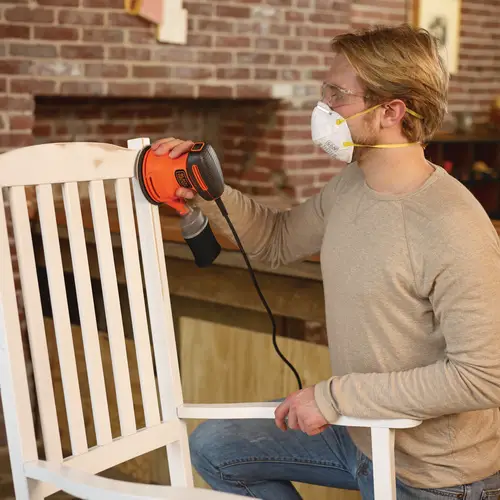
#6 Orbital Sander

These use sandpaper pads to smoothen surfaces. Being electric, they tend to be faster and do not require as much energy to operate as manual sanding tools. 

Regular orbital sanders work in a circular motion, but leave swirl marks that are challenging to remove. A random orbital sander oscillates rather than circulates. This gives you a mark-free, silky finish. 

#7 Hand Files

Good quality hand files are durable and often inexpensive. These are excellent smoothing options especially for beginners. 

The main file choices to have are:

Rasps: these have coarse teeth and rough edges. This is often the first file to be used as it shaves off larger chunks of wood before finer files take over. 

Half-round files: these feature one rounded side and one flat surface. The two ends make it possible to work on both flat and curved wood pieces. 

Mill files: these have two flat surfaces, with one end being courser than the other. These files can also work on tight spaces thanks to their toothed edges. 

Hand files are also often used to sharpen other bits and blades used in woodwork. 

Assembly Tools

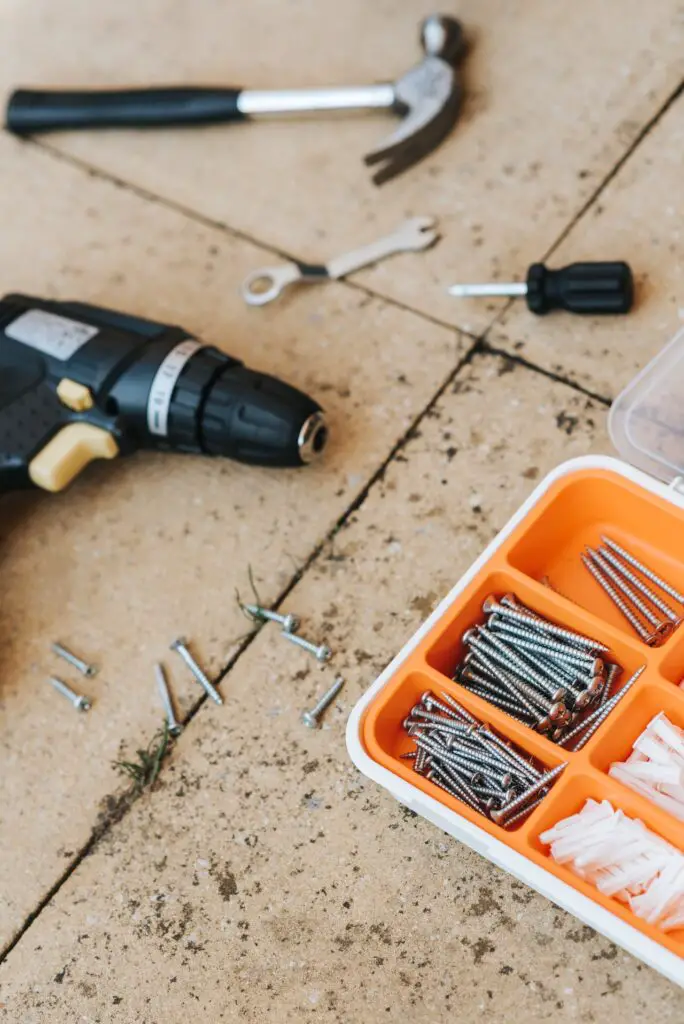
hammers and screws essential tools for a beginner woodworker

Once wood planks are sized and smoothened adequately, they need to be put together to form the final product. 

Assembly is dependent on two things: precision joints and fastening. 

The more common ones are:

#8 Hammer

There are different woodworking hammers to accomplish various tasks. The main ones are prying and pounding. 

How well a hammer accomplishes these tasks is dependent on several factors. These are:

Hammer claw: the claw design includes a hammer claw’s length and curve. Finishing hammers have longer claws while framing tools have straighter edges for splitting materials.

Head design: some hammerheads, especially finishing hammers, have smooth heads. On the other hand, framing hammers have serrated faces for prying fasteners and nails. 

Handle design: composite or wooden hammer handlers are great for beginners as they deliver minimal shock. Framing works better with steel handles, however. These have more shock, but steel makes them heavier, increasing their force. 

The main type of hammers are:

  • Finishing hammers which tend to be all-purpose
  • Framing hammers with are heavier and sturdier
  • Tack hammers, ideal for small jobs and have no claws

#9 Mallets

Mallets are often confused with hammers. Mallets feature large wood or leather heads with detachable bits to allow various head sizes. 

Unlike a hammer, mallets will absorb shock rather than discharge it. They also leave minimal striking marks, giving off a more refined finish. 

Measurement tools

It is said that a good woodworker measures twice and cuts once. 

These necessitate some good quality, easy to read measuring tools. The following are absolute must-haves in your toolbox. 
#10 Squares

A good assortment of squares is central to great woodwork pieces. Aside from allowing the creation of various angles, squares have measurements on them, making it possible to use them as rulers. 

The key squares to have are:

  • Framing squares: these are large, right-angled for bigger tools
  • Speed squares to check 45 and 90-degree cuts
  • Try squares for smaller, right-angled for verifying squares 
  • bevel squares to recreate existing angles

#11 Tape measure

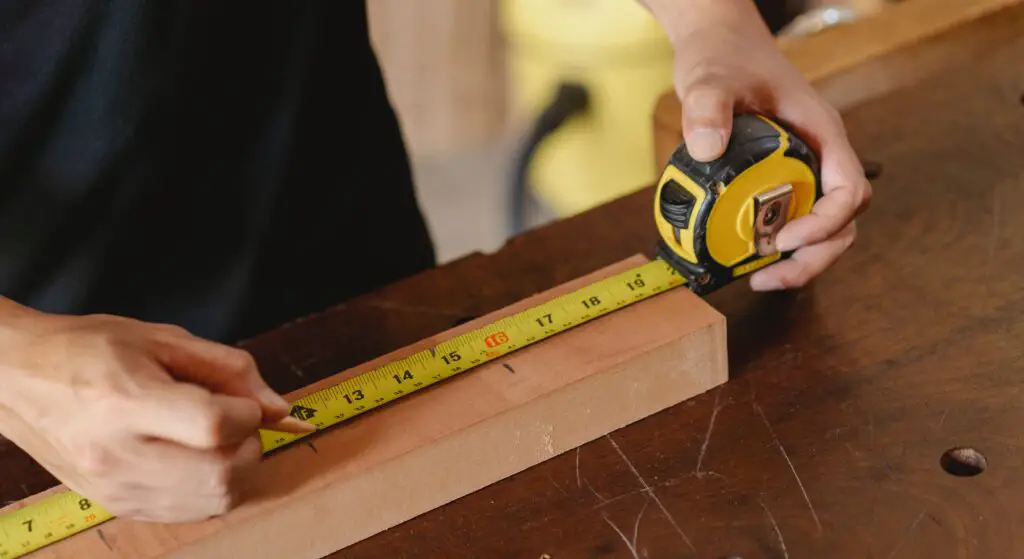
measuring essential tools for a beginner woodworker

You should have at least one tape measure in your woodworking kit. This can be:

  • Retractable steel tapes: these are very common and come folded in a shell for easy handling
  • Folding Rules: these are rigid measuring sticks that fold into several sections
  • Flexible reel tapes: these measure over 100 feet and come in both steel and fabric
  • Straight edges and yardsticks: these are ideal for laying straight lines

With just a few simple tools you can get started in woodworking easily. Don’t let not having all the fanciest tools hold you back for getting started creating and working on projects.

Older Posts

I hope you love the products I recommend. Just so you know, DaddyStaysHome may collect a share of the sales or other compensation from links on this page.

Best Random Orbital Sander

An electric sander should enable you to quickly achieve three vital sanding objectives before the power tool can earn the title of ‘Best Random Orbital Sander’. First, the random orbital electric sander should allow you to realize a flawless professional finish in a wide array of DIY sanding tasks, including:

  • Smoothing down wood surfaces on new furniture to allow proper adhesion of an initial coating of wood varnish or paint
  • Heavy-duty sanding in building construction and renovation, such as smoothing down wooden floorboards, decks, guard railing, staircases, patios, outside benches, etc.
  • Thoroughly removing coats of old varnish and paint from wooden surfaces before the application of a different varnish or paint.

Second, the power sander should feature a high material removal rate to ensure you spend the least amount of time carrying out sanding tasks. Third, the electric sanding tool should minimize the amount of dust produced as you perform various sanding operations.

Luckily for you, the Black & Decker BDERO100 Random Orbital Sander ensures both professional woodworkers and DIY enthusiasts can easily achieve all three sanding objectives. This review article looks at the functional features, device specifications, performance capabilities and benefits of an electric sander worthy of the title of ‘best random orbital sander’.

Functional Features of Black & Decker 5inch Random Orbital Sander

The BDERO100 is a 5inch random orbital sander from the Baltimore-based power tool manufacturer, Black & Decker. This electric sander model comes with several features that make the power tool remarkably easy to use. The various functional features that you find on the Black & Decker BDERO100 include

  • Hook and Loop Sandpaper Fastening

Random orbital sander velcro disk fastener

The backing pad of the Black & Decker BDERO100 random orbital sander is a circular disc with a diameter of 5inches. The 5inch backing disc is covered with a velcro-like adhesive material that features countless hooks. The hooks catch onto the loops found at the back of specially-designed sanding paper. The hook and loop attachment ensures your sandpaper is firmly fixed to the base of this electric sander as you sand down wooden surfaces. This sandpaper fastening mechanism also makes it remarkably easy to quickly peel off used sandpaper and replace it with a new sanding disc. This is different from orbital sanders where they take square sheets of sandpaper that is held on with mechanical clips.

  • Dust-sealed switch

The recessed power switch of the BDERO100 random orbital sander is housed within a tight-fitting enclosure. These design features ensure the power switch of the BDERO100 is fully protected from ultra-fine sanding dust. In the absence of sealing measures, super-fine dust infiltrates into the contact points of the button, causing it to fail. Consequently, the dust-sealed switch of the Black & Decker BDERO100 assures you of an extended tool life when you purchase this electric random orbital sander.

  • Random orbit action 

The Black & Decker BDERO100 random orbital sander comes with a powerful 2-ampere AC motor capable of attaining an impressive 12,000 Orbits per Minute (OPM). The patented gear mechanism attached to the high-torque motor of the BDERO100 guarantees the sanding disc moves through random orbits of rotation. The random orbital motion and high rotation rate of this electric sander allow you to achieve three desirable sanding performance outcomes easily:

  1. The complete elimination of cross-grain scratching on all wood surfaces you are sand down. Consequently, you achieve a perfectly smooth sanded surface when you use the Black & Decker BDERO100 Random Orbital Sander to carry out a wide array of sanding tasks.


  1. A high material removal rate from target surfaces, which translates to reduced turnaround time in your sanding operations. As a result, you realize considerable time saving when you use this Black & Decker electric sander for your sanding tasks.


  1. The rapid removal of material from surfaces makes it possible for you to use the BDERO100 random orbit sander to shape wooden workpieces to precise dimensions. Therefore, you can use this electric sander to perfect concave and convex surfaces on furniture pieces such as chair and table legs, wooden tabletops, headboards, etc.


  • Runtime Duct Removal

As you use the BDERO100 random orbital sander, the fine dust that is generated is efficiently sucked into the device via a series of perforations on both the sanding disc and the backing pad. The vacuum system of this electric sander conveys the collected debris into a side-mounted dust bag. Since vacuumed sanding dust is ultra-fine, you can carry out prolonged sanding operations without having to empty the high-capacity dust bag.

best random orbital sander dust woodworking

Once the dust bag fills up, the BDERO100 electric sander goes into automatic shutoff mode. You then empty the reusable dust bag in three simple steps.

  1. An anticlockwise half-turn of the dust bag container allows you to disconnect it from the electric sander easily.
  2. You then remove the dust bag, empty its contents into a waste bin, replace the dust bag into its purpose-built container, and finally reconnect the container to the BDERO100 power sander.

Using the BDERO100 Random Orbit Sander

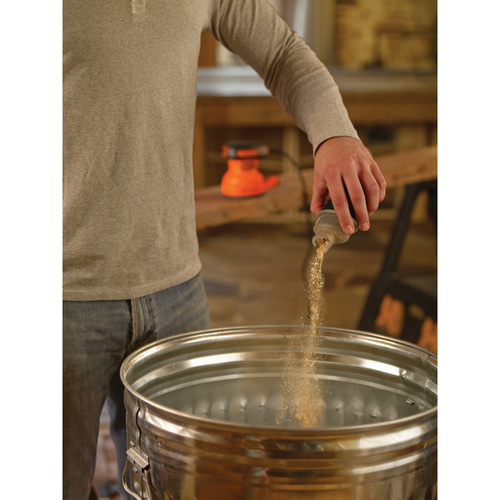
You begin using the Black & Decker BDERO100 by mounting the desired grit of sandpaper to the electric sander. The sandpaper you use with the BDERO100 should feature a fabric back that allows firm hook-and-loop attachment to the backing disc. Note that this Black & Decker power sander comes with free ten circular sanding discs included in the package.

What is a random orbit sander

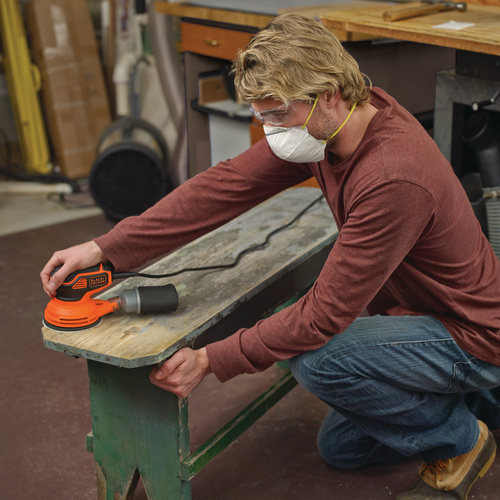
Once you successfully mount sandpaper to the BDERO100, you then turn on the power switch before you place the power tool onto the target surface. Doing so ensures the 2-ampere high-torque motor warms up adequately. You then firmly grip the round top of the electric sander as systemically sand down the wooden surface using easy to-and-fro motions. 

Verdict on if the Black & Decker BDERO100 is the Best Random Orbital Sander

There are several reasons why you should consider the BDERO100 electric sander the best random orbital sander in the market. The two most significant reasons are:

  • The remarkable ease with which you can achieve immaculately smooth sanded surfaces while carrying out a wide array of sanding operations using the BDERO100 power sander.
  • The notably short turnaround time when using this Black & Decker electric sander for your sanding tasks, allowing you to realize considerable time savings.

Note that in addition to exceptional sanding performance, you can also use the Black & Decker BDERO100 random orbital sander to shape workpieces in your DIY woodworking projects.

Older Posts

I hope you love the products I recommend. Just so you know, DaddyStaysHome may collect a share of the sales or other compensation from links on this page.

What is a Random Orbit Sander?

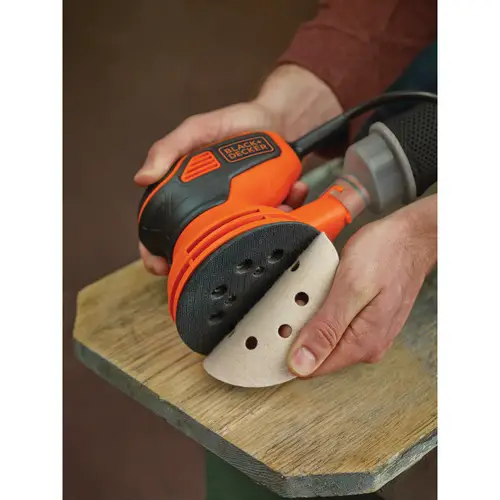
A Random Orbit Sander is a woodworking power tool featuring a circular piece of heavy-duty sandpaper mounted on a round metallic pad connected to a high-torque AC motor. This handy woodworking tool, also known as a Rotary Sander, significantly reduces the time and effort you would spend carrying out manual wood sanding on wooden surfaces. You can use a random orbit sander to efficiently perform a wide array of sanding tasks, including:

  • Stripping layers of old paint from wooden surfaces when intending to apply a fresh coat of the same or different colored paint
  • Removing varnish from furniture surfaces to allow proper application of a new wood finish
  • Smoothing down wooden surfaces before applying a coating of wood varnish or paint 
  • Tackling large-scale sanding tasks on wooden building projects such as wooden floors, staircases, decks, patios, railing, and so forth.

Random Orbit Sander versus Orbital Sander

Another electric sanding tool that is remarkably easy to confuse with the random orbit sander is the Orbital Sander. You can use an orbital sander to carry out similar sanding tasks as those performed using a random orbital sander. However, differences in the mode of operation of these two power sanders make each electric sander more suited to specific sanding tasks. 

Therefore, you need to learn the unique differences between random orbit and orbital sanders if you want to optimize your sanding tasks. Luckily, the woodworking knowledge presented in the next section of this article ensures you always choose the right electric sander for the right job.

Visual Differences Between Random Orbit and Orbital Sanders 

Distinguishing between a random orbit sander and an orbital one is the first thing you need to know before you can adequately utilize these powered sanding tools. This feat involves looking for distinct external features that characterize these two electric sanding tools.  Visible traits you can use to identify either type of sander correctly include: –

  • The shape of the Mounting/Backing Pad

Both sanders require you to attach a piece of sandpaper to the mounting pad before you can embark on a sanding operation. The mounting pad of a random orbit sander is circular, while an orbital sander is square or rectangular.

Orbital sander Square mounting

sandpaper mount of a common orbital sander

  • The shape of the Sandpaper

The shape of the sandpaper you use with either electric sander depends on the mounting pad’s shape. Consequently, the mounting pad on an orbital sander requires that you attach a rectangular 9inch by 11inch sandpaper. On the other hand, you can only mount disc-shaped sandpaper when using a random orbit sander for powered sanding tasks. 

  • Sandpaper Fastening Mechanism

Loading a piece of sandpaper to a random orbit sander involves aligning perforations on sanding discs to tiny hooks on the underside of the mounting or backing pad. The recessed hooks on a random orbit sander ensure the circular sandpaper stays in place as you meticulously sand a wooden surface.

Random orbital sander velcro disk fastener

Random orbital sander velcro disk attachment

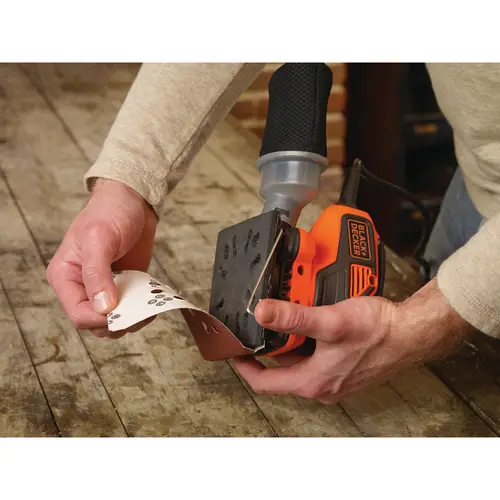
In comparison, the fastening mechanism on an orbital sander consists of two wire clips located on top of the backing pad. These stainless steel clips firmly hold the two ends of rectangular or square sandpaper to the pad as you perform a sanding operation.

Sanding Capabilities of a Random Orbit versus an Orbital Sander

In addition to differences in exterior appearance, a random orbit sander’s sanding abilities differ markedly from that of an orbital sander. This performance difference arises from how each power sander operates, as outlined below.

Using a Random Orbit Sander

After you attach a sanding disc to a random orbit sander, you power up the tool and press the tool’s sanding end onto the target wood. The sanding’s high-torque AC motor causes the rotation of the sanding disc over a target area equivalent to the diameter of the disc. Proper sanding using a random orbit sander involves moving the rotating sanding pad of this electric sander systemically over a wooden surface.

During a sanding operation using a random orbit sander, a mechanism below the AC motor ensures that the sanding pad moves in random concentric orbits over the wooden surface. This precise but random rotational motion ensures that this electric sander avoids creating distinct sanding patterns on the surface that you are sanding. 

As a  result, using a random orbit sander allows you to realize an impeccably smooth surface with minimal cross-grain scratching. Furthermore, this electric sander’s random circular motion allows you a high material removal rate from a wooden surface.

Using an Orbital Sander

As with a random orbit sander, you begin your sanding task with an orbital sander by first attaching rectangular or square sandpaper to the backing pad. You then power up this electric sander and press it firmly against the target wooden surface. However, unlike a random orbit sander whose AC motor generates a circular sanding motion, the motor of an orbital sander causes the mounting/backing pad’s to-and-fro movement.

As a result, you achieve a sanded surface bearing distinct sanding patterns with clearly visible cross-grain scratching when you use this electric sander. Furthermore, the sanding end of this woodworking power tool’s basic to-and-from movement translates to a low material-removal rate when you are using an orbit sander.

What is a Random Orbit Sander and Why use One Over an Orbital Sander?

Using a random orbit sander for your sanding tasks provides you with notable advantages over using an orbital sander. First and foremost, you attain a significantly higher rate of material removal from wooden surfaces when using a random orbit sander than possible with an orbital electric sander. Second, choosing a random orbit sander for your sanding tasks allows you to realize a smoother wood sanding finish than with an orbital sander. The outcome is that a random orbit sander allows you to use far less time and effort to perform similar sanding tasks than would be necessary with an orbital sander.

Consequently, a random orbit sander’s faster and smoother sanding performance makes this electric sanding tool a better fit for powered sanding tasks than an orbital sander. However, a random orbit sander’s circular pad is why this electric sanding tool falls short when intending to smooth out corners and angled surfaces.

Here are 2 budget options for sanders depending on your needs. Both are the top of the class on Amazon and very reasonably priced.

Older Posts

I hope you love the products I recommend. Just so you know, DaddyStaysHome may collect a share of the sales or other compensation from links on this page.

Blacksmithing is a hobby that is growing in popularity all over the world, as people develop a new interest in exploring this ancient art form and learning to work and shape metal with their hands. It’s a fantastic way to develop a deeper understanding of the art and science of metalworking, and to make things that you can enjoy for years to come.

If you have an interest in taking up blacksmithing, but don’t know where to begin, a beginner kit is a great investment in the first set of tools and equipment you need to become a blacksmith. A beginner blacksmith kit gives you everything you need to get started, in a complete, convenient package. Just add a hard flat object to hit stuff on (really any piece of steel will do fine to start) and a way to heat the metal (check out some easy to make forges here) They also make great gifts for aspiring blacksmiths. Here are some of the best beginner blacksmith kits.

Each one offers a different set of items from just basic hammers to including tongs and safety gear. Have a look and choose the ones that fit what you need to get started.

​​​​

Goplus Tools 5-Piece Blacksmith Starter Kit

Beginner Blacksmith KitThis beginner blacksmith hammer set from Goplus is a complete set of hammers for different purposes. The set includes:

  • 2 ball pein hammers for reshaping metal surfaces, riveting, and rounding edges of metal pins and fasteners
  • 1 rubber mallet for shaping mortar beds, or working with wood, soft metal, or tiles
  • 1 sledgehammer for small demolition jobs like breaking concrete and drywall or for driving stakes
  • 1 cross pein hammer for shaping and bending unhardened metal, or for shaping brick and stone blocks

The heads are made of forged, polished steel for strength and durability. The handles are made of fibreglass, with solid cores that absorb vibration and shock and reduce fatigue. The handles are covered with non-slip plastic and have rubber grips for a lasting, secure hold.

These hammers have great grip and shock absorption that let you to work comfortably for long periods and are an excellent size and weight for maximum efficiency.

Whitlox Hammer & Tongs Blacksmith Starter Kit

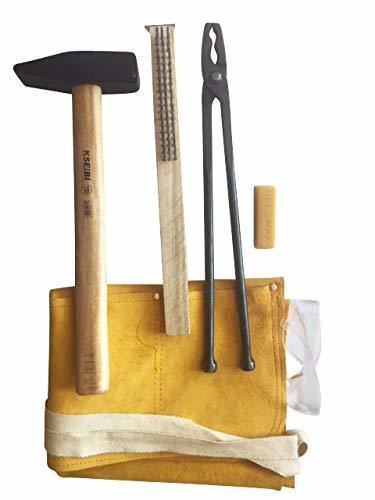
Blacksmith Starter KitThe Hammer & Tongs Blacksmith Starter Kit from Whitlox is a 6-item bundle great for the beginning blacksmith, with high-quality tools that will be used for years to come. The set comes with:

  • A Chicago Electric leather apron designed to protect you and your clothes from hot sparks. It has four pockets to keep your tools and supplies close at hand, neck and waist straps for a comfortable fit, and double-stitched seams for durability
  • A steel brush with a long, easy-grip handle and durable steel bristles perfect for knocking off scale.
  • A Kseibi cross pein hammer made of high-carbon steel with high hardness and a durable wooden handle. This hammer has a size and weight meant to reinforce good form and reduce vibration and fatigue.
  • Western Safety clear safety glasses for rugged eye protection.
  • Whitlox 16-inch wolf jaw tongs sized to grab and hold many sizes and shapes of stock. These tongs grip securely both end-on and cross-way, and are sturdy and lightweight. The ball ends provide grip and ease of use. These tongs are well-designed and versatile, ideal for beginner blacksmiths who don’t have a different pair of tongs for every purpose.
  • Natural beeswax to provide a professional finishing touch to forged pieces. Beeswax closes the pores in metal, protecting it from water that can lead to corrosion and rust, and also provides a natural, attractive, slightly glossy finish.

With the basics of safety gear, the two most important tools, and even finishing brushes and beeswax, this set is a great start for a beginner blacksmith to work their first metal from beginning to end. Despite being a beginner kit, the components are rugged and durable, high-quality and designed to last for years to come.

Blacksmith Tongs Beginner Kit

BetterForge Blacksmith Tongs Set - Starter Kit - Wolf Jaw Plus V-bit TongsIncluding both Wolfjaw tongs, my favorite all round style of tongs, and V-bit tongs. This Starter kit will handle most all of your blacksmith needs until you develop the skill to tackle harder projects. By then you will have the skills to make tongs that fit your needs!

They open at about a 45 degrees and can hold both flat and round stock at 1/4 to 3/8 inch securely. Perfect for new blacksmiths.

Beginner Knifemaking Tongs Set

Knife Making Tongs Set Tools Assembled Knife Making Blacksmith Bladesmith Anvil Forge-3PCsIf you are planning to make knives these specialized tongs are exactly what you need to securely hold your knife making steel billets.

  • V-Bit Blade Tongs – Extremely versatile and effective in respect to handling wider flat stock sizes up to 1 1/2 inches , 1/4 inch thickness or less.Designed with deep V Groves in the jaws to insure your flat stock stays deadlocked while delivering heavy hammer blows.
  • Blade Tongs – Will handle a variety of stock thickness from 1/8 to 3/8 inches. Allowing easy transitions from forge to anvil. Designed for Knife-smiths these tongs will allow you to grip the knife in various positions when drawing out the blade.
  • Flat Tongs – For 1/4 inch Flat Stock. These tongs are made out of thinner material, making the tongs lighter and easier to handle when working with smaller stock sizes. They are great for almost any project and can be shaped into box jaw, wolf jaw, or v-bit tongs to hold various sizes of metal.
  • Material: Forged from high quality steel round stock providing the user with a comfortable grip. Finished with non-slip wax to protect from rust and corrosion. All tongs measure approximately 15 1/2 to 16 inches making them easy to maneuver in addition to keeping your hands a safe distance from the forge when removing steel.


Beginner BlackSmith Forges

There are several ways to go with a blacksmith forge, the biggest decision is the type of fuel it will use. Coal, Propane and Charcoal are the big 3 and they all have pros and cons. Propane is easy to source but can get expensive (a 20lb bottle usually last me about 4 hours of forge time). Coal is very dirty and learning to manage the fire is an entire skill in itself and IMO not worth the trouble when starting out. Charcoal is a middle ground between the ease of propane and the high heat of coal. Here are couple of great options for a forge for the beginner blacksmith.

Whitlox Wood Fired Forges

There are 2 sizes of this forge available. I have one and use it regularly even though I have a propane forge as well. There is just something about tending the fire that feels right when blacksmithing. Both of these forges will run on lump charcoal (avoid charcoal briquettes if possible) and even scraps of wood will work just fine. They very easily get hot enough to forge weld and will even melt steel if you aren’t careful.

For a propane forge I’d go with a simple all included kit. You can make one yourself but having been down that road it is a lot of hassle to find all of the parts from specialized gas fittings to ceramic blankets and rigidizer. Instead I’d recommend a beginner forge kit like this one that has everything and comes with instructions.

The Anvil

Finally, the anvil. THe big heavy hunk of metal you hit things on. The most important things about an anvil are the

1) Rebound. How much of the energy bounces back up into your blow rather than being absorbed into the anvil. Having bad rebound means you have to work harder to move hot iron and will tire much faster.

2) Mass under the working face. The more mass under your blows that easier it will be to move the hot steel. This is why anvils are super heavy (more mass).

A premium anvil for a working smith can easily run into the several thousands of dollars range and is overkill for a starting blacksmith.

Typically you want a forged anvil not a cast iron anvil since the cast iron ones have typically worse rebound. However a small forged anvil like this one.

At only 20lbs it is pretty light and will bounce like crazy when struck until it is permanently mounted. For a similar price you can get started with a cast iron anvil that is far heavier and will let you get going in the hobby with less hassle.

At 100lbs this anvil will take your hardest blows and not budge. The fact that it has Free Shipping will save you more than the cost of the anvil just in shipping fees.

Wrapping it up

A beginner blacksmithing tool kit is a fantastic way to start a blacksmithing hobby, taking some of the guesswork out of buying all the tools, supplies, and equipment you need to start enjoying the satisfaction of working with metal.

Over time, as a person builds skill and expertise, or as projects get more complex, it is natural to gain a greater understanding of which tools are best for your work and your needs, and to start purchasing (or even making) more advanced, customized tools. But this understanding often only comes with time and experience, and in the beginning,  you have to start somewhere.

These kits will put any beginner blacksmith off on the right foot, with the basic tools and equipment they need to get started with blacksmithing and metallurgy.

See the best selling (and I think the best overall) beginner blacksmith kit on Amazon and read the reviews to see why by Clicking Here.

More Guides By Me:

Want to learn how to forge your first knife? Check out my beginners guide

Looking to improve your skills or learn new projects? See the Best Blacksmithing Books I use.

Completely new to Blacksmithing and want to know what the tools and equipment you need are?

-THE STAY AT HOME DAD


Older Posts

I hope you love the products I recommend. Just so you know, DaddyStaysHome may collect a share of the sales or other compensation from links on this page.

So, what exactly is a tabletop bandsaw? And what makes for the best tabletop bandsaw? 

If you work with wood and other materials, you’ll know how important it is to have precision when it comes to cutting, and so your tabletop band saw has a significant part to play.

An unreliable or inaccurate tabletop bandsaw can make the difference between a great piece of work and a piece, which is a complete waste of your materials as well as your time. 

Want to jump straight to our recommendation?  Click Here: Best Tabletop BandSaw

For professional craftsmen, there’s nothing worse than seeing many hours of hard graft being totally ruined just because the tool wasn’t up to the job. Having the best tabletop bandsaw for your project saves time and money.

Because, if you didn’t know already, they are the absolute best cutting machines of all tools known to humankind when they do the job right… And so, if you are into your DIY or are a professional, this is a machine you simply can’t do without.

There are plenty of tabletop bandsaws out there in the marketplace and so trying to decipher which are the best for performance as well as value for money is a challenging task. It can be an overwhelming task as, after all, you are going to invest time and money into this little beauty, and you don’t want to get it wrong.

The problem is that many are quite like toys – plastic and flimsy with poor blade tracking and very little power to get you through thin softwood stock, let alone anything more solid, so you need to be able to decide on the tool which is a good investment rather than a throwaway.

Why Use a TableTop BandSaw?

Depending on what you are going to use the machine for – either as a professional or a DIYer, the tabletop bandsaw can be used for more or less any cutting job requiring precision.

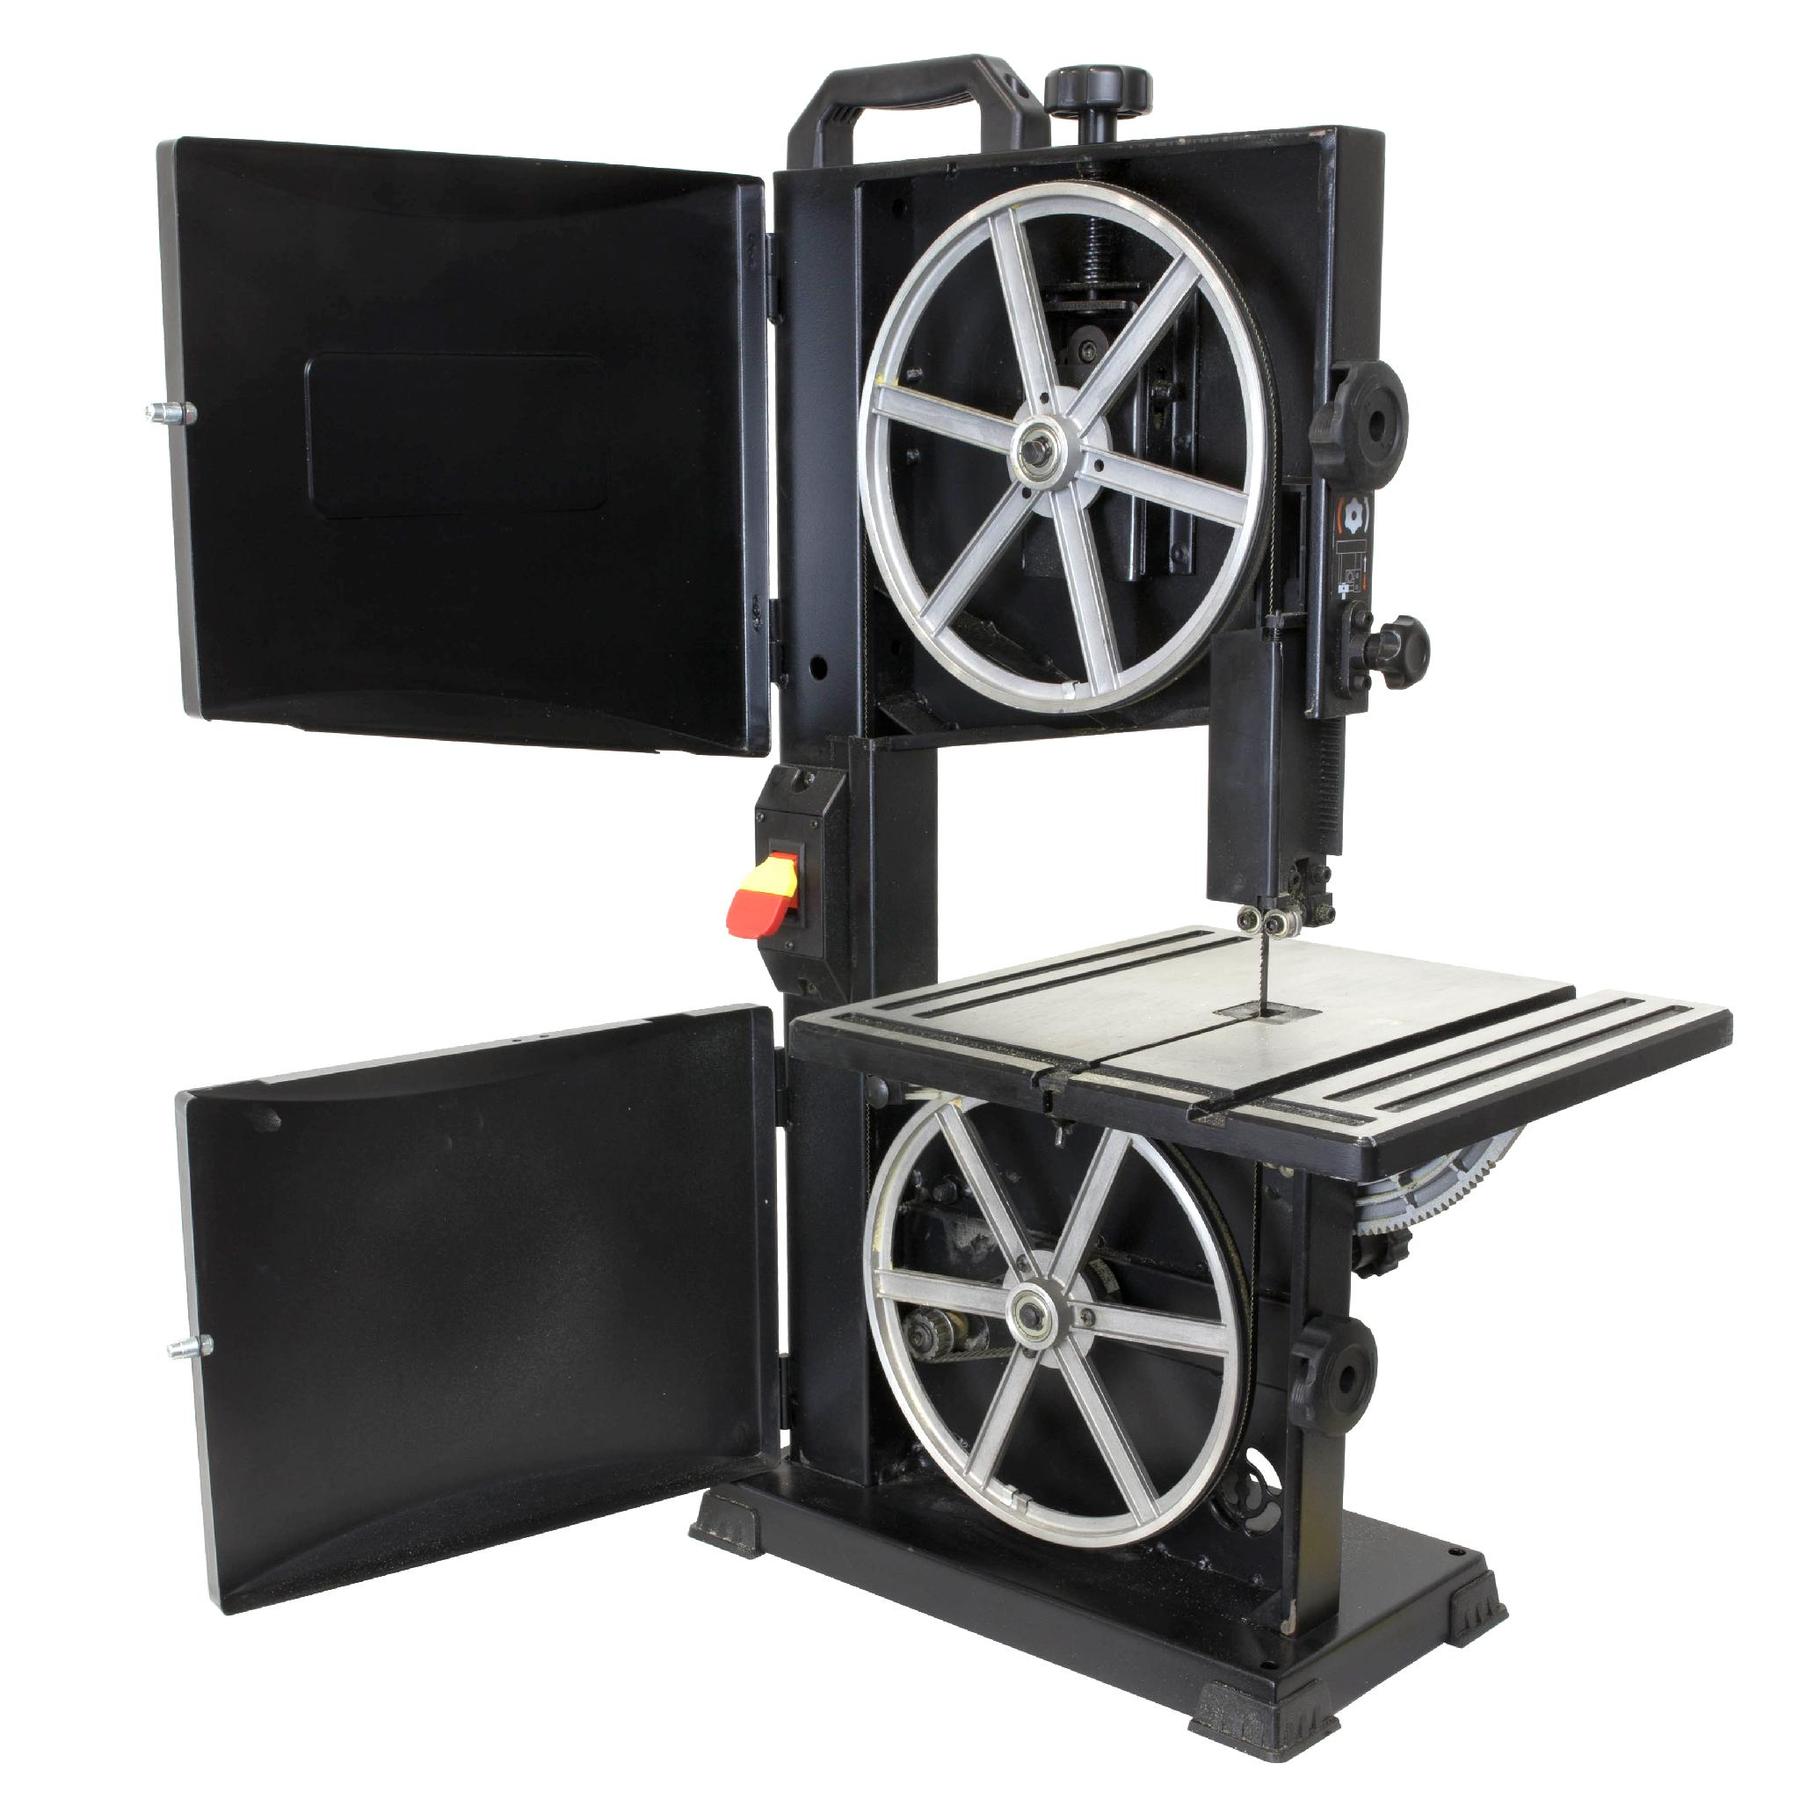
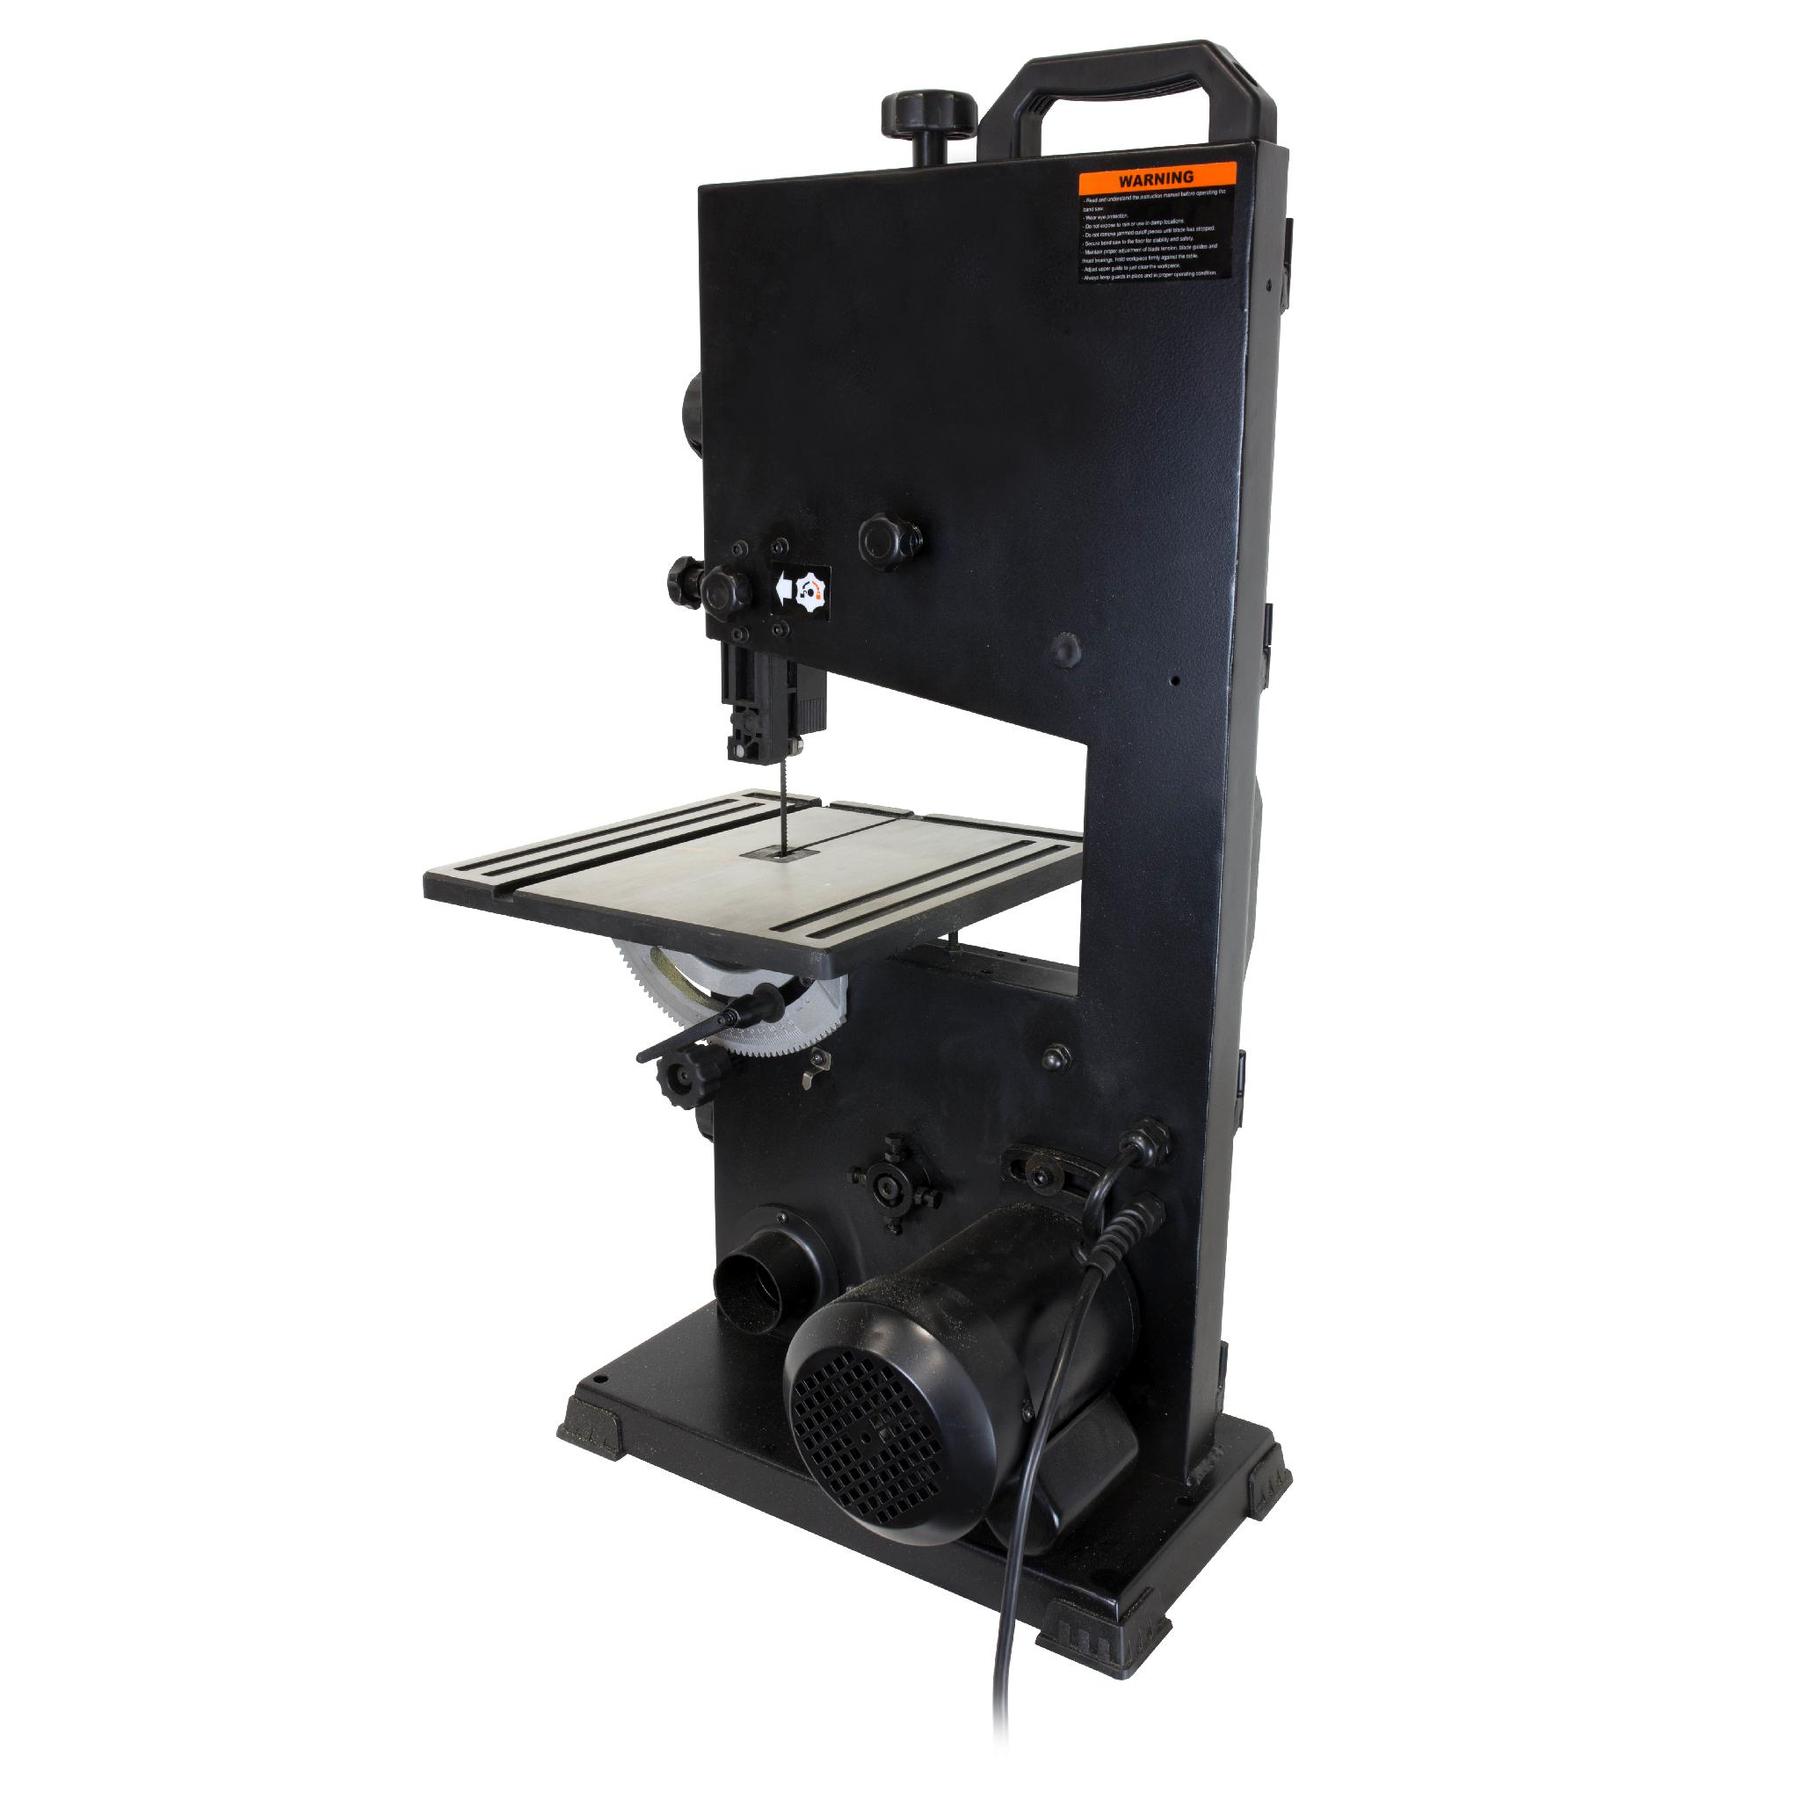
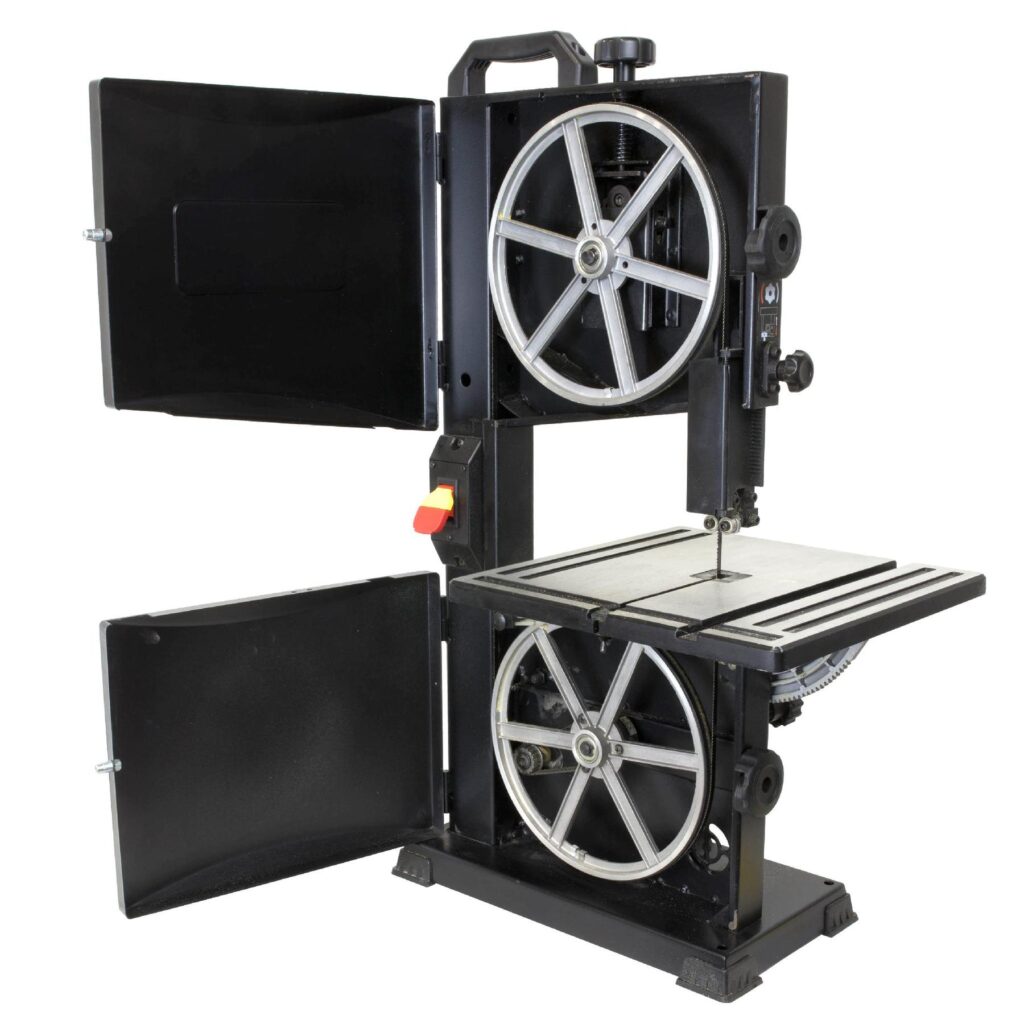
The tabletop saw is basically a loop shaped blade that peeks out through the top of a work-table like a thin ribbon and stretched between two wheels.

The blade rotates as you feed sheet materials into it so the blade can rip them along the grain.

Tabletop bandsaws range from small and relatively in-expensive benchtop model-types targeted to the occasional home DIYer to the bulkier, heavy-duty, and very expensive cabinet models that are more suited to professional wood workshops or on-site varieties.

If you are going to take your saw around with you, you are going to need not just a powerful and reliable machine but one that is protected against potential drops and knocks.

One of the biggest attractions for these types of saws is that they have the ability to cut every plank and workpiece perfectly due to its interchangeable blades.

These blades vary in specifications and include teeth-per-inch and tooth configuration, as well as blades, which are so specialized they can be made for rip-cutting, crosscutting, or dadoing and rebating. 

Similarly, blades are also specifically designed and made to cut hardwoods, softwoods, MDF, melamine, soft metals, and that’s just for starters. 

An adjustable blade guard covers the saw-blade itself. A parallel fence rests in a groove, and some of them are even designed to extend telescopically. 

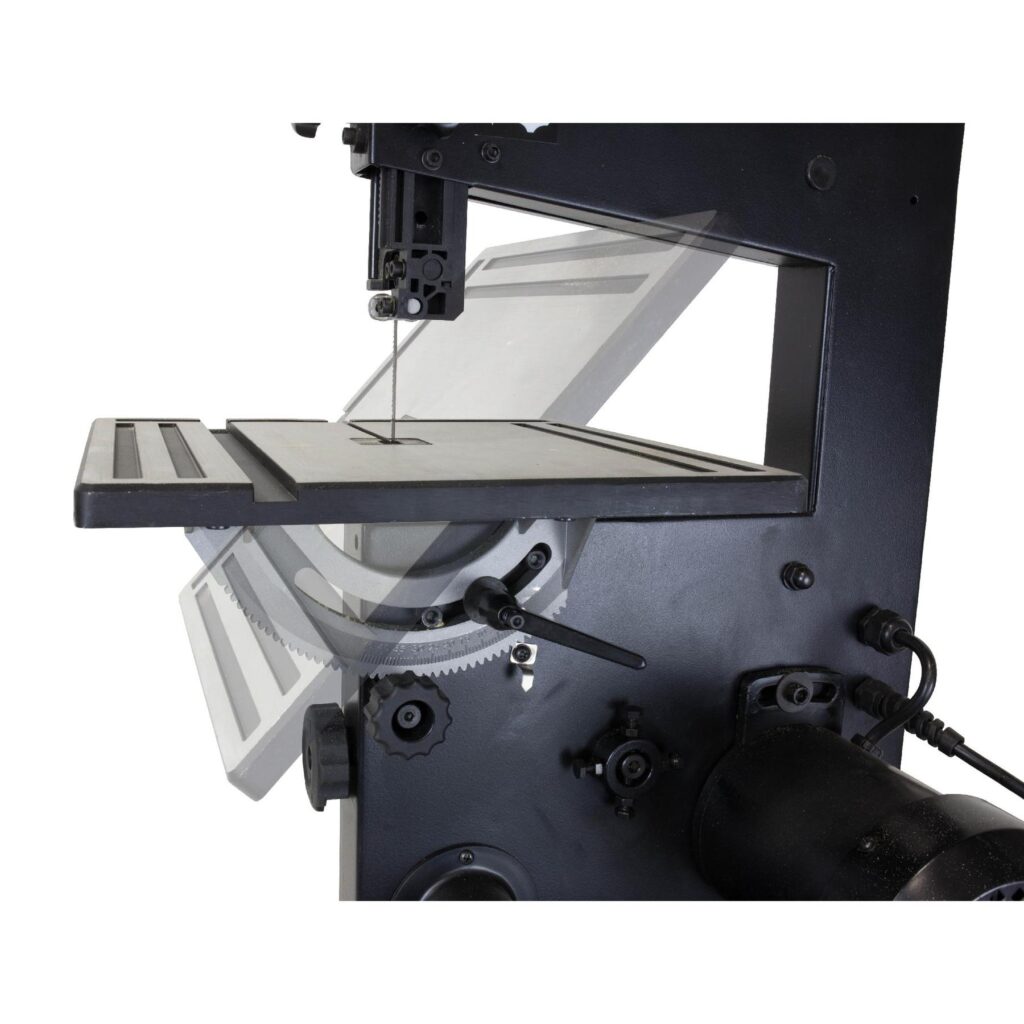
An angle stop also rides along a groove and is adjustable to hold the workpiece at an angle to make cuts. The blade itself can be tilted, even to angles as deep as 45 degrees, so as to make bevel cuts. 

All this is just for starters, so what makes the best tabletop bandsaw?

One which has an excellent design, an abundance of features, and with matchless cutting capability.


Here are The bandsaws that are a cut above the rest…


Overall Best Value tabletop bandsaw and Best Budget bandsaw under $500

Our Overall Best Value tabletop bandsaw and Best Budget bandsaw under $500 happens to be the same one. Combining many must have features, great build quality and an almost impossibly low price this is a hard one to pass up for the DIY and enthusiast crowd yet good enough for professional work. If you want to see my full write up about it check out my WEN 3939t Review

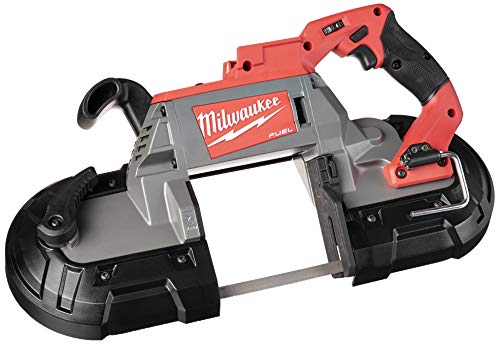
Best Portable Bandsaw

When you need to take the saw to the project a portaband is what you need, something tough, portable and powerful.  Milwaukee makes great tools all around and you can’t go wrong with this portaband. Just take a look at the reviews on Amazon and you will see lots of happy trades talking about how well it handles black pipe, unistrut and PVC. 

Best Upright Bandsaw over $500

When price is less of a concern and you just need to have the best tool for the job This would be my pick.

Older Posts

I hope you love the products I recommend. Just so you know, DaddyStaysHome may collect a share of the sales or other compensation from links on this page.

If you are looking for the best band saw under 500 dollars, you need not look any further than the WEN 3939T benchtop band saw. You can buy this band saw from Amazon an amazingly affordable price it won’t cost you a single cent above $500 to have the WEN 3939T bandsaw delivered to your doorstep. Check the listing below to see the current price on Amazon

This band saw features a powerful 2.8-ampere AC motor that is capable of moving the cutting blade at an incredible rate of 2460 feet per minute. The impressive sawing power of the WEN 3939T makes it remarkably easy for you to achieve precision cuts on all manner of timber, wood-derivative workpieces and metal working projects.


The cutting blades you can install on the WEN  3939T can have widths ranging between ⅛ to ⅜ inches, However, the maximum circumference of the circular saw blade you intend to install should not exceed 62-inches. Make sure you read this article to the end to find out how to safely install cutting blades onto the WEN 3939T benchtop band saw.


Unboxing your Brand New WEN 3939t Band Saw

Choosing to purchase the WEN 3939T not only gets you the best band saw for under 500 dollars, but you also acquire a powerful woodworking tool with an array of complementary components. The following function-specific components should be part of your WEN 3939T band saw package.


  • A tiltable 12 x12-inch work table that you can pivot up to 45 degrees while making intricate and detailed cuts on wooden workpieces
  • A ⅜-inch wide cutting blade made using high-grade tensile steel, allowing you to achieve cuts that are 3 to 8 inches deep and up to 9 inches wide.
  • A miter gauge that enables you to make precise angular measurements on workpieces 
  • An onboard dust port to which you connect 2-inch flexible hosing for the efficient removal of saw debris from the worktop
  • A fence against which you support workpieces while striving for exceptionally straight cuts
  • An adjustable blade guard that helps you minimize unnecessary tension on the cutting blade while making cuts on different sized workpieces.
WEN 3939T Bed Tilt

The main body of the band saw is fully assembled when you finally unbox your brand new WEN 3939T benchtop band saw. You only need to attach the tiltable worktop, install the cutting blade, and connect elastic hosing to the onboard dust port at the base of the saw. The easy-to-understand user manual should offer you ample guidance on how to successfully assemble your WEN 3939T band saw. However, we have taken the liberty to provide you with an even simpler cutting blade installation procedure in the next section.


The manufacturer of the WEN 3939T offers a 2-year warranty on your benchtop band saw purchase. The warranty means you are eligible for 24-months of free repairs from registered WEN band saw dealers. Furthermore, you have the option of replacing the benchtop band saw if the units exhibit serious manufacturing-level defects. That many of these features aren’t available on even more expensive bandsaws further shows that this is the best band saw under 500. 


Safety Features and Protocols for the WEN 3939T

The WEN 3939T benchtop band saw has several safety features designed to offer you maximum protection against injury while using the woodworking tool. The bandsaw uses strong cast-iron housing to enclose the upper and lower stainless-steel guide wheels. You access the guide wheels when installing and removing the circular bandsaws via user-friendly latches. 


Furthermore, the blade guards on the neck of the unit and above the tiltable worktop keep the fast-rotating cutting blade safely hidden while you use the WEN 3939T. Two guide rollers at the worktop-end of the guard rail allow proper alignment of the cutting blade with workpieces. The manufacturer has also included a thrust bearing which functions to eliminate undue tension on the saw blade while you work on tough wood.


While the WEN 3939T is safe to use, you should ensure you wear personal safety equipment while using this powerful benchtop band saw. The attention paid to making this safe  where others skimp , further demonstrates to me this is easily the best band saw under 500. Personal safety items that you should have while using this band saw include protective goggles, a face shield, leather work gloves, a work apron, and hard-tipped boots.


Installing the WEN 3939T Cutting Blade 

Before you can start using your brand new WEN 3939T benchtop band saw, you need to install the ⅜-inch cutting. You begin by opening the guide wheels housing via latches on the sides. Each cover swings sideways to expose the two stainless-steel via side-mounted hinges. You then fix the new cutting blade along the groves on the two wheels and ensure the cutting blade passes along the neck and worktop-end of the guard rails. 

WEN 3939T Best Band Saw Under 500

While installing the blade, you have to ensure it passes through the worktop slit and that the teeth face the right direction. The blade should rest on the rubber-tired rim of the two guide wheels, after which you slightly adjust the tension adjustment knob to keep the cutting blade in place. Proceed to turn the wheels by hand to check whether the blade wonders from the rubber track on the wheels. If the blade strays,  you correct the misalignment by adjusting the tilt angle of the top wheel via the blade tracking adjustment knob. 


Once you successfully align the blade, increase its tension on the blade using the tension chart visible on the neck of the unit. The properly installed blade should have a 1/4 -inch of play. Your WEN 3939T is now ready for use.


Benefits the WEN 3939T Benchtop Bandsaw

When you choose to buy the WEN 3939T, you get an affordable yet versatile benchtop band saw suited for use on a wide array of DIY woodworking projects. This bandsaw grants you the ability to make precise crosscuts, straight cuts, and angled cuts, in addition to an unlimited range of detailed free-hand cuts.


The WEN 3939T is invaluable when you are ripping timber or knife making steel to desired sizes at the start of projects, to the final stages involving fabrication of precise joints and pieces. Furthermore, the array of safety features on the WEN 3939T ensures you are protected in any eventuality. 


Bottomline – This Is the Best Band Saw Under 500 Hands Down

You can’t go wrong when you choose the WEN 3939T bandsaw for your hobby or commercial DIY woodworking.

The WoodWorkers Guild Of America has a ton of helpful tutorials on youtube to help you get the most out of your new bandsaw.

Older Posts

I hope you love the products I recommend. Just so you know, DaddyStaysHome may collect a share of the sales or other compensation from links on this page.

While hunting is not anywhere as popular as it once was, it’s still present in countries around the world. As you know, survival hunting is almost extinct.

Today most people hunt either for the trophies or to balance the biodiversity of a specific area. Bearing this in mind, the equipment needed for hunting not only consists of proper clothing and protection, but also the weapon and tools you will be hunting with. But what do you hunt with a knife?

What do you hunt with a knife

Hunting guns and rifles are by far the most common weapon hunters use today. However, there are still those who enjoy using a good bow or a knife. But are these as effective? And what do you hunt with a knife? To answer these questions, we first need to discuss the uses of a hunting knife and the regulations surrounding them.

Uses for a Hunting Knife

As we mentioned above the hunting knife is rarely used for killing an animal, despite the name suggesting it is, because guns and rifles are both easier and far more effective to get the kill. Some people do still enjoy hunting with a knife because it is more challenging. But it is limited to only a small group of animals that can be reasonably hunted with success. So what are the other uses of a hunting knife and why should you always have one on you?

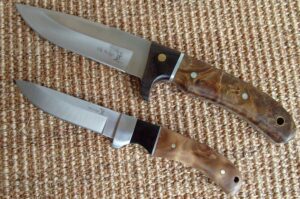
While most people don’t use it for stabbing an animal through the heart, a knife is invaluable for skinning, deboning, gutting and even caping the animal for a trophy.

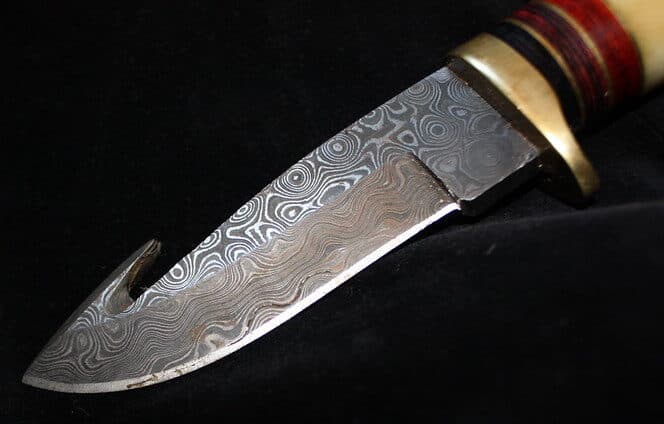
damascus gut hook hunting knife

Gutting is usually done with a gut hook blade, as it’s perfect for making sure that no abdominal or muscle tissue is damaged in the process. For skinning and deboning, sweeping blade knives seem to be the most effective.

Caping is done solely by trophy hunters. Usually, it consists of removing the head with or without a neck by skinning and detaching it from the chest area.

Is it Legal to Hunt With a Knife?

Great question. And now that we’ve covered a few common uses of a hunting knife, let’s take a look at the regulations around them. To answer this, you will need to think about the hunting permit regulations that are present in both your country and state/provincal levels. Since most hunters use firearms instead of so-called primitive weapons, including the knife, bow, arrow, and spear, so hunting with a knife is not nearly as well-regulated as you might expect.

Still, the overall concept is that if you have a hunting permit, you shouldn’t have an issue using the knife to deliver the final blow. Chances are you will not be coming close to the animal that you are hunting with only a hunting knife. So in most cases, you will simply be piercing through its heart once it’s already wounded. Still, this doesn’t undermine the importance or the versatility use of a good hunting knife, as you will need one to get the field dressing done.

What you should remember is that certain animals are not legal to be hunted — with a firearm or with a primitive weapon. As long as you are familiar with the regulations in your area, and you have the permit, using weapons and doing as our ancestors once did, shouldn’t be a problem. But what do you hunt with a knife? And is there any animal that is slow enough that you can get everything done with only a hunting knife?

Animals You Can Hunt With a Knife

The answer to the question above is quite simple — since there aren’t many animals that you’ll be able to chase down using only a knife. Bows and arrows are much more effective and get rid of the need to run down the prey animal, like you would have to do with a knife. Bearing this in mind, hogs and tortoises seem to be the only two common animal types that you can kill using only a hunting knife.

This is mostly because thee animals are quite static and have other defence mechanisms that don’t feature running. If you are an experienced hunter and you are going after the wild boar, you can be in a situation where once your dogs have cornered the animal, you step into the action and finish it off with a knife. Still, this can be quite risky because wounded & unwounded boars can go at you, which can result in grave injuries.

Wild Boar

Never underestimate how dangerous a wild boar can be

Conclusion

While using a knife for hunting can be quite a challenge, it is not as efficient as it was back in the day of primitive hunters. This doesn’t mean that you shouldn’t invest in one, or learn to make one yourself, as not only are hunting knives cool looking, but these are also used for a variety of other actions such as skinning, deboning, gutting and caping.

Older Posts

I hope you love the products I recommend. Just so you know, DaddyStaysHome may collect a share of the sales or other compensation from links on this page.

Like so many others who get into blacksmithing, I’m interested in making knives by hand. I’m just starting the whole (very complicated) process of learning with the goal to make a set of kitchen knives for myself since I love to cook and do most of it being a stay at home dad.

Knives play a critical role when it comes to food preparation. But as you use your knife over and over, the blade dulls and the edges chip away. Dull blades are dangerous because you generally need to apply more pressure when cutting and if/when a slip happens the cut can be far worse than the light nick from a razor-sharp knife moving with almost no force. So to keep your knives safe, you need to sharpen them regularly with a sharpening stone, also called a whetstone.

If you are new to sharpening

and don’t want to learn all the details of how to use a sharpening stone then I’d highly recommend going with a sharpening system designed to make it foolproof to get a razor’s edge with little effort beyond sliding the knife down the ceramic rod like you are chopping vegetables. 

  A razor edge you could shave with in minutes without the learning curve of a whetstone.

Whether you’re a housewife, househusband, a chef, or a camping buff, a sharpening stone will make your work so much easier and enjoyable. But not all sharpening stones are good for your knife or whatever blade you use. In fact, there are 4 main kinds of sharpening stones on the market today, namely water stones, oil stones, ceramic stones, and diamond stones.

Sharpening stones are available in different materials, sizes, and shapes. They may be flat or feature a complex edge based on the blade to be sharpened. All things considered, here’s a rundown of the 4 main kinds of sharpening stones out there.

Before We Get Started: A Note On Sharpening vs. Honing

Sharpening is quite different from honing even though they are often confused.

When using any of the many kinds of sharpening stones you are grinding away at the metal edge of the knife and removing steel in the process. Honing using any of the many kinds of honing steel Types of Honing Steel Knife Sharpening Steel Sharpening Rod or what are sometimes advertised as sharpening tools do not remove steel.

It doesn’t use grit like an oil, diamond or another whetstone abrasive but a hard steel surface to move the edge. What honing steel does is straighten or even uncurl the very fine edge of the blade so that it comes to a point rather than a bluntly rounded surface.

Types of sharpening stones


Oil sharpening stones

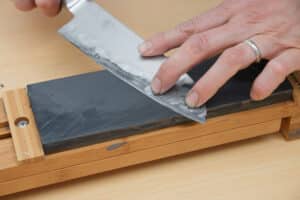
knife sharpening on one of many kind of sharpening stone

These are the traditional sharpening stones that many people in the West grew up using. They’re made from one of these materials: Aluminum Oxide, Silicon Carbide, or Novaculite and utilize oil for metal filing (swarf) removal.

The most common oil sharpening stones are Novaculite natural stones. They’re mined in Arkansas and used to make what are known as Arkansas stones. Arkansas stones come in different grades based on the density and finish the stone creates on a blade.

Washita is the coarsest grade and isn’t used often today as it’s very soft. Hard Arkansas, Hard Translucent Arkansas, Hard Black Arkansas, and Soft Arkansas are the finer grades. These oil stones often cut slower than synthetic stones but can leave a polished edge. Hard Translucent Arkansas and Hard Black Arkansas are rarer and therefore costlier.

Silicon Carbide oil stones are the fastest when it comes to cutting. Those manufactured by Norton are known as Crystolon stones. Silicon Carbide stones are also graded as coarse, medium, and fine grit, and are usually grey in color.

While Silicone Carbide stones won’t produce a fine edge like natural or India stones will, the fast cutting ability makes them perfect for the initial coarse sharpening. As they sharpen fast, it’s ideal to use coarse Crystolon stones, followed by a fine India stone, and finally an Arkansas stone.

oil sharpening stone

Before getting to know about oil stones, bear in mind that they’re the slowest cutters of all sharpening stones. And due to oil, it’s very difficult to clear out the swarf after use. Of all the modern types of sharpening stones, Oil stones are falling out of favour for more effective and easier to use options.

Click below to see examples of each type of oil stone on Amazon.

Water sharpening stones

Water stones come in natural and synthetic forms, but synthetic varieties are more common. While water stones are comparatively newer in the market, they’ve become very popular these days snd are often in the bestseller spot on Amazon. Moreover, sharpening experts consider them one of the best sharpening stones.

They’re very easy to use and come in different grit levels. They only need to be soaked in water for around 5-15 minutes before use.

water sharpening stone

Like India stones, man-made water stones are made from Aluminum Oxide. But there’s a difference between the two. As water stones are the softer of the two, they cut faster than India stones.

Water stones are easier to clean as well, and won’t leave oil residue on tools. Owing to the increased use of water for sharpening and improved performance, many people now sharpen their kitchen knives, other blades and other household tools with water stones.

However, water stones do require maintenance and they can become brittle when soaked in water so be careful after soaking. But contrary to older style oil stones, this type of sharpening stones have been getting ever more popular because of ease of use and cost. That said, what I’ve put below is a very reasonably priced all in one kit that you can’t really go wrong with.

What are the types of sharpening stones for knives? 1

Diamond sharpening stones

Diamond stones are fast becoming the most popular types of sharpening stones and are now the go-to option for many experts and chefs. They’re made of synthetic diamonds attached to a metal plate in a process known as electroplating. The diamond bits are implanted in nickel plating, giving them their incredible durability.

Diamond stones work extremely fast, are very durable, and will sharpen anything with a blade quickly, including stainless steel, ceramic, and high carbon knives.

Diamond stones can come with both an interrupted and solid surface. They quickly remove steel, require minimal maintenance, and are unlikely to be worn out by the average user.

Diamond stones usually have perforated surfaces to hold ground metal (swarf), but some models don’t have that. They’re also available in a variety of grades and abrasion levels.

The key benefits of diamond stones are that they sharpen very fast and keep their flat shape more easily than any stone, which may become hollowed or curved because of the sharpening process.

Ceramic stones have a different quality as they’re synthetic. They’re made from extremely tough materials and thus are long-lasting. They can be used without water or oil. In fact, using water or oil is optional.

Ceramic stones require a higher maintenance level as they can very easily break. As with other stones, you need to clean them after every use. Most people don’t know much about ceramic stones. And as they’re very tough, they’re usually used in the refining or honing stages of sharpening.

What are the types of sharpening stones for knives? 3

If you are just starting out these might not be the best choice for a first sharpening stone. However, if you are curious you can see what is available on Amazon for ceramic kinds of sharpening stones.  .What are the types of sharpening stones for knives? 2

Summary of the types of sharpening stones

Different blades require different kinds of sharpening stones, which come with an array of grit levels. If you’ve never used a sharpening stone before, you can begin with man-made water stones or pick your own stone. But be sure to choose the right stone for your blade.

When deciding what kind of sharpening stone you might need it seems clear that there is more to consider than just what grit to choose. You need to decide what kind of stone you need based on what steel your knife is made from and where you will be sharpening it.

Oil whetstones are great for use in the shop or at home. But if you are out in the bush you are probably better off with a whetstone that only needs to be soaked in water since that will likely be easier to come by. You can even find portable all-in-1 sharpeners like this one 


that are made to be carried on a belt.

Diamond types of sharpening stones are great for being super long life and able to sharpen even the hardest steel however they are not usually made in the easiest to carry sizes except in the above all-in-1 which usually leaves them in the shop or at home.

As far as Grit choices I personally use a 200/1000 grit for most of my every day carry knives. 200 grit is great for apexing if there are nicks and chips out of the edge. 1000 grit is my go to for just maintaining an already established edge. Sure you can apex with a 1000 grit but it will take you FAR longer than on a more aggressive grit.  

Some will say that 1000 is not high enough but with 1000 grit and a quick stropping I get my knives sharp enough to shave easily without grabbing hairs. For me, that is more than adequate for a knife I use every day for a multitude of tasks.

Happy sharpening!

If I had to pick one for a beginner looking to use a proper whetstone for sharpening knives it would be the kit I mentioned earlier.  It has everything you need to get razor sharp edges with a little practice. Knife Sharpening Stone Set – 400/1000 and 3000/8000-Grit Professional, Safe Knife Sharpener Set – Whetstone Set Includes Flattening Stone, Bamboo Base, and 2 Nonslip Rubber BasesWhat are the types of sharpening stones for knives? 2

types of sharpening stones
Older Posts