Who Makes Turbo Torch?

I hope you love the products I recommend. Just so you know, DaddyStaysHome may collect a share of the sales or other compensation from links on this page.

Who makes Turbo Torch? And other questions

Who Makes Turbo Torch? 1

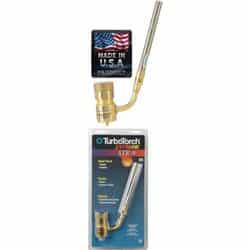
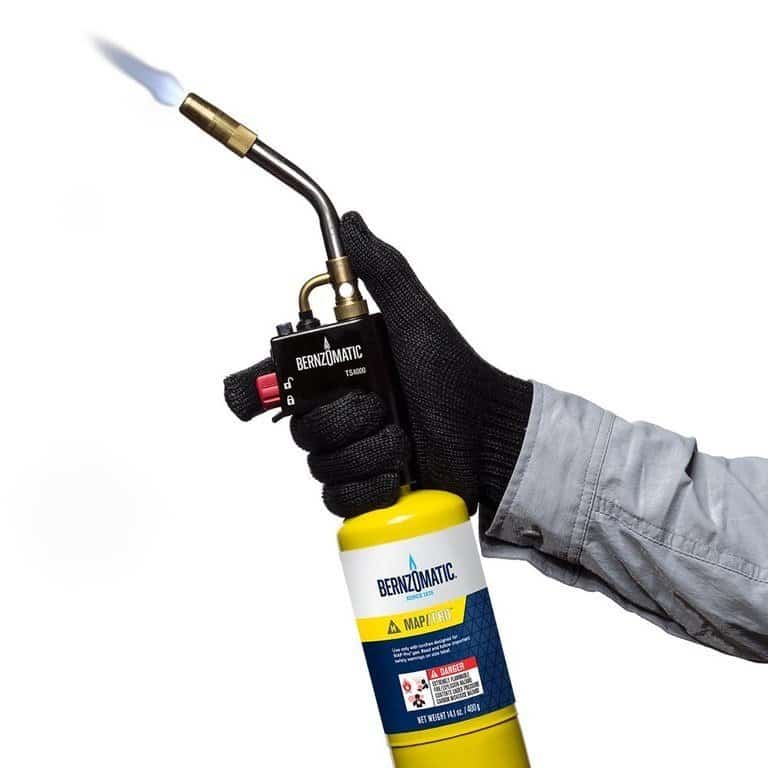
Turbo Torch is a brand name that has become synonymous with high output torch tips in general. Typically if you are wondering who makes turbo torch you are probably thinking of a product from one of these 2 companies. The actual turbotorch brand tips are manufactured by Victor Technologies based in Texas. The second most common maker of high output torches for brazing and soldering is Berzomatic.


How Hot Does A Turbo Torch Get?

That depends on the the fuel and air mixture you go with. Here are the temps you can expect from common mixtures in open air:

• 1,750°F (954°C) – air-propane

• 2,150°F (1177°C)– air-MAP

• 2,700°F (1482°C) – air-acetylene

• 4,700°F (2593°C) – oxy-acetylene

For forging mild steel most tasks can be done at or below 1,750°F with just regular propane. If you plan to forge weld you will need temps up around 2300F which can still be achieved with propane using a strong flame in a good enclosed, well-insulated forge. Other gasses can get you hotter faster but are far less convenient to use compared to propane.

How to Clean a Propane Torch Nozzle?

You may not realize it but propane is not really all that clean and it is not uncommon for a torch head to become clogged. To unclog it and clean out the torch head just follow the simple steps below.

  1. Unscrew the head from the bottle or hose.
  2. Get a pot big enough to completely submerge the head.
  3. Fill it with water and bring it to a rolling boil. 
  4. Put the head in and let it boil for 10 mins. Turning down the heat if needed if it boils over.
  5. Remove the head and let it cool till easy to handle.
  6. Dry it off with a cloth and then shake all the water out.
  7. Leave it to air dry for 24 hours or put it in a oven set to its lowest temp overnight to ensure there is no moisture left inside.

Can you braze with acetylene only?

The American Welding Society (AWS) defines soldering and brazing by the temps they are done at.

Soldering: A joining process that takes place below 840°F (450°C)

Brazing: A joining process that occurs above 840°F (450°C)

Out in the real world, most soldering occurs at temperatures of 350° (177°C) to 550° (288°C), and most brazing occurs at 1,100° (593°C) to 1,500° (815°C)

Does acetylene burn without oxygen?

You don’t need an oxy tank to use acetylene. An air-acetylene mix will burn around 2,700°F (1482°C). A little more than half the temp oxy-acetylene’s 4,700°F (2593°C) temp and depending on your uses can be more than enough.

Can I use a Turbo Torch in my forge?

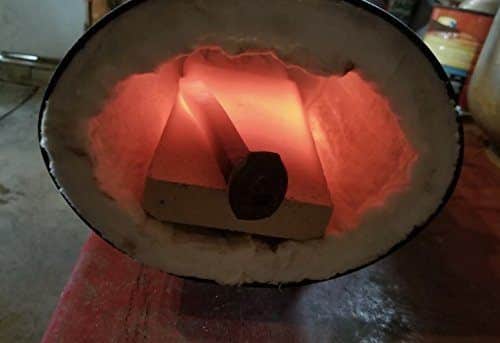
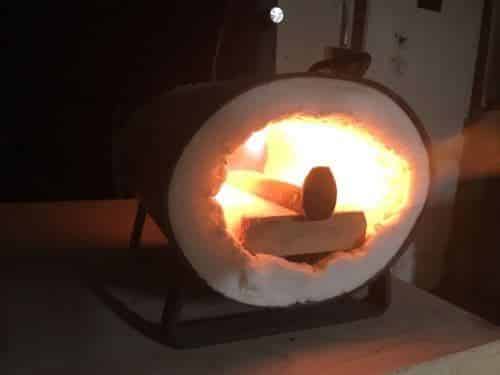
Absolutely! If you have a small knife making forge or a DIY coffee can forge they can work great! Though I would recommend looking at a better solution like a proper burner that will get your metal to working temp MUCH faster. I wrote an entire guide about forge burners that you can find HERE.

-The Stay At Home Dad

Who Makes Turbo Torch? 2

I hope you love the products I recommend. Just so you know, DaddyStaysHome may collect a share of the sales or other compensation from links on this page.

How Much Propane Does a Forge Use?

How Much Propane Does a Forge Use? 3

Coal and charcoal can be quite cheap but availability is problematic for some, and they come with extra considerations like the ash mess and tending a fire. That isn’t an issue with a propane burner.  For this reason, many people chose to go with propane. But how much propane does a forge use?

That’s not an easy to answer question, since there are a few variables that will affect how fast you go through propane. 

Factor 1: Number of Burners.

Yea, I know it seems obvious, but you will burn more propane if you have a multi-burner setup. For all the numbers below I’m going to assume a single burner. Just multiply by the number of burners you are using.

Factor 2: Size of the Forge.

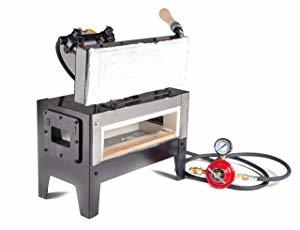
A soup can forge has a much smaller area to heat up than even a forge like the little Hell’s Forge Portable Propane Forge

Hell's Forge Portable Propane Forge

 or the far larger Whisper Momma Atmospheric Forge

Whisper Momma Atmospheric Forge

 If your burner is too big or too small for the forge you are going to turn up the PSI for more flame or turn it down for less.

Factor 3: Type of Burner.

If you are using the naturally aspirated burners like the DIY ones I show how to build, just a turbo torch, or an air fed burner they will pull different amounts of fuel. By far the most common hobbyist burner is the naturally aspirated burner design know as the ‘Ron Reil’ style. These will typically work in the 6-10 PSI range.

Factor 4: How much pressure (PSI) you are running your burner at.

At 6 psi which is commonly the amount of heat needed for most work in a forge sized for the burner (like the Hell’s Forge Portable mentioned above). This heat will get your metal to workable temps quickly and not waste a ton of gas.

10 PSI is a much hotter flame and typically only needed for getting to forge welding temps. This will go through gas almost twice as fast as running at 6 PSI.

Factor 5: How well your forge is insulated.

If your forge is letting all the heat from the torch just radiate away it will obviously need more flame to get hot enough for doing work. More flame means more PSI. More PSI means more propane used by the forge.

Having said all that! We can still ballpark how much propane a forge uses with guidelines based on my own and others experiences. 

If we assume the most common hobbyist setup, a burner and forge like the hells forge portable single burner running at an average of 8 PSI.  A fair guess is that a 20lb tank will last about 7-8 hours. Bigger tanks can obviously go longer.

So, how much propane does a forge use? 

In the end, it’s almost impossible to give exact numbers without knowing the details of your forge set up. But if you assume about 8 hours per 20lbs of propane and then divide by the number of burners you are running you should be in the ballpark for most cases.

-The Stay At Home Dad

How Much Propane Does a Forge Use? 4

I hope you love the products I recommend. Just so you know, DaddyStaysHome may collect a share of the sales or other compensation from links on this page.

How To Make A Propane Torch Burn Hotter 5

When setting up your first forge for doing a little blacksmithing, a foundry for metal casting, or a kiln to fire pottery, one of the fundamental issues is how to get enough heat. Below I’m going to tell you how to make a propane torch burn hotter.

Now, charcoal and coal can be used for heat and are excellent fuels. Nonetheless, for ease and availability, it’s hard to beat a 20lb propane tank as a fuel supply. The problem is most off the shelf torches from home depot or the like don’t put out enough heat to do much for our uses. Along with hacking a propane torch to get more BTU’s, I’ll also show how to build a DIY forge burner with parts easily found on Amazon or at a hardware store. And then show you a budget-friendly done for you burner with regulator that is cheaper than what you can buy the parts for!

Let’s get to it!

What makes a propane torch burn hotter?

An air-only propane torch will burn at around 1,990 °C (3,614 °F). That is plenty of degrees to melt many metals like aluminum 660.3 °C and copper 1,085 °C, right?

Well, not so fast.

Just like you wouldn’t expect to go drag racing with a smart car and its tiny engine, your off the shelf burner from the hardware store just doesn’t pump out enough fuel for what we will need it to do.

More fuel + More Air = More BTU’S

There is a fairly simple hack you can do to most store-bought torches to increase the flow of fuel and air and create a bigger hotter flame. I personally don’t recommend this as it could make the torch pretty dangerous.

If you choose to do this you do so at your own risk.

Watch the video to see how to make a propane torch burn hotter.

Personally, if I was going this route I’d just buy a TurboTorch. But they still only pump out so many BTUs

To really get metal to the temperatures where it can be worked at an anvil or even melted you really want a burner that lets you control the flow of gas and air and get a focused blast of heat.

There are 2 options Do It Yourself or Buy it.

Option 1: DIY  Forge Burner

Here is a great burner you can make with minimal tools and no need of a welder. However, if you need to buy all the tools and taps it can quickly start to get more expensive than a pre-made burner. I’ll post a parts list with links to all the parts below the video.

Click here to see the full parts list with everything you need to build it.

Option 2: Buy A Forge/Foundry/Kiln Burner

Going DIY still costs a quite a bit and takes time .

As well there are things that can be easily messed up like not getting good seals when threading the pipe that can cause gas leaks and potentially be dangerous.

For just a few dollars more (or less if you needed to buy tools and high pressure propane gas regulator for the DIY version) than building it yourself, you can pick up a pre-made burner that will work out of the box.

Goede G-2 Stainless Steel Forge/Foundry Burner and 0-30 PSI Regulator with Gauge.  

And

Goede G-2-90 Stainless Steel Forge/Foundry Burner with Regulator and Gauge

I personally use the one with the 90 degree connector in my home forge since it makes it easier to route the gas line in my setup.

Both are great options at a very decent price.

They include everything you need to hook up to a common BBQ propane tank and light.

The difference between the 2 is the fitting where the gas line connects. One goes straight out the back and the other connects at 90 degrees. Simply choose the one that works best for your setup.

For more about blacksmithing and getting started at home checkout my guide to beginners blacksmith tools.

Want to Forge your First Knife? Here is what you need to know to make it happen.

-The Stay At Home Dad

How To Make A Propane Torch Burn Hotter 6

I hope you love the products I recommend. Just so you know, DaddyStaysHome may collect a share of the sales or other compensation from links on this page.

A Guide to Blacksmith tools for beginners

Updated: Nov 10, 2020

A Guide To Blacksmith Tools For Beginners 7

When getting into blacksmithing one of the things that attracts a lot of people is being able to make their own tools. However one of the realities is when you’re starting off, you don’t have good tools with which to make better tools. This guide is all about the must-have blacksmith tools for beginners. A simple and inexpensive beginners kit I recommend is available on Amazon. It has all you need other than a forge and anvil.Often, simply buying a tool to start with is a great idea it, can save you a lot of time and frustration that comes with working with a tool not designed for the job you are using it for.

That being said, what I’m going to do below is go over the very basic tools that you need if you want to get started in blacksmithing. I’m going to point out the things you can use that you might just have laying about or will be easy to put together as well as some of the less expensive paid options that you can find online where the right tool for the job can save you a lot of that time and frustration.

I definitely do not recommend just buying everything right out of the box, you can get a lot done for very cheap and that’s how I got started personally. I had a lot of stuff from working as an electrician plenty of tools such as pliers, and hammers and things like that worked well enough for trying it out, to see if I really enjoyed the act of blacksmithing as much as the idea of blacksmithing. Turns out I love actually working on the anvil.

My first anvil was a foot-and-a-half long section of railroad track that I stood on its end and mounted to a stump. I used an angle grinder to turn one of the sides into a makeshift hardy chisel for cutting stock.When my wife bought me an anvil for one of our anniversaries (a used one) the railroad track quickly got replaced and the difference was night and day. However there were a lot of things that I learned while using that piece of railroad track that came in very handy when I started using a real anvil and there are a lot of projects I couldn’t have done if I just waited to get the ‘proper’ tool you should have rather than just making do with what I had.
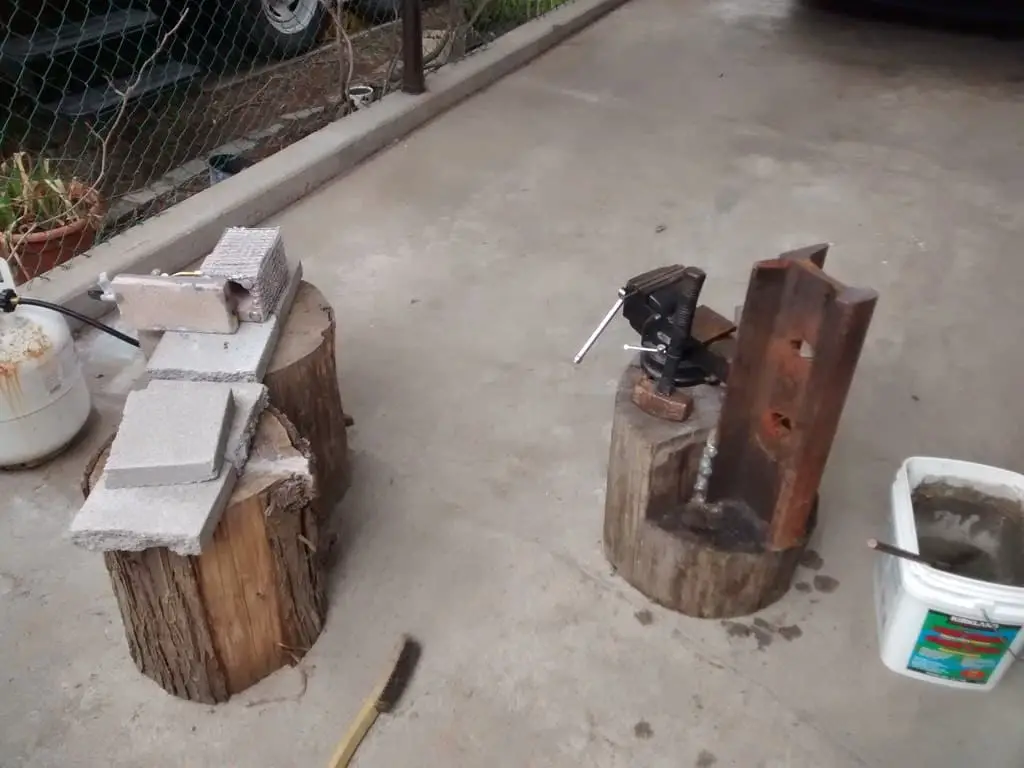
diy gas forge and railroad track post anvil

My very first forge and anvil. Made out of some firebricks an off the shelf propane torch and rail track anvil on end with hot cut ground into it with an angle grinder.

Anvils are expensive and heavy, so they cost a lot if delivered, finding a used one or making something like a railroad track post anvil is a great way to get on with moving metal rather than just dreaming about it. The way my wife found mine was a $5 classified ad in a local buy-and-sell paper. Lots of old men still read the buy and sell papers front to back and will jump at a chance to get rid of that super heavy paperweight in the yard. I got a 200+ lb peter wright in pretty good shape for $100. For comparison on eBay, they range from $500 to $2500 PLUS DELIVERY!

Blacksmith Hammers

A Guide To Blacksmith Tools For Beginners 7
Other than the Anvil the most iconic pieces of blacksmithing kit that you’ll need might be the hammer and forge. When you start out you really only need a few hammers for forging texturing drawing things out and the rest of things that you be doing at the Anvil. You want to look for Hammer that’s in the 1-1/2 to 3 lb range.

It’s very important that you have a hammer that is heavy enough, to begin with. If you use a hammer that’s too light you can actually develop a pain in your elbow and the top of your forearm right where the elbow bends. If it feels like a sharp, pinching sensation it’s likely what is known as Carpenters Elbow. What happens with a hammer that’s too light is you’ll tend to push down on your arm in order to create the force needed to move the hot metal instead of allowing the weight of the hammer and gravity to do the work for you. Over time this pushing creates the injury described above.

If you have a hammer that’s too heavy you can get pain and discomfort in the shoulders and the wrist as well as the elbow, but that’s usually just your body gaining strength to be able to cope with the weight of the hammer and that is something that will go away and will be very different from the sharp feeling of Carpenters elbow.

There are four basic types of hammers that you’ll be using you don’t need all of them when you’re beginning you really only need one.

Cross-peen hammer

Picard 0000811-1000 Blacksmiths' hammer 2.205 lb Swedish pattern of ash

Typical cross peen hammers weigh between 1 and 4 lbs one of the faces is basically a big flat Square the other end Is the actual cross peen which looks like a pointed end and if you were to hold the hammer in your hand and look at it would look like a straight line running left to right. This is the iconic shape that is commonly known as a blacksmith’s hammer for good reason and is the best choice for a first hammer if you are thinking of buying.

The square side of the hammer should be fairly obvious in its use, it makes the metal flatter and moves it around in ways you can probably imagine. The other end, or cross peen, is designed to focus your force into a smaller area and allow you to draw out and move the metal much quicker because you’re putting more force in a smaller area. Moving metal faster while you’re forging is important when you’re working from heat to heat on your forge.

Picard 0000811-1000 Blacksmiths' hammer 2.205 lb Swedish pattern of ashCheck out this Blacksmiths’ hammer 2.205 lb Swedish head pattern with ash handle on Amazon.

Straight Peen Hammer

Fiskars IsoCore 3 Pound Club Hammer, 11 Inch

This is the cousin to the Cross-peen hammer and is basically identical in every way except that if you hold the hammer in your hand the peen runs in line with the handle instead of across the handle. This Hammer is less common but also it has its uses in certain situations.

Ball Peen Hammer

Estwing Ball Peen Hammer - 12 oz Metalworking Tool with Forged Steel Construction & Shock Reduction Grip - E3-12BP

Most people are at least familiar with what a ball-peen hammer looks like. Typically they have a smaller head on them and weight a bit less, usually in 1/4 pound to 2 1/2 pound range. It is named a ball-peen because one of the faces looks like half of a ball has been attached to the Hammer. the ball peen is usually used to add texture to pieces giving it that hammered look.

Estwing Ball Peen Hammer - 12 oz Metalworking Tool with Forged Steel Construction & Shock Reduction Grip - E3-12BPCheck out this Ball Peen Hammer – 12 oz Metalworking Tool with Forged Steel Construction & Shock Reduction Grip on Amazon

Sledgehammer

Fiskars PRO 750620-1001 IsoCore 10 lb Sledge Hammer, 36 Inch

Sledge Hammers are the heavy ones, usually weighing between 5 and 10 lbs. (sometimes more!) Normally they have two flat faces, no peen but some come different faces. Often they are slightly less hard than peening hammers and are usually designed for striking cold metal.

A word on Forges

A Guide To Blacksmith Tools For Beginners 7

Forges have one job, make your metal hot. They come in a lot of different styles From simple homemade DIY charcoal pits made with a few firebricks and a hair dryer all the way up to complicated and very expensive multi-burner gas forges. I’ll link to a video of how to make a simple coffee can forge which is a great way to start.

What I personally use now is the

I use this simply because I have easy access to lots of wood and charcoal and it’s an easy, relatively inexpensive, but very useful fullsize forge.

I also own a Propane forge that I use regularly.

But it is quite small and when doing anything large I find it easier to use the charcoal forge.

Anyway, here is how to make a simple coffee can forge to get started smithing today.

Blacksmith Tongs​​​​​

A Guide To Blacksmith Tools For Beginners 7

Tongs are the only safe way to move and hold onto hot metal. They take some time and practice to get used to using them, but eventually they will just be an extension of your own hand. While you can get by with using pliers, channel locks or vice grips those sorts of home tools aren’t really cut out for day to day work at the forge. If you’re just getting started and don’t have tongs and don’t want to use pliers, one of the easiest things to do is just to keep your stock really long So the end not in the fire stays cool enough to handle.

Tongs are definitely one of the things I would highly recommend that you actually spend a bit of money on to buy a proper pair of blacksmithing tongs. A good pair of wolf jaw tongs that are sized for the kinds of material you plan on handling will go a long way towards making your blacksmith projects more tolerable to pull off. Having bad tongs and not being able to hold your material securely while you’re working is going to just lead you to frustration and slow down your learning process.
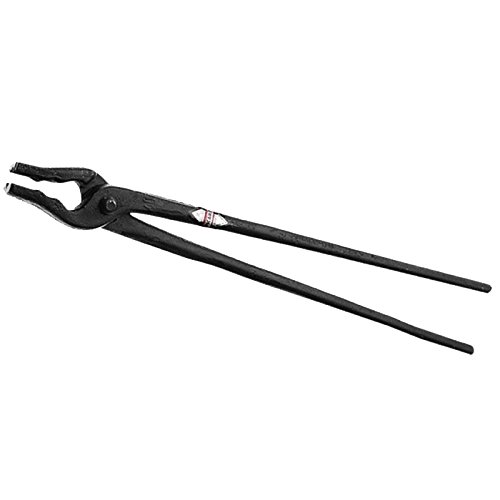
Picard 0004900-300 Blacksmiths' tong 1.102 lb wolf's jaw

There are plenty of how to guides showing how to make tongs yourself that you can find all over YouTube, I’ll link to one below, they almost always require that you actually own a pair of tongs to be able to make more tongs which is kind of self-defeating.

Making tongs is not the easiest project to do when you are still figuring out hammer control and how to move metal efficiently and where you want it to go.

However it is a great project once you have advanced to the point where it you need more tongs and your first set of proper tongs (while almost guaranteed to be ugly) will be something you will remember.

Hot Cut And Cold Cut Chisels

A Guide To Blacksmith Tools For Beginners 7Punch And Chisel Set, 16 Pieces- Includes Taper Punches, Cold Chisels, Pin Punches, Center Punches, Chisel Gauge, and Storage Case- By Stalwart

Essentially chisels are just a way for you to break down large pieces of stock material into smaller pieces that you can handle easily. There are two kinds of chisels that you’re going to need a hot cut, and cold cut. The names of which should be fairly self-explanatory.

Hot cut chisels to use cutting hot metal, cold cut chisels to cut cold metal.

You don’t want to mix your chisels because cutting hot metal on a cold cut chisel will change the structure of the metal and soften the end making it nearly useless for cutting cold metals later unless you re-harden the tip. Sets of chisels are very inexpensive and also very easily made once you are forging regularly.

A Last Recommendation

A Guide To Blacksmith Tools For Beginners 7
Now there are hundreds of other tools that you can talk about but for beginner blacksmiths, most of them aren’t necessary. You will be able to create and or acquire them as you gain skill and find a need to have them.

Tools like Fullers, swage blocks, guillotines, or hardy bending forks (which is actually one of the projects you should tackle fairly early on in my opinion because it’s just very useful). Other hardy tools like having a hardy hot cut and cold cut chisel, cutting plates, punches, cupping tools, and drifts these are all things that you can buy but you likely don’t need them right away.

If I had to make one MUST buy item recommendation beyond wolf jaw tongsor the beginners blacksmith kit it would be The Backyard Blacksmith by Lorelei Sims. 

It is filled with tips and guides on how to get started and even projects to tackle in order to build your skills. EASILY worth far more than the couple of bucks to order the book so you can have it next to you at the anvil.
All in all what you need to start is pretty simple… a thing to make the metal hot, something to hold onto the hot metal, a heavy hard thing to put the hot metal on, and something to hit the hot metal.

That’s it!

Blacksmithing 101.

I hope you love the products I recommend. Just so you know, DaddyStaysHome may collect a share of the sales or other compensation from links on this page.

Hooks, Hold downs, and a quiet anvil

Hooks, Hold Downs, And A Quiet Anvil 13

I’ve been dabbling in blacksmithing for years now. However I found that as a hobby it really didn’t mix well with babies. Your only free time comes when they are asleep and the last thing to do is go make a ton of noise beating pieces of metal together. Then once they are toddlers they are not super trustworthy about not picking up a piece of hot metal or putting a hand into the forge…

Since my forge and anvil are in the back yard this has been my reality for the last 7+ years. Sneaking in a few hours at the forge here and there.

Not to say I have done nothing in the last 7 years. My wife bought me a used anvil, that was at the time unidentified, for $100 as an anniversary gift, replacing my railroad track post anvil. Turns out after a bit of cleaning it is a Peter Wright with weight markings 2 1 2 (meaning it is 254 lbs according to the anvil weight calulator on anvilfire.com) not a bad score for $100!  

It had quite a loud ring when I first mounted it to my wood block however after a few 4 inch lag bolts and some metal bar strapping it down it makes more of a thud than a ring. Black Bear Forge (who I’ve linked below) has an entire video on options to quiet a loud anvil that I used as a starting place for ideas.

I also bought a wood fired forge off of Amazon. To replace my homemade forge made out of a hibachi tabletop bbq, some clay and a bunch of steel pipe.

Yesterday I was out in the yard putting the garden to sleep for the winter. As I was putting everything away in my shed I found I was hunting for places to hang hoses and rope and well everything. I needed some hooks.

5 mins later with an excuse firmly in hand I was lighting my forge to make some custom hooks to fit in the rafters of the shed.

Hooks are pretty easy to make a little heat an a couple of bends and you are good. I needed to make some odd shapes to fit the ends of the hooks over rafters and into gaps in the wall. It’s a tin shed with corrugated walls so plenty of places to hang a hook if its the right shape.

I also decided I finally needed to stop fussing with trying to hold material alone and make a hold fast. I had some round stock that is about 1/32 smaller than the pritchel hole on my anvil which is perfect. A hold fast needs to be smaller than the hole it will be used in but not too much smaller. Making a hold fast is pretty easy and I really should have done it a LONG time ago.

  • First I used my hot cut to take a 1 1/2 ft section off the end of my stock.
  • Flattened one end down till it was maybe 3/16 thick
  • Tossed it back in the forge and got a good amount of heat about 7 inches back from the flat end
  • Stick the flat end down through the hardy hole and put the bent in the bar past 90 degrees
  • Let the bent part cool a bit in the air or the next step will just flatten your bend
  • Heat the flat end back up and place the straight end into the pritchel
  • Hit the top of the bend to flatten the foot of the hold fast down till it’s flat on the anvil.
  • Thats it! Just let it air cool and you have a hold fast.
  • I chose to give the end that goes into  the pritchel a bit of a taper to make it easier to get into the hole but that is optional and you can always do it later if you choose.

Here’s a great video of how to do the entire process from Black Bear Forge. He’s got some really great tutorials on just about everything to do with blacksmithing and is definitely worth hitting the subscribe button if you are learning how to smith.

Pretty simple projects, but functional, and it feels great to get the hammer swinging again now that the kids are old enough that I can spend an hour or 2 just doing something for myself and not worry about them too much.

More to come.