I hope you love the products I recommend. Just so you know, DaddyStaysHome may collect a share of the sales or other compensation from links on this page.

One of the biggest advantages of forging your own knife is the personality you can infuse in it. Sure, you could buy a knife that’ll be just about as good as a hand-forged knife, but it won’t have any character. It’ll also probably cost a lot more than your own creation would – especially if you use scrap metals to forge.

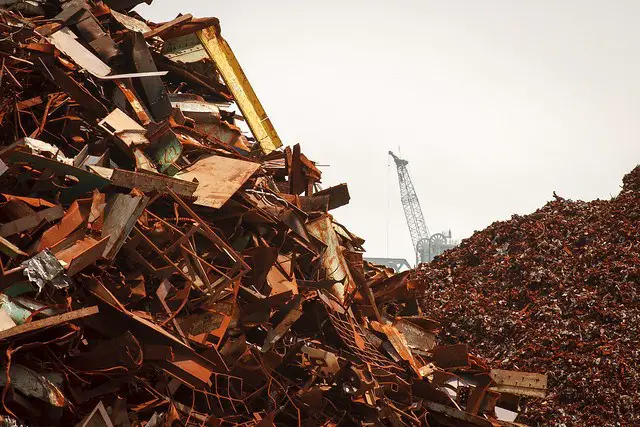
So what is the best scrap metal to use for knife making? And are knives scrap metal? The short answer is.. No, knives are not generally made of just any scrap metal. For a knife to work it needs to be both hard, to hold a keen edge, and flexible so it doesn’t snap in two. While you can shape almost any material into knife shape, a blade made of cast iron (for example) won’t hold an edge for more than a cut or 2.

Take the guess work out and get a billet of known steel from amazon. 1095 knife making steel is surprisingly cheap and with free shipping if you have prime it’s even more of a deal. I wish this had been so easily  available when I started out.

The good thing about metals (and steel in particular) is that despite whatever form they previously took once they are heated, they can be reshaped, given an edge and more. Smaller but thick steel can be pounded down to a wider, flatter knife shape with enough work. This means that a surprising number of “scrap” metals can be used for knife forging – and bring their stories along with them.

What Is A Good Knife Making Steel?

The ideal type of metal for your knife or blade depends on what you plan to use it for. For hatchets, machetes, and other blades that have to withstand impacts, you want a tougher and stronger metal that won’t fracture. For finer knives that emphasize cutting, you’ll want something strong and hard, but it won’t face much impact, so it doesn’t need to be as tough.

When it comes to determining the strength, hardness, and toughness of your knife, the carbon content plays a major role. In steels with higher carbon content, the metal is going to be harder and stronger because it helps hold the iron atoms in place. However, if there is too much carbon it becomes brittle and you risk fracturing with any impact.

Overall, the ideal knife will have the right percentage of carbon and other alloys to perform what it was made to do effectively without risking breaking or other damage.

What to Look for in Potential Scrap

When looking through your local junkyard or workshop for scrap, you’ll want to keep an eye out for anything that was regularly put under strain. This is because the steel used in these scrap items would need a higher percentage of carbon to be able to withstand pushing and pulling, but a low enough carbon content so that it is not brittle enough to fracture outright. In many cases, this carbon content is great for all-purpose knives and shouldn’t give you too much trouble when it comes to forging.

Additionally, you’ll need to consider the size of the scrap you’re going to use. If you plan to make a 6-inch blade, you need something of a similar size because although you can hammer the steel to various shapes, you cannot suddenly make more appear to fit your project. Fortunately, you can always cut a piece off of a bigger piece to make a smaller knife, which is why many scrap knives are smaller.

You can also perform some basic tests on the scrap you come across, such as scratching the material to determine the hardness, trying to bend it to test strength, or smacking it into something to test toughness. If there is a fracture or other serious damage sustained, it probably won’t last through the forging process.

2 Ways to Test Scrap Metals

  • Harden then break a small piece

Take a small piece and heat it till it is no longer magnetic (that’s a very general way to know you got it hot enough) then quench it in oil to harden it. many common metals used in knife making are oil quenchable so it’s a good place to start.

Take your quenched and cooled piece and put in a vice then smack the side of the piece hard with your hammer. If it is hardenable steel it will break rather than bend. If it bends either it’s low carbon steel or it’s a water quenching steel. Try the same heat then quench process but use water this time. If the piece still bends it’s no good for knives since it won’t hold an edge.

  •  Spark Test

By taking a piece of your mystery metal and touching it to your grinding wheel you can judge the carbon content by the color and shape of the sparks. It is FAR easier to understand with a video than in words so give this quick (just over 1 minute) video a watch.

Pretty straight forward, right?

The Best Scrap Metal to Use for Knife Making

Below are some of the more viable scrap pieces to consider for your home forging. Depending on your plans for the blade, some may work better than others but if you’re able to get one, it’s hard to go wrong. Just aim for older pieces of steel as they don’t make things like they used to, with older steel being higher quality overall.

Suspension Springs

At first glance, a spring may not seem like it could possibly be a knife because it is round and coiled. However, a coil is just metal wrapped around something so if you unwrap it, it becomes just a cylindrical piece of steel that can be worked like anything else. Whether you plan on breaking a piece off or unravelling the whole thing, all it takes is some extreme heat and elbow grease to have the beginnings of your new knife.

Leaf Springs

Leaf springs off an old truck are generally excellent steel for blade making. You will need to anneal them, like most found steel, but they have to bonus of being in nice flat wide bars already so its less work on the anvil to get them into a knife-like shape.

Steel Cable

If you happen to be lucky enough to find elevator cable, you could be in for a unique knife-forging experience. Like the coiled spring, steel cable is braided steel just asking to be separated and reused for one or more knives. The tension the cable is built to stand up to means it has a higher carbon percentage, so it is strong and great for knife forging.

Circular Saw Blade

Saw blades are sharp, but they can be sharper! While you won’t use the entire saw blade for a single knife, cutting a small section out from the blade would allow you to forge a decently sized knife made of very hard and edge-holding steel – as long as you find an older blade. Newer blades may not have the same chemical makeup with less strength, making them sharper but struggling to hold their shape.

Railroad Spikes

Railroad spikes are already scary as is, but when you sharpen the spike at the bottom into a blade, you’re talking about a unique knife that looks as dangerous as it is. Railroad spikes are made of stronger, more carbon-rich steel which makes them more suited towards hardness, durability, and strength than sharpness because they needed to resist the impacts of hammering when laid on tracks. Meaning they won’t have great edge retention compared to some other steels.

A railroad spike is also usually the perfect size to fit in your hand, and the large tang you can leave allows for more custom metalwork, engraving, and other unique additions to make it stand out.

Steel Files

Perhaps the most popular first knife scrap metal, the old school steel file is a great way to make a small but incredibly sharp blade that fits in your hand. These files are made to be very hard – which isn’t ideal for knife making – but can be annealed to soften the steel so that it can be better shaped before you reharden it. After shaping and annealing, you’ll have a versatile piece of steel that will be hard, hold an edge well, and make a great knife.

Sourcing Scrap Metal for Knife Making Steel

Finding suitable scrap metal for your DIY knife making hobby or business venture is certainly easier now than it was a decade ago. This is due to an increased number of viable sources of affordable raw materials for knife making steel. You can easily find scrap metal items that have knife making steel by checking out the following places.

  • Immediate Neighborhood

Your neighbors should be more than happy to let you have any scrap metal items that might be lying around on their property such as old refrigerators, lawnmowers, dishwashers and so forth.

  • Local Businesses

Appliance and auto repair shops in your locality should have scrap metal items that they no longer need such as old cars, washing machines, microwave ovens, deep fryers, freezers, ovens, etc. 


You can also seek out steel-bearing scrap from local manufacturing facilities, warehouses, supermarkets, hotels, public schools, nearby farms and so forth.

  • Local Junkyard

A visit to your local junkyard should offer you a wide range of scrap steel items, such as vehicle parts, domestic appliances, children toys, lawnmowers, electric irons, and myriad other junk. Note that you may have to pay with a minimal fee to remove a viable scrap item from the yard. This is likely the easiest place to find the best scrap metal for knife making steel.

  • Construction and Renovation sites

You can find steel-bearing construction waste, such as steel bars and fixtures, by visiting locations where construction or renovation is underway.

  • Medical Facilities

You can also check out nearby healthcare facilities for unused items containing knife making steel such as old beds, wheelchairs, wheeled trays, damaged equipment, and so forth. It is important to ensure any such items are adequately disinfected before you take them with you.

  • Dumpsters and Dump Sites

If none of the other sources prove feasible, you can decide to check out neighborhood dumpsters and the nearby dumpsite for scrap metal items bearing knife making steel. 

  • Sourcing Knife Making Steel Online 

Alternatively, you can save yourself the time and effort needed to physically look for scrap metal by shopping for knife making steel online. You find a wide array of cheap second-hand items that you can use as scrap metal on craigslist.com, including old washing machines, lawnmowers, service carts, washing machines, and so forth.


Buying annealed steel billets on Amazon is advisable if you intend to pursue DIY knife making as a long-term business venture rather than as a one-time hobby.

Other Options

If I was starting out again and wanted to try my hand at a few knives I would save myself the trouble of finding metal then testing and shaping it into what might not end up being useful as a blade. This option wasn’t around when I started or I would have gone this route.

IMO the best scrap metal for knife making steel is not scrap metal at all. You can order 1095 high carbon steel billets from amazon for amazingly cheap. The fact that if you have prime you can get that heavy steel shipped for free is just icing on the cake since that is what usually kills you when ordering steel online.

Heres an example off amazon:

You can get different widths (3 Inch x 12 Inch x 0.187 Inch) and thickness (0.125 Inch) or 3-packs with several billets (1.5 Inch x 12 Inch x 0.187 Inch, 3 Pack)

If you aren’t familiar with 1095 steel it is a favorite of knife makers and reasonably easy to work on an anvil making. It’s also not super hard to cut on a bandsaw making it a great choice when starting out. Here is a very brief rundown of how to heat and use 1095 high carbon steel.

Forging:  heat to 2100°F (1150°C) . Do not forge below 1500°F (815°C).

Normalizing: Heat to 1575°F (855°C). Air cool. 

Annealing: Heat to 1475°F (800°C). Furnace cool to 1200°F (650°C) at a rate not exceeding 50°F (28°C) per hour. Alternately bury it in sand or even the ground to cool for several hours. I often will toss it in a campfire and dig it out in the morning.

Hardening: Austenitize- Heat to 1475°F (800°C). Thicker sections can be quenched in water or brine with extreme care but can also be oil quenched in sections under 1/4 in. (6.35 mm) thick as the preferred method.

Tempering:  The quenched hardness should be approximately 66 HRC. Hardness can be adjusted downward by proper tempering.

[table id=2 /]

Knife Making as a Viable Business Idea

Transforming your knife making hobby into a full-time business requires a reliable source low-cost knife making steel and a knife manufacturing process that produces consistent quality products. There are several types of professional knives you can make at home including:

  • Chef’s knife

A chef’s knife is typically an 8 to 10inch steel blade primarily used in food preparation tasks such as chopping up carrots, dicing onions, slicing cabbage, and so forth.

  • Paring Knife

A paring knife is a smaller version of the chef’s knife featuring a 5 to 7-inch blade. This stainless steel knife is also used during food preparation.

  • Boning Knife

As its name suggests, a boning knife is used in removing meat from bone and consists of a long, thin and strong stainless steel blade. 

  • Bread Knife

A bread knife is typically a 4 to 6inch blade whose serrated edge allows the easy cutting of fresh bread without causing it to lose its shape.

  • Cheese Knife

As suggested by the name, the purpose of a cheese knife is to cut through the cheese. The steel blade of this knife has holes which prevent cheese from sticking to the blade by reducing surface contact.

  • Meat Cleavers

A meat cleaver is a large, heavy steel knife whose size and weight aids in cutting through meat with bones in it.

Besides professional knives, you can also delve into custom knife making which involves the production of specialty knives, with examples including flick knives, folding knives and hunting knives. 

Note that specialty knife making necessitates that you have considerable knife making skills than those required with professional knives. The reason being, specialty knives often feature complex blade retrieval/concealment mechanisms. 

Selling your Knives 

You can begin marketing your professional and specialty knives to neighbors and friends. The initial feedback you get can help you to refine further your knife product offering, such as increasing/reducing blade length, adjusting the blade thickness and enhancing the grip of the knife’s handle. 

Armed with a refined product, you can then start approaching local hotels, restaurants, supermarkets, butcher shops, hunting stores, and other businesses with an interest in professional and specialty knives.

In addition to direct marketing, you can also sell your professional and specialty knife products online. A most cost-effective method of attaining this objective is using a free drag-and-drop website builder like Wix.com. Using appealing website templates, you can realize an online knife store that grants access to an incredibly vast pool of potential customers on the web. Your online marketing approach can even encompass advertising your professional and specialty knife products on social media platforms like Facebook, Instagram, Reddit, and myriad others.

DIY Knife Making Process

Making a knife from scratch requires that you obtain a thick flat steel plate from the scrap metal you have sourced. You must also possess a few essential metalworking tools, which include:

  • A Marker Pen: for drawing the outline of the blade on paper and marking the blade’s center
  • A Hacksaw and multiple High Tensile Blades: for cutting the steel plate to appropriate size
  • A Bench Vice: to firmly grip the steel plate as you work on it
  • Bastard Mill and Chainsaw Files: for rounding out sharp edges, achieving the blade profile and sharpening its edge
  • An Etching Tool: for marking down the outline of the blade onto the steel plate
  • An Electric Drill; for making holes to aid the cutting of the thick steel plate 
  • A Belt or Random Orbit Sander: for polishing the finished blade 
  • An Electric Grinder: for obtaining a rough blade outline and tapering down the flat steel plate when creating the knife-edge

The Basic Knife Making Steps 

  • You begin making your knife by etching the outline of the blade onto your steel plate using the etching tool. You draw the desired shape of the knife on paper using the maker, cut out the shape, and then use the cut-out to etch the blade design onto the steel plate.
  • You then use the electric drill to punch holes through the steel plate along the outer edge of the blade outline. These holes make it easier for you to cut through the thick steel plate.
  • Next, use the bench vice to firmly grip the steel plate as you commence cutting out the blade from the larger steel plate with the hacksaw. Adjust the point of the grip of the vice as while cutting out different parts of your blade outline.

Alternatively, you can use a metal cutting band saw to cut out the blade outline on the steel plate. Regardless of You are left with a rough blade once you complete cutting it out from the steel plate.

  • After that, remove the steel plate from the vice and replace it with the rough blade and use the grinder to smooth out the hole marks on the edges. Ensure you have a container with cold water nearby to cool down the hot blade once you are done smoothing out the blade with the grinder.
  • Once the blade has cooled down, wipe off the water and then use the electric drill to make holes, 1inch apart, on the handle-end of the blade. These holes help you to firmly fix the blade into the workbench as you file it down to achieve a knife profile.
  • Begin by Identifying the center of the blade and mark it with the marker. Then firmly fix the blade towards the edge of your workbench via the holes on its handle. With the bastard mill file held flat onto the blade and starting at its center, begin filing down the blade towards the intended edge to achieve a knife profile.

Gradually wear down the blade to half its thickness before unscrewing it from the bench. Turn the blade over and refix it to the workbench using the screws. Repeat the process of filing down the blade towards the intended edge.

  • Once you have achieved the knife profile on the blade, start using the chainsaw file to smooth out scratches made on the blade by the bastard mill file. Ensure you do this for both sides of the blade for a fine finish of the blade’s edge.
  • Now that your knife blade is almost done, you must heat-treat it to enhance its service life. Heat treating your blade aids to reduce its brittleness and increase its hardness. You can heat-treat the blade in one of two ways.
  • Place the knife in a blazing hot forge for a few minutes and then let it cool down slowly. Repeat this process two or three times. Note that this is the standard heat-treatment procedure used by professional blacksmiths. 
  • Alternative, light a wood fire and let the fire burn down to embers. Then place the embers in the red hot embers for until it gets red hot, before removing it and allowing it to cool down slowly. Repeat this process two or three times.
  • At this point, you are almost through with your first DIY knife. Heat-treatment causes the knife to blacken. You, therefore, have to polish the knife using the belt or random orbit sander to remove  the black tinge on the blade caused by the fire.
  • The final step of your DIY knife making revolves around fixing a handle to the blade. You can choose to install a rubber or wooden handle to the blade of your DIY knife. You begin by cutting appropriately sized pieces of wood or rubber for either side of the blade. You then modify each piece to your desired shape and design. 

Next, you make holes on the handle pieces that correspond to the holes on the handle-end of the blade. Finally, you set the two rubber/wood pieces to either side of the finished blade and fix them using bolts and nuts or glue. You have now completed making your DIY knife.

This is obviously a very high level guide to what is a long and intricate process. Here is a video that shows most of the process.

Final Thoughts

In the end, making a knife from scrap metal is a cost-effective way to forge for fun. Not knowing the specific chemical composition of the metals you use adds a bit of guesswork to certain things like the ideal temperature and treatment method, but as long as you don’t mind it being a bit rough around the edges, scrap metal can be used to make a perfectly good knife.
You’ll want to look for high-carbon steel scrap that is built to be hard but not brittle like springs or cables for the most versatile option, or stronger pieces like railroad spikes if you’re going for something with a little more impact.
Overall, if you’re making the knife for yourself it’s hard to go wrong with any of the scrap recommendations. Some will work better than others for what you’re trying to do, but as long as you enjoy the process, that’s the fun of knife forging.
 

Older Posts

I hope you love the products I recommend. Just so you know, DaddyStaysHome may collect a share of the sales or other compensation from links on this page.

DIY Forge Burner Complete Parts List 1

UPDATE: Links to all items updated Feb 08 2020 and added budget-friendly pre-built burner choice.

Unless you already have most of these parts it will be far cheaper and faster to order a pre-built burner. I use this one in my forge and kiln and it’s never let me down.

As an added plus, it comes with a high pressure propane regulator so you have to do is hook it up to a standard BBQ propane tank and light it. Saving you time and money.


DIY Parts List:

Please note all links will open the Amazon product in a new window so you can come back here easily to find any other missing parts.

1-1/4” Coupling

1-1/4” x 3/4” Bushing

3/4” x 9” Nipple

1-1/2” x 3/4” Reducer


.023” MIG Tip

1/8” Brass “T”

1/8” x 3” Brass Nipple x2

1/8” Brass End Caps

1/8” x 3” Lamp Nipple

1/4” x 1/8” Brass Bushing

1/4 Inch Ball Valve

1/4” Hose Barb

1/4”-5/8” Hose Clamp


0-40psi Gas Regulator & Hose


3/16” x 2” x 48” aluminum stock

JB KwikWeld


High Temp Gas Line Thread Seal Tape


Tools/Bits:

M6 Tap

5mm Drill Bit


1/8” NPT Tap

File

Hack Saw

Drill

Here is the video once more if you need to take a look at the assembly process again.

Check this out if you are looking for how to make a propane torch burn hotter or other options for a forge burner that you don’t have to build. 

https://daddystayshome.com/how-to-make-a-propane-torch-burn-hotter/

Older Posts

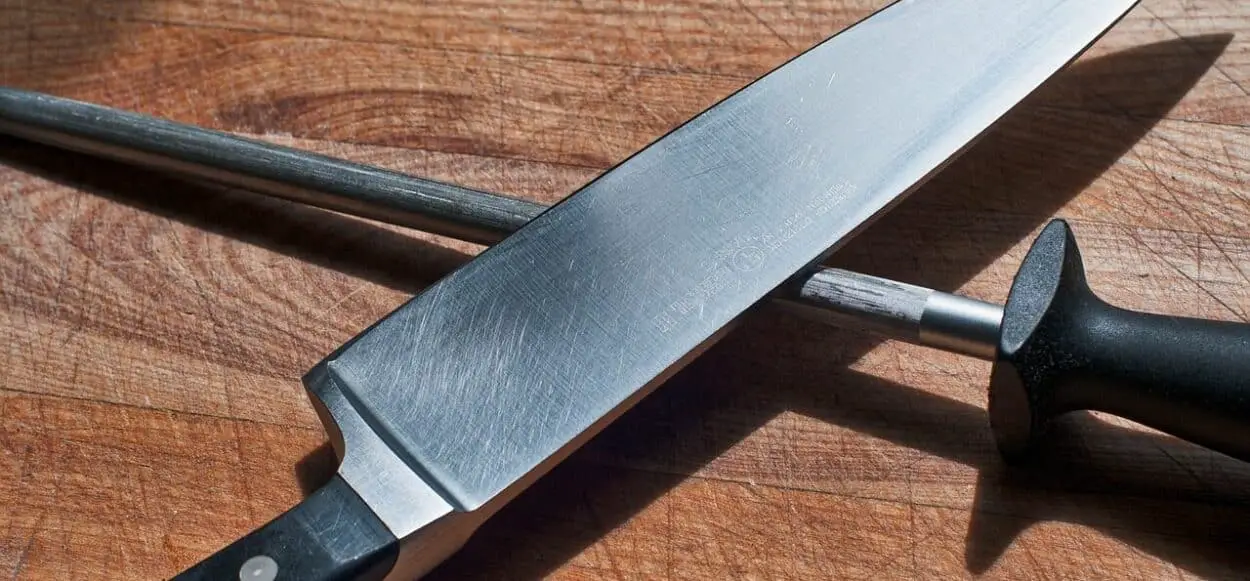
What is Honing a Knife?

I hope you love the products I recommend. Just so you know, DaddyStaysHome may collect a share of the sales or other compensation from links on this page.

What to Know About Honing a Knife

A knife is a must-have tool in the kitchen. Made in a range of styles and sizes and extremely versatile, different knives serve various purposes, including delicately filleting fish, tearing apart a chicken, and chiffonading basil. 

If you do know how to properly use and take care of knives, a quality knife can last for years and make it so much easier to prepare your meals. One vital inspect of regular knife care and maintenance is to keep your knives sharp through sharpening and honing (more on that later). 

So why is a sharp knife important?

Having a sharper knife gets your job done faster as it’s more effortless to cut through ingredients. Sharpness ensures more accurate cuts, which will also maintain the consistency of your cooking. If your vegetables are of the same size, they’ll take the same time to cook and will cook more evenly. And if you’re cutting fat off meat, a more accurate cut will get you as much useful meat as possible.

When skinning fish, it also helps to have a sharp knife as a dull one makes it doubly difficult to get precise cuts on the fillet. And when you’re cutting vegetables, you’ll lose less pulp and juice to the cutting board if you use a sharp knife. When serving greens, this will ensure you get the most of out your vegetables, both in terms of quantity and nutritional value.

A sharp knife also means less strain on your back, arms, and hands. Using extra energy—in what might be several hours of standing—can tire even the most experienced chefs. Your safety is also at stake. A dull knife can easily slip as you push it down harder, which may cause an accident. In addition, cuts from a duller knife are likely to be more severe than those from a sharper knife. 

Taking your time to ensure your knives are sharp and good to go makes practical sense. However, even experienced cooks (home-taught or professional) might have no idea of how to correctly keep their knives sharp. To properly maintain your kitchen knife, one important thing is to differentiate between sharpening and honing.

Honing vs. sharpening 

Most people mistake honing a knife for sharpening it. In most cases, honing steel is frequently seen as sharpening steel. So how does honing differ from sharpening?

To know the difference, it’s important to first to know how and why knives get dull. In dull knives, the blade’s sharp edge isn’t there anymore or the edge’s metal is no longer properly aligned because of use. Even if the blade’s edge remains sharp, a loss of the edge’s alignment means it won’t properly cut through food. 

So how does a knife get that alignment and sharp edge back? This is where sharpening and honing come in:

Sharpening

Sharpening grinds and shaves off bits of metal from the blade to create a sharp, new edge. It may be done with various tools, including a whetstone, water stone, or large electric knife sharpener.

Unlike honing, sharpening may be carried out less frequently—only a handful of times yearly depending on how frequently the knife is used. With training, suitable sharpening stones, and patience, you can carry out basic knife sharpening at home. 

For best results, there’s no better way to do it than to let highly skilled professionals sharpen your knives with their professional grade tools. Professional sharpening will make your knife last longer, more fun to work with, and can fix broken tips, dents, and even a bent knife. 

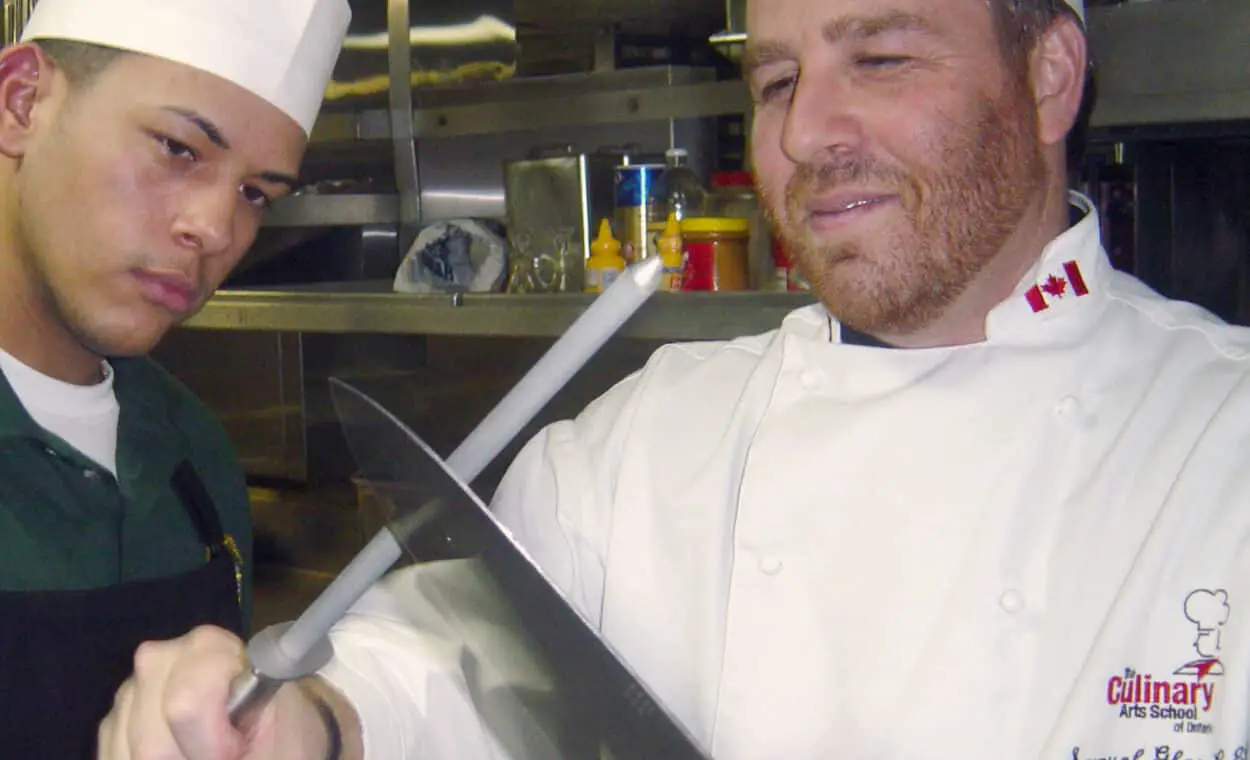
Honing a knife demonstration

Honing 

Honing is essentially maintaining an edge that’s already sharp. In the honing process, honing steel or home pull-through knife sharpener simply pushes the knife’s edge back to the middle and straightens it. Honing fixes the edge without getting rid of too much blade material. It doesn’t actually sharpen a knife but if you do it properly, your knife will appear sharper as the blade’s now in the right position. 

Honing should be carried out more often and can be easily done at home. Ideally, you should hone your knife before each use. 

When to sharpen and hone your knife

Sharpening basically cuts into a knife to achieve the preferred angle, so it’ll leave some debris behind. Sharpening is very efficient and, if done properly, long-lasting. In fact, your knife may only need sharpening a few times per year. 

Honing realigns the edge of the blade without getting rid of material. This helps to maintain the sharpness of the blade for food preparation tasks. You can certainly hone your knives as many times as you want. 

If you cook a lot, you may choose to hone your knife every time you use it. Then again, if you cook less frequently, you many only hone your knife every few weeks to months.

The bottom line

Honing, which refers to straightening a crooked cutting edge, is the simplest way to make sure your knives work well for a long time. The more often you hone your knives, the less often you need to sharpen them. That means the knives will work efficiently and last for many years to come.

References:

https://daddystayshome.com/what-are-the-different-types-of-sharpening-stones/

https://daddystayshome.com/what-is-a-scandi-grind/

https://daddystayshome.com/what-is-a-hollow-grind/

https://www.thedailybeast.com/guide-to-knife-sharpening-and-honing-both-electric-and-handheld?ref=scroll

https://knifeaid.com/blogs/knife-mastery/honed-vs-sharpened-knives


Older Posts

What is a Hollow Grind?

I hope you love the products I recommend. Just so you know, DaddyStaysHome may collect a share of the sales or other compensation from links on this page.

The grind is essentially the heart of a blade.

In other words, it refers to the manner in which a blade is cut to ready it for sharpening and polishing. The grind is the functioning part of your knife for most of its jobs and determines how well the knife will cut and even retain sharpness. 

There are many kinds of grinds out there, including the hollow grind, full flat grind, chisel grind, sabre grind, convex grind, and scandi grind. Of course, all of these types of edges come with their own unique features, but in this piece, we’re going to take a more detailed look at a hollow grind.

Understanding a hollow grind

As the name already suggests, a hollow grind is actually hollow. It’s quite a common grind for many knife blades. Blades with a hollow grind offer great cutting qualities and more flexibility than blades with other types of grind. 

A hollow ground knife blade is one that’s been ground to create a distinct bevelled, concave edge along the knife’s cutting edge. This effect is achieved by having the grind start below the middle of the knife, producing a small concave wedge that’s very sharp and easy to maintain. Many mass-produced knives have hollow ground blades, as they’re also easy to manufacture and customers prefer knives that are easy to sharpen.

When making a hollow ground blade, a grinding wheel cuts a convex scoop from the blade. The knife’s cutting edge is found at the base of the scoop, and it’s very fine and therefore extremely sharp. 

In cross section view, the blade almost looks like an old-school fountain pen nib, with a soft, fluted base and strong upper section. The secondary bevel is easily gripped with a sharpening stone, making sharpening super easy.

Hollow grind vs convex ground blades

dcknives.blogspot.com

Hollow grind blades are perfect for soft, thin materials. They shouldn’t be used for tough materials with larger diameters. Hollow ground blades were traditionally used for scissors and straight razors. Today, this blade type is mainly found in kitchen knives, as well as outdoor and hunting knives.

If you want your knife to slice really well, but don’t want it to get too deep, a hollow grind will do the job superbly. Dressing your game needs a knife with excellent slicing to take off the skin. For this reason, hollow ground blades are common on hunting as well as skinning knives.

Picking a hollow ground blade

When selecting a knife, you should go for one with a strong blade made from a high-quality metal. If you can, go to the store personally so you can pick up the knife and see how it feels. 

Make sure the handle feels comfortable in your hand and the knife is balanced when held. An awkward, cumbersome blade won’t be fun or easy to work with. 

TIP: You shouldn’t run your knives through the dishwasher because that can make them dull. Instead,  hand wash your knives and always wipe them dry to maintain the blades.

Of course, a hollow grind isn’t without downsides. The thinner edge may roll over or chip with hard use. Also, it can have trouble cutting food owing to the concave scoops taken out of the blade. These hollowed out parts can create suction on occasion, making deep cuts a bit harder.


How to sharpen a hollow ground blade

You can sharpen a hollow ground with ease. 

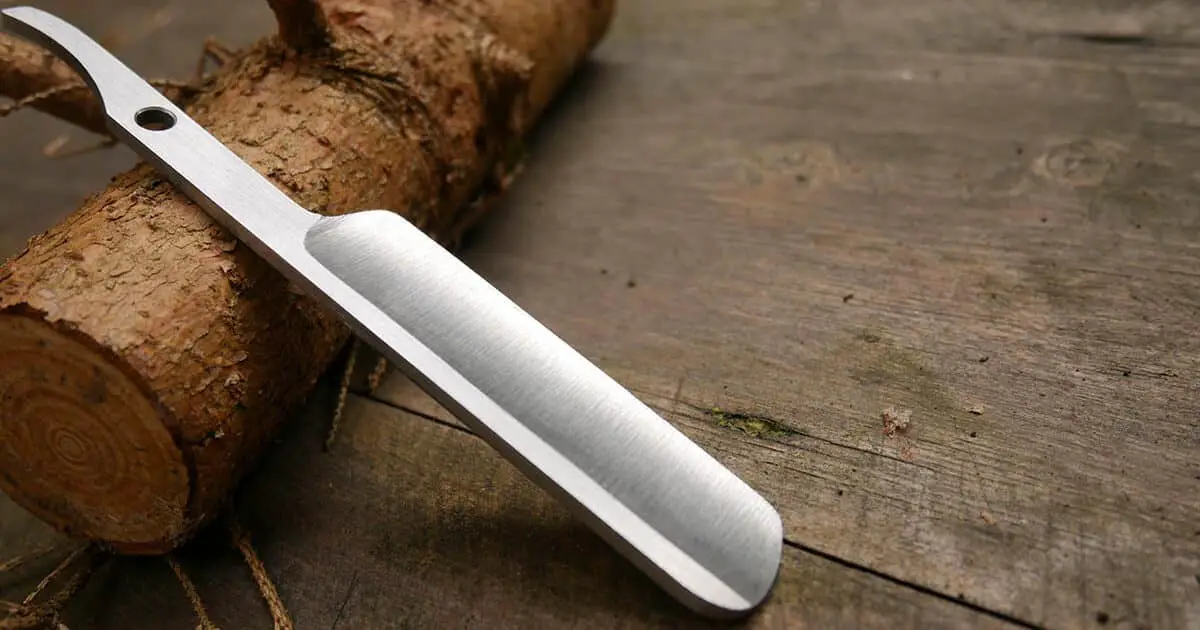
Straight razors have a hollow grind. They’ve always been sharpened on a leather strop, with the help of abrasive stropping compound. The majority of hollow grind knives made today feature a secondary V-shaped bevel at the cutting edge. Therefore, they can be sharpened with a sharpening stone, or with a sharpening system. A hollow-ground knife can be incredibly sharp, but it can greatly benefit from a bit of stropping.

Sharpening the edge of your knife with a grinding wheel will produce a hollow grind. As there’s little material behind the edge, it’s less durable (although how long the edge can last is debatable).

See how a freehand hollow grind is done rather quickly after a bit of practice.

A straight razor (for shaving) features a hollow grind. It has an extremely delicate edge, but it doesn’t need a durable edge due to its use. A hollow grind means metal is only removed at the secondary cutting edge, as well as at the spine to a lesser degree. 

As a hollow grind assumes the shape of the outer diameter of the grinding wheel that sharpened it, different diameters of wheel will produce a less or more hollow grind. In other words, a large wheel creates an extremely shallow hollow grind while a small wheel creates a more prominent hollow grind.  

If you are interested in trying to create a hollow grind in your own knife you should check out this calculator that allows you to put in the diameter of the wheel you are sharpening on and the thickness of your material to get the exact height of the grind to make a perfect hollow ground edge.

WARNING: If you sharpen your hollow ground knife on a sharpening stone, it will create a flat grind blade if done incorrectly.

If your kitchen knife has indentations on both sides, called scallops, that release the vacuum formed when cutting food and allow it to slide off the blade easily.

I recommend that you sharpen it with a good sharpening system or sharpening stone specifically for the grind on that blade or else you could ruin your knife.


Is the hollow grind right for you?

To wrap up, different jobs require different blade grinds. If you’re trying to pick out a blade grind, consider what it’ll be used for most to know which knife grind will suit your needs best.

Older Posts

What is a Scandi Grind?

I hope you love the products I recommend. Just so you know, DaddyStaysHome may collect a share of the sales or other compensation from links on this page.

To most people, a knife is made up of 2 parts: a handle and a blade. Most people view a knife in this simplistic way, but to know your knife even better, you need to understand how each part of your knife determines how it’s used.

The grind is one of the most forgotten characteristics of a knife. It’s referring to how the blade’s thinned to show the cutting edge or the shape of the blade’s cross-section. Believe you me, the kind of grind your knife has changes the entire behaviour of the blade.

As such, it’s important to know the various edges on knives to better understand how to look after your knife and how to get the most out of it.

While the most common kinds of knife grinds include flat, hollow, convex, double-devel, chisel, and Scandi grind. The main focus of this post is the Scandi grind.

what is a scandi grind

So… What’s a Scandi Grind?

The Scandi grind is also called the Scandinavian or Sabre grind and refers to a form of flat grind. It’s also sometimes known as a V-grind.

As the V-grind name implies the Scandi grind is V-shaped, but the angle doesn’t fully go up to the spine. There’s a bevel partway all the way down the blade instead. So, a good chunk of the blade has a similar thickness to the spine.

As the name suggests, the Scandi grind originated from Scandinavia. It’s commonly seen in hunting knives, bushcraft knives, and outdoor knives. In fact, the Scandi grind is one huge secondary edge, minus any extra frills like curves or scallops seen in other knives.

The Scandi grind is practical in that you can sharpen it with ease and it’s easy to produce. Moreover, it’s perfect for woodworking. As the blade is quite thick, it’s unbelievably strong and can certainly handle a fair bit of cutting.

In addition, due to the huge, wide edge, you’ll be able to see everything you’re doing while using it.

If you’ve made a mistake, you’ll immediately be able to tell if you look at the wide edge. If you’ve chipped the edge, you’ll need to get rid of plenty of material to sort out the mistake.

How a knifemaker creates a scandi grind in a new blade


Sharpening the Scandi grind

To sharpen the Scandi grind by hand, place the bevel flat to the sharpening stone and work on the whole edge. Initially, it doesn’t matter what kind of motion you apply, so long as the bevel stays flat. Since the bevel on scandi grind knives is so large and flat it is pretty easy to get the right angle for sharpening.

Work the edge until you feel a small burr while you run your fingertip off the cutting edge on the opposite side. You want a burr along the entire edge. Once you’ve created a burr along the whole length of the cutting edge, turn your knife over and start the same process on the other side.

Once you’re able to feel the burr along the entire length of the first side, you’ve created the edge. Now you need to get rid of the burr. Lightly stroke the blade over the sharpening stone as though you’re removing slices from the surface.

At this juncture, you should move in a single direction only, beginning with the edge, as though you’re cutting the stone. Make sure the bevel stays flat. Switch between sides, moving the burr backward and forward, until it’s properly honed. Finish up on a strop.

Is your blade badly nicked or very dull? If so, you may want to begin with a medium to coarse stone to get rid of the nicks. Then go for the fine stone. Based on your use, it might be wise to repeat the process with diamond plates or finer stone grades.

How to sharpen the belly

After a few minutes, sharpening the flat blade area will begin to feel familiar. After that, you need to sharpen the curved edge area—the belly. Many people dread this task. After all, it’ll be a bit more difficult to maintain the correct angle.

But it’s totally not impossible. Many people make the mistake of turning the knife over to a 45-degree angle against the stone to address that curved area. That’s usually not the simplest method. We suggest you just lift the handle.

Once you do that and maintain the stone’s surface level, you’ll roll towards the belly by yourself. Repeat the process and occasionally ensure you’re sharpening along the whole cutting edge. This insight sometimes surprises even those who’ve been sharpening a long time and never knew this trick.

Scandinavian grind pocket knife

Summary what is the scandi grind most useful for?

We’ll always need knives as long as we live. Whether it’s kitchen knives, camping knives, hunting knives, military knives, machetes, or axes, we’ll always have things to cut. We cut food, cut boxes and ropes, chisel stone and wood, and clear bushes that have overgrown on our yards.

The type of grind and task at hand will determine the right blade for your job. Consider two things—the purpose of your knife along with the level of maintenance you want to give it. When you’ve figured that out, you can then choose the right grind for the job at hand.

For basic tasks or use in places where they might take a lot of abuse and need to be field sharpened a scandi grind is a great option.

This style of knife was the first I tackled when I started making knives in my home forge. Mostly because they are robust and the bevel is not a complex shape to create and simple to sharpen on a stone

Older Posts

I hope you love the products I recommend. Just so you know, DaddyStaysHome may collect a share of the sales or other compensation from links on this page.

If you are interested in the ancient art of smithing, and want to try it yourself, or simply learn more about it, it can be difficult to know where to start. If you already have some experience in blacksmithing, you may want more insights into projects and techniques that might be new to you.

In any case, a blacksmith book is an excellent way to learn more about the art, science, and craft of blacksmithing. Here are 5 (plus a bonus 1) of the best blacksmithing books for beginners and even for more advanced smiths.

5 Best Blacksmithing Books For Beginners Tool & Knife Making 2

1. New Edge of the Anvil: A Resource Book for the Blacksmith

This exceptional book is divided into two sections. The first section is a basic overview of the principles, tools, and technologies of metalworking. It covers metallurgy and toolmaking, metals and corrosion, information, and supplies. It is an excellent overview of the basics of blacksmithing and metalworking.

The second section of the book features the work of six contemporary metal artists, with demonstration pieces and profiles. While this may seem more like an art showcase section, it is incredibly valuable to show how different artists are exploring techniques, processes, and materials that you may not have thought of. Even if you don’t like the art, it’s a source of inspiration and new ideas.

For readers with some experience, this initial section may seem too basic and too conceptual, lacking in hands-on exercises. But it is an excellent foundation for newcomers, with a wealth of data and reference material that will be useful for years. Click here to see more reviews and current pricing on Amazon.

5 Best Blacksmithing Books For Beginners Tool & Knife Making 2

2. The Art of Blacksmithing

This blacksmith book uses words and illustrations to show blacksmithing tools, equipment, and techniques that have been developed over the past 6,000 years. It’s a fascinating exploration of the history and background of blacksmithing, along with diagrams, methods, and anecdotes.

This book gives a rich historical context to modern blacksmithing, told visually as well as verbally. It’s helpful for those who are looking to set up their first blacksmithing shop, or backyard forge, and understanding not just what they need, but why. This is one of the best blacksmith books for beginners especially. Head to Amazon to read more reviews and see current pricing.

5 Best Blacksmithing Books For Beginners Tool & Knife Making 2

3. A Blacksmithing Primer: A Course in Basic and Intermediate Blacksmithing

While the previous two books give principles, concepts, context, and background for blacksmithing, this book is a manual for instruction of tasks and skills the beginner blacksmith needs to master. It has over 400 detailed drawings and diagrams for clarity and understanding.

It’s a reference manual offering a practical introduction for beginner and intermediate blacksmiths to learn the skills and procedures of smithing and metallurgy and apply them to your own projects, and the spiral binding makes it great for keeping open on the workbench and referring to as you progress. ​See more reviews and the current price on Amazon.

5 Best Blacksmithing Books For Beginners Tool & Knife Making 2

4. Blacksmithing: Hot Techniques & Striking Projects

This book has step-by-step instructions, with clear and detailed photographs, for the basic skills of blacksmithing, and applies them to simple projects suitable for beginners. By learning the basics of bending, curling, and flattening metals, beginners can start making beautiful, useful objects right away, including trivets and wall sconces.

When the techniques are combined, beginners can take on more advanced blacksmithing projects like door handles and metal railings. It’s a great way to get first-hand experience and start showing off your new blacksmithing skills. To read more reviews and grab a copy on Amazon click here.

José Antonio Ares also has another  book “Blacksmithing Techniques: The Basics Explained Step by Step, Complete with 10 Projects

As you can probably guess this one is focused on the beginner and gives a very clear path to progress your skills with over 500 color photos showing every step. Check it out on Amazon.

5 Best Blacksmithing Books For Beginners Tool & Knife Making 2

5. The Complete Modern Blacksmith

The Complete Modern Blacksmith book contains in a single volume three of Alexander Weygers’ classic, out-of-print blacksmithing books: The Modern Blacksmith; The Recycling, Use, and Repair of Tools; and The Making of Tools. While this volume is excellent reference for beginning blacksmiths to start learning the craft, it is especially valuable for intermediate blacksmiths who want to progress into creating, repairing, and customizing their own tools and implements.

The book contains step-by-step instructions and illustrations that will help you make your own custom tools and hardware, including pliers, shovels, and hinges. Learn how to repair and recycle old materials, following simple steps to restore and reuse old tools and implements. Or design your own custom tools with basic equipment and scrap steel, tools that are completely unique to your projects and your needs.

For blacksmiths who have struggled to find the right tools for their needs, or who have damaged their tools with use, or who want to restore old, classic tools, this volume is invaluable. The spiral binding allows it to lay flat for quick and easy reference on the tool bench, and learning these skills will save you money on tools and implements that you could be repairing yourself or making from scratch. You can read more reviews and pick up your copy of this essential reference on Amazon.

5 Best Blacksmithing Books For Beginners Tool & Knife Making 2

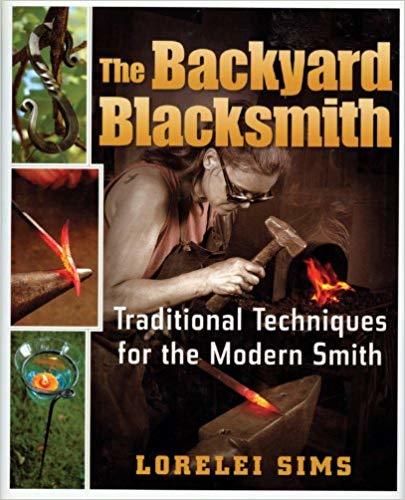
6. The Backyard Blacksmith

The Backyard Blacksmith is not a volume for absolute beginners. While it does cover the fundamentals with words and explanations, it assumes you already have a forge, basic tools, and some basic knowledge of metals and techniques.

It is focused on giving step-by-step, detailed instructions on how to make simple tools and useful items like nails, hinges, and handles, as well as more ornamental and creative projects like letter openers, racks, and door knockers. Author Lorelei Sims is famous for her organic and botanical themed metal work, and her own techniques are illustrated in this book. It bridges the gap between blacksmithing for practical needs and objects, and metal working as an art form and vehicle for creative expression.

The focus on projects and processes that are accessible for the beginner blacksmith in a home shop makes it a good place to for a new blacksmith to polish their basic skills, and then begin to branch out and explore their own creativity. Click here to check the current price on Amazon and read more reviews.

5 Best Blacksmithing Books For Beginners Tool & Knife Making 2

Conclusion

If I had to choose one to be the best blacksmithing book it would have to be The Backyard Blacksmith. Simple explanations and the projects go from easy to hard in a logical manner. I keep a copy within reach while I work at the forge (but not too close!) so i can reference techniques as I go.

Blacksmithing is an ancient skill that is enjoying a modern resurgence, as more and more people are interested in not simply purchasing poor-quality products that are destined for the landfill in a few years, but in making their own, high-quality, heirloom pieces that are built to last. It’s a fantastic way to grow creatively, make your own custom tools and objects, and share your skills with the world. These books are a great way to begin the journey, by explaining the basics of blacksmithing and metallurgy, and showing how these ancient crafts are practiced today.

I’ve written a few other guides if you are looking for more information before jumping into buying a book on it:

-THE STAY AT HOME DAD

5 Best Blacksmithing Books For Beginners Tool & Knife Making 2

Older Posts

How Hot Does Charcoal Burn?

I hope you love the products I recommend. Just so you know, DaddyStaysHome may collect a share of the sales or other compensation from links on this page.

When it comes to forging a knife, heat is a critical factor in determining how easy it will be to work the steel as well as the quality of the final product you’ll end up with. Hot, consistent temperatures in your forge is a necessity, and the fuel source that you choose helps determine that temperature as well as your cost of forging and more.

Of the various fuel types available, the primary 3 to choose from are lump coal, propane, and charcoal. Depending on the availability of the fuel, the forge you are using, and the local laws governing your workshop, there may be an ideal option for you to consider. However, if you’re unsure or are just starting out, consider charcoal – the fuel you can make yourself.

What Determines the Temperature Charcoal Burns At?

As heat is incredibly important to the forging process, it makes sense that the fuel you choose needs to burn hot enough to get the blade to critical temperature so that it can be shaped, annealed, and hardened. However, unlike fuels such as propane, charcoal can come in various compositions that determine its burning efficacy, and it also needs an exceptional amount of air to allow it to reach the necessary temperature.

Air Availability

In order to produce fire and extreme heat, combustion needs to occur between oxygen, the fuel source, and something to ignite it such as friction or another heat source. Once the fuel reaches ignition temperature, combustion occurs and it burns on its own as long as it has oxygen and fuel for combustion. You can also increase the air availability, increasing the rate of combustion and leading to more heat being released by the burning charcoal.

To introduce more air to your forge, you have some options. First, you want to make sure you have proper ventilation so that the air in the forge is rich in oxygen rather than smoky and inefficient. Once your ventilation is cleared, you can add more air with a hairdryer for smaller forges, a bellow for larger forges, and custom air blowers for the largest of forges.

Composition of the Charcoal

Charcoal comes in primarily 2 different forms: lump charcoal and charcoal briquettes. In general, briquettes are used for cooking due to the odorless burn and ability to flavor what you’re cooking depending on the wood used for the base of the charcoal.

Meanwhile, charcoal is used where more extreme heat is needed because the absence of the other ingredients allows for more fuel to burn. Lump charcoal comes from burning wood, making it entirely charcoal as opposed to briquettes of charcoal which are a combination of char, coal, nitrates, lime, and starch.

Based on this information, it is hard to determine exactly how hot the charcoal you may use could get in your forge. As a general rule, you want the steel you’re working to reach about 2,000-2,200°F to be malleable. Meanwhile, lump charcoal is believed to be able to reach temperatures of about 2,000°F at its upper range – which explains why it’s crucial you use lump coal instead of briquettes.

Should I Use Charcoal for My Forge?

When it comes to choosing the fuel source for your forge, the choice is primarily up to you as any of the 3 primary fuel sources can work for some applications. However, each has their own pros and cons – charcoal included.

One of the major benefits of choosing charcoal is its availability as well as low cost. You can make lump charcoal yourself by burning wood until it chars, making it both easily renewable and inexpensive if you’ve got extra firewood or trees around. Here is a quick video that shows the process of how to make your own charcoal (it’s very simple)

Unfortunately, depending on the composition of the charcoal, it can struggle to reach and maintain the necessary temperature needed to make the steel for your knife malleable. This means that if you want to use charcoal, you will need to use pure lump charcoal as opposed to briquettes. Additionally, it takes more charcoal to reach and maintain hotter temperatures than coal or propane – the other choices for fuel.

The Verdict

Charcoal is often considered the lesser of the 3 fuel choices for your forge due to its lower burning temperature. Steel needs to be heated to upwards of 2,000°F in order to be forged, but charcoal can struggle to reach that in some cases which makes it a bit too unreliable for many blacksmiths. However, that is not to say that charcoal can’t be used – it just depends on your specific use case.

I own use both charcoal and propane forges and for some projects that need really high heat or forge welding temps I will usually use my propane forge.

However for small jobs with mild steel (hooks, nails, garden projects, etc..) I’ll use my whitlox charcoal forge. It’s cheap to run easy to use and MUCH quieter than my propane forge.

Smaller forges and those who smith multiple metals (with lower critical temperatures) may be able to make charcoal work for them and given the availability of the fuel (and your ability to make it yourself), it is quite beginner and budget-friendly. It won’t hurt to give charcoal a try, and if it works for you then you’ve got a low-cost, renewable fuel. If not, just choose coal or propane for your next forging.

Sources:

https://en.wikipedia.org/wiki/Charcoal

-THE STAY AT HOME DAD

How Hot Does Charcoal Burn? 10

Older Posts

I hope you love the products I recommend. Just so you know, DaddyStaysHome may collect a share of the sales or other compensation from links on this page.

There is perhaps no more important tool for a blacksmith than their hammer. It’s the iconic instrument of the craft, and we always envision blacksmiths wielding a hammer over an anvil.

The truth is, blacksmiths rely on many different hammers, for different purposes, and every blacksmith has a range of hammers for the job at hand. Here are some of the most common hammers used in blacksmithing, and what they are used for.

Blacksmithing Hammers


Cross Peen (Pein) Hammer

The cross peen or cross pein hammer is the hammer most commonly used by blacksmiths and metalworkers. A cross peen hammer has the wedge end of the head (the peen) angled horizontally relative to the handle. This wedged peen at a flat angle allows a blacksmith to hammer in compact, small spaces that are too restricted and precise for the full, flat head of the hammer.

Cross peen hammers are particularly used in riveting. They are ideal for spreading, and the hammer can simply be flipped from the flat end of the head to the wedge end of the head when more precision is needed.


The KSEIBI Cross Pein Hammer at 3.2 pounds is a classic blacksmith’s hammer. It has a polished face, bevel, and pein. The fiber glass handle withstands stress and strain, with superior breaking tolerance designed for tough work.

The head is permanently bonded to the handle with epoxy, and will not loosen over time. The head is made of forged steel. The high-strength fiberglass handle core absorbs shock and vibration and reduces fatigue. And it has a rubberized grip for secure holding, hour after hour. The 3.2 pound weight is great for a range of blacksmithing tasks, with enough weight to pound and shape metal, but not so heavy that it causes fatigue. If you are thinking of buying blacksmithing hammers these are the first ones to think about, you will use them every day.

Straight Peen (Pein) Hammer

A straight peen or straight pein hammer has the wedge shape of the peen running vertically, parallel to the line of the handle. As with the cross peen hammer, it is used for drawing and shaping metals in precise, specific areas that are tighter than allowed by the flat head of the hammer. They are also particularly used in riveting.

Most blacksmiths prefer to stick with a cross peen hammer, and simply rotate the work to the needed angle, rather than switching to a straight peen hammer. But some blacksmiths prefer straight peen hammers, or alternate between the two hammers depending on the angle and precision needed.

The Bon RiverWorks Straight Pen Driving Hammer is an excellent choice for blacksmiths who prefer a straight peen. It has crowned striking faces with beveled edges, and is made in the USA of hand forged steel. It has a sturdy wooden handle. It weighs 3.9 pounds, so it brings plenty of strength and power to almost any sledging operation.

Rounding Hammer

Rounding hammers were traditionally used by farriers, but recent years have seen them surge in popularity among blacksmiths. As the name might imply, they have one flat face and one rounded face. The round face allows you to draw steel faster than with a flat faced hammer, so you can use a single hammer for drawing and smoothing.

Used properly, they are versatile hammers and take the place of other, more specialized hammers. The more balanced, symmetrical weight of a rounding hammer appeals to some blacksmiths, who find it easier to use, and is disliked by others, who prefer to have the flat surface weighted a bit more heavily, as in a cross peen hammer.

Many popular YouTube blacksmiths use rounding hammers, which may be the cause of their surge in visibility as blacksmithing hammers.

The Nordic Forge 2 Lb. Rounding Hammer is a classic rounding hammer, designed for farriers since 1906. It has one round, crowned face, and one flat face. Both faces are beveled to reduce chipping. The handle is hard wood. The hammer is perfectly balanced, and weighs 2 pounds, perfect for a wide range of blacksmithing jobs.

Swedish Blacksmith Hammers

Swedish blacksmith hammers are a local variation of cross peen hammers. They have a much narrower, more dramatic wedge, that helps create deep, smooth cuts in metal while putting a lot of weight behind the flat face.

The Picard 0000811-1500 Swedish pattern blacksmith’s hammer is a great example of this design, with a handle made of ash wood. Ash is a very symbolic wood in Norse mythology, known for its strength and durability. This hammer weighs 3.7 pounds, bringing plenty of power to every strike.

French Blacksmith Hammers

French hammers are cross peen hammers with a distinctive offset on the wedge side. It is said that this hammer shape was specifically invented for working on the unique curved metals and construction of the Eiffel tower. This unusual shape is preferred by some blacksmiths, as it improves their line of sight to the work, and disliked by others, as it changes the weight distribution of the hammer.

The Picard 0001601-0800 Locksmith’s hammer has that distinctive French shape, with a handle made of ash wood. This hammer weighs just 1.76 pounds, making it great for small, precise jobs.

Notes on the Weight of a Hammer 

As you can see, the hammers on this list range from weighing less than 2 pounds to weighing nearly 4. A heavier hammer is faster and more efficient, but a blacksmith should never use a hammer that is heavier than they can wield with control. While weight is a matter of personal preference, it is usually recommended that beginners start with a lighter hammer, because even a light hammer can start to feel very heavy after an hour of use.

Over time, a blacksmith will not only build the arm strength they need to use heavy hammers for long periods of time, but they will develop greater skill and confidence that lets them use a heavier hammer with the same amount of control.

Conclusion

Now you know what the most common blacksmithing hammers are, and what they are used for, you can make the choice that is best for your comfort and your metalworking needs.

-THE STAY AT HOME DAD

Types of Blacksmithing Hammers and Their Uses 11

Older Posts

I hope you love the products I recommend. Just so you know, DaddyStaysHome may collect a share of the sales or other compensation from links on this page.

Updated: Nov 10, 2020

After you’ve finished hammering out and shaping your most recent forging experiment, it’s time to “lock it in” by quenching the blade or tool so that it is hard enough to use and last. A quenching oil for blacksmithing could be many things, including dedicated quenching oils or miscellaneous oils you may use for your car or cooking. However, the quenching process can be incredibly delicate so choosing the ideal oil can be the difference between your creation breaking right away or lasting a lifetime.

quenching oil for blacksmithing

The Different Oils You Can Use To Quench

The right choice for your quenching oil will depend on your desired hardness and the metal you are working with, so we’ve gathered some recommendations as well as insight into why these quenching oils for blacksmiths may work for you.

First Up.

Commercial Quenching Oil for Blacksmithing

When it comes to quenching, it’s hard to go wrong with a specialized oil just for that very task. This commercial quenching oil for blacksmithing is made of mineral oil as well as additives that help to speed up or slow down the quenching process depending on the quality you select.

Though this 5-gallon tub comes in medium speed #100, there are multiple levels of quenching depending on your specific needs. If you want something faster for a harder quench, consider dropping to #50 or going up for a slower and softer result.

The negative of this option is that it can be harder to find locally and more expensive because it is made specifically just for quenching rather than multiple uses like the rest of our choices. However, you can buy it on Amazon and if you want one of the better options, consider a commercial quenching oil.

Automatic Transmission Fluid

This automatic transmission fluid from Valvoline can be used to quench steel, though it obviously isn’t made specifically for this use case.

Automatic transmission fluid (or ATF for short) is a type of mineral oil that, in addition to an unusual color, can come with some nasty fumes making it a problem for smaller and enclosed areas. The reason for this is because similar to motor oil, ATF comes with additives to protect the hardware of the vehicles since that’s the main use for the fluid. It can also be thicker than what is ideal for quenching, which may lead to overhardening.

While using ATF for quenching steel does have downsides, one of the best upsides is the price and availability. This product will be much cheaper when compared to more expensive choices such as commercial quenching oils because it can be used in your car or forge.

Mineral Oil

The UltraPro Mineral Oil from UltraSource is a reliable resource to use as your quenching oil if you don’t want a dedicated commercial grade  quenching oil or don’t want to inhale potential ATF fumes. A wonderful upside to choosing to go with mineral oil as your quenching oil is being able to complete the process nearly anywhere – even your home.

Choosing to use something such as motor oil or ATF oils could be less ideal for a home environment due to the combination of smell and additives that can create potentially harmful fumes that you could accidentally inhale. Fortunately, mineral oil is both colorless and primarily odorless and doesn’t have any of the additives that motor oils contain.

When it comes to the speed of the quenching, mineral oil will be a slower quench when compared to other types of oils. This isn’t always a bad thing, but it really depends on the type of steel you plan on quenching. Some types such as 1095 steel require a quicker quenching oil, but other types such as 5160 or 52100 steel will be perfect for mineral oil – just make sure you do your research on your metal before buying for the best results. Or if you have scrap metal and need to figure out if it will harden check out this video.

Mineral oil is one of the cheaper and more available kinds of quenching oil you will come across, it’s possible the reason for this is because it’s used for a vast number of things such as treating wood, moisturizer, and many other things.

Coconut Oil

Looking for a wonderful smell in your forge? This pure coconut oil made by Golden Barrel is a great choice for your quenching oil, should you decide to go the vegetable oil route. Similar to mineral oil, vegetable oils come with the benefit of not polluting your house with odors and even filling them with nice smells – the smell of coconut in this specific case. However, while these oils are more home-friendly, you will also have to pre-heat it to about 120°F before using it for quenching due to a lower viscosity.

This product specifically is more expensive when compared to other vegetable oils due to it being pure coconut oil that isn’t overly abundant, with many uses such as on skin, in hair products, and cooking with food. However, generally you can expect vegetable oils to be similar to mineral oils and among the cheapest of quenching oils because of their availability in many forms.

Along with being normally greatly priced, you should be able to walk into nearly any general retailer and find a type of vegetable oil suitable for quenching steel, including canola or vegetable oil. It definitely all depends on the type of steel you’re working with, but vegetable oil is the most home-friendly quenching oil because of the lack of any odors or additives, and normally being priced well with maximum availability.

One last Important Tool You Need

Once you’ve got your blade forged and quenched, it’s important to check the hardness of the metal you’ve forged to ensure it is not too brittle from your quenching. This is one of the most common mistakes novices make, and also one of the most disheartening things to experience. To measure this hardness, a special tool comes in handy.

Hardness Test File Set

The TTC 6-Piece Hardness File Set is a beginner-friendly hardness tester that will work on just about anything that comes out of your forge. You simply run the file over the surface of your creation to test it, comparing your results to the included chart. Each colored file corresponds to a specific hardness level that will scratch the material if it is harder, giving you an idea of whether the blade is too hard or too soft so that you can make changes before it is time to temper the metal.

Conclusion 

When it comes to choosing the best blacksmith quenching oil, much of the decision comes down to preference. If you ask around, most experienced smiths have their own preferred quenching oils (in addition to metal choices and fuel types) because they work for them. Aside from the potential health risks of inhaling dangerous motor oil fumes, every option we listed should work for a variety of uses, so be sure to consider all types of oils before you choose one.

If I had to pick a specific type of oil to go with, it’s hard to go wrong with any vegetable oils. They are clean-burning, either don’t smell or smell good, and are primarily affordable and available. You can also stock up on them and use any leftovers for cooking, making them a versatile option for the forge or kitchen.

If you are just starting out check out my beginners guide to blacksmith tools

Or if you are just getting into knife making? Look at my guide to all the many steps in forging your first knife.

-THE STAY AT HOME DAD

Quenching Oil For Blacksmithing 4 Great Options 12

Older Posts

I hope you love the products I recommend. Just so you know, DaddyStaysHome may collect a share of the sales or other compensation from links on this page.

There’s something special about making your own tools, and knives are no exception. Whether you plan to craft daggers to throw for fun, make an outdoor knife for your workshop, or want a custom addition to your cutlery set, forging a knife lets you do all of that – and more.

This guide is meant as a very high level overview of the different parts of the process. I’ll link out to detail guides along the way where you can dig deeper into any particular part of the process like quenching or sharpening. But this guide will give you all the pieces you need to know to get out there and hammer out your first knife.

Forging a Knife Beginners Guide

But why should you make your own knife instead of buying one of the millions of options there are on the market? To start, in many cases it is cheaper to make your own knife because scrap can be melted to be reformed into a knife, which essentially lowers the cost to just your time.

Additionally, unless you plan to pay a ton for a custom knife from a knifemaker, you won’t have the same level of customization or story behind the blade – which is one of the coolest parts of blade forging.

If you feel like you now need your own knife (or knives.), you’re in the right place. The following guide will walk you through your first knife forging, helping you prepare accordingly and forge the best knife possible from start to finish.

Choosing Your Metal

The first and likely most important decision you will have to make before forging is choosing your metal. There are a variety of different kinds of metals out there, however steel’s combination of hardness, strength, and ability to hold an edge makes it the ideal choice. The type of steel, however, can vary as well.

If you’re feeling thrifty (or happen to live near a junk yard), you can reuse other pieces of steel by breaking or cutting a piece off and forging the knife from that. Some common scrap you may find includes railroad spikes, coil springs, or leaf spring steel like you would find in a car’s suspension. They are good options because they are made of quality steel (primarily due to the wear put on them regularly) that – when uncoiled or forged – holds an edge well for a knife and hardens well.

If you’re looking for something a bit more scientifically precise or higher quality, you can buy metal bars to craft your knife with. They come in multiple types, each with their pros and cons as well as their own individual grades that explain the chemical makeup of the metal, so you can know precisely how to use it.

Carbon Steel

Carbon steel is just what you’d expect – steel infused with carbon to add strength and hardness while losing some corrosion resistance. It is best for knives that will be subjected to impacts rather than relying on sharpness because it can lose some edge in favor of hardness. C1045 is an example of a hard carbon steel that is commonly used for knife forging, but there are plenty to choose from.

Tool Steel

Tool steel is very similar to carbon steel, but contains additional alloys that make it more resistant to corrosion so it can be used in more situations (like for many outdoor tools). Tool steel is strong, corrosion-resistant, and can hold an edge well. However, depending on the grade of the metal it will be better at certain aspects of forging. For example, A2 tool steel is tough but more prone to rust while D2 offers better corrosion resistance and a sharper edge, but loses some toughness so it is best for low-impact.

Stainless Steel

While primarily seen in kitchen appliances and silverware, stainless steel can also be used for knife forging. It has chromium and other alloys infused that provides a boost to corrosion resistance, but they suffer when it comes to hardness and edge sharpness. However, some higher-carbon grades like 440 can be used for knife making while still standing up to the duties of a knife.

Choosing Your Fuel

After choosing your forging steel, the next decision will have to be the fuel source for your forge. Depending on your specific forging setup, fuel availability, and location, there is likely an ideal choice for you to use – either propane, coal, or charcoal.

Propane

Clean, readily available, and burns incredibly hot. With just a simple propane torch you can build yourself in an afternoon, you could directly heat metal to the point of it becoming workable. This is inefficient for forging larger pieces of course, but the same idea applies to your forge. You can also buy a forge with an integrated propane heat source for an even easier setup for a beginner.

Coal​

Very hot-burning fuel source that fits into many forges easily, but may smoke you out of your workshop without proper ventilation. While an effective fuel source, the smoke produced is thick, which may alert the local authorities of a potential fire and earn you a hefty fine. For this reason (and pollution overall), coal may be illegal for you to use so check local laws before you decide to smoke up.

Charcoal​

One of the more affordable fuel source you can use, but won’t work for everyone. Charcoal can be made on your own by burning wood, so it is very easy to get. However, even incredibly efficient forges can struggle to reach and maintain the temperatures needed to forge steel. If your only option is charcoal, it doesn’t hurt to give it a try at the beginning but be warned that you may not have the best experience.

What Tools You’ll Need

Once you’ve decided on your fuel and metal choices, the next thing you’ll need is a forge that works with your fuel of choice. If you go with propane, you can find some prebuilt forges that simply need to be fueled with a propane tank.

Alternatively, if you feel like doing it yourself a forge can be built with any of the three fuel types working just fine. You simply need air flow so that the heat can be maintained, enough room to heat your knife, and that’s it.

After your forge, you’ll need a forging hammer and a forging table or anvil that you can use to pound out the metal. It needs to be heatproof so that the extremely hot metals don’t burn a hole or set it on fire, and the hammer needs to be heavy and strong enough to stand up to the steel.

Finally, an oven or brick box is needed to temper the steel after it has been forged and shaped.

I have a guide to the gear you need when starting out if you need more detail check it out here.

The Forging Process

To get started, you’ll need to get the steel up to temperature so that it can be worked. If you have a forge that includes a thermostat for heat, you’ll want to set it to around 2,200°F or use a color guide to determine the steel’s temperature.

Once the steel is malleable, transfer it to your “pounding area” so that it can be hammered out to begin forming the blade. As you hammer on one side to develop an edge, be sure to leave a few inches for the tang so that it’s easier to handle, and flip the blade over so that it doesn’t warp towards one side.

Once you’ve formed a basic knife shape, it will need to anneal before you can further refine it. Annealing softens the metal so that shaping is easier, and you can get a more genuine knife look. You can do this by heating the blade until it is red and letting it air cool 2-3 times.

After annealing you can file it so that it begins to look polished before sending it back into the forge to begin quenching. Quenching involves heating the metal to red-hot temperatures and then quickly cooling it by dipping it in water, oil, or other substances that will reduce the temperature quickly and allow it to harden by locking the molecules in place. Once submerged tip-first, stir the blade so that it can cool evenly, surrounded by different water or oil that isn’t already heated.

One you’ve got a hard blade, it’s time to temper it so that the blade is not too brittle to use. This slight softening of the steel will bring it from all the way towards hard to closer to the middle where it is most effective as a knife. You can do this by heating it in the oven at 300°F for 2 hours, then cool it with water. Now you have a knife!

Finishing Touches

After you’ve forged, annealed, and tempered the blade, it’s time to put the finishing touches on so that it can be wielded and cut through whatever you come up against.

The blade needs a handle in place of the tang you left when forging. You have a variety of choices on how to handle your knife, but a common approach is to drill holes and mount wooden or rubber handle grips to the tang. If you don’t have access to a drill, you can handle it with rope, rubber, wood, or anything else that would make for a solid grip when using your knife. Just wrap it around the tang and secure it for grip.

You’ll also want to sharpen the blade on a file and then a whetstone in order to improve its ability to cut. This is especially important for blades with lesser blade retention because they can dull easily and become less useful.

Conclusion 

If you’ve ever felt like forging your own knife but didn’t know where to start, you’ve hopefully learned enough from this piece to give it a try. Remember that working with anything this hot can be dangerous, so it’s important to know what you’re doing before you jump into it. However, once you get the hang of it, knife forging can be a fun and relaxing way to pass the time or make something special. Just don’t get discouraged if you break a blade or 2. It happens to everyone.

-THE STAY AT HOME DAD

How To Forge A Knife For Beginners 13

Older Posts